Follow this step-by-step guide to set up a complete booking system that allows your customers to book appointments in your store on their own.

If you have questions about purchasing the subscription, please contact support at [email protected].
Start by clicking the gear icon (Settings) at the bottom of the left sidebar, then select the 'Case Management' / 'Work Card' tab to access the configuration options for case and booking management.
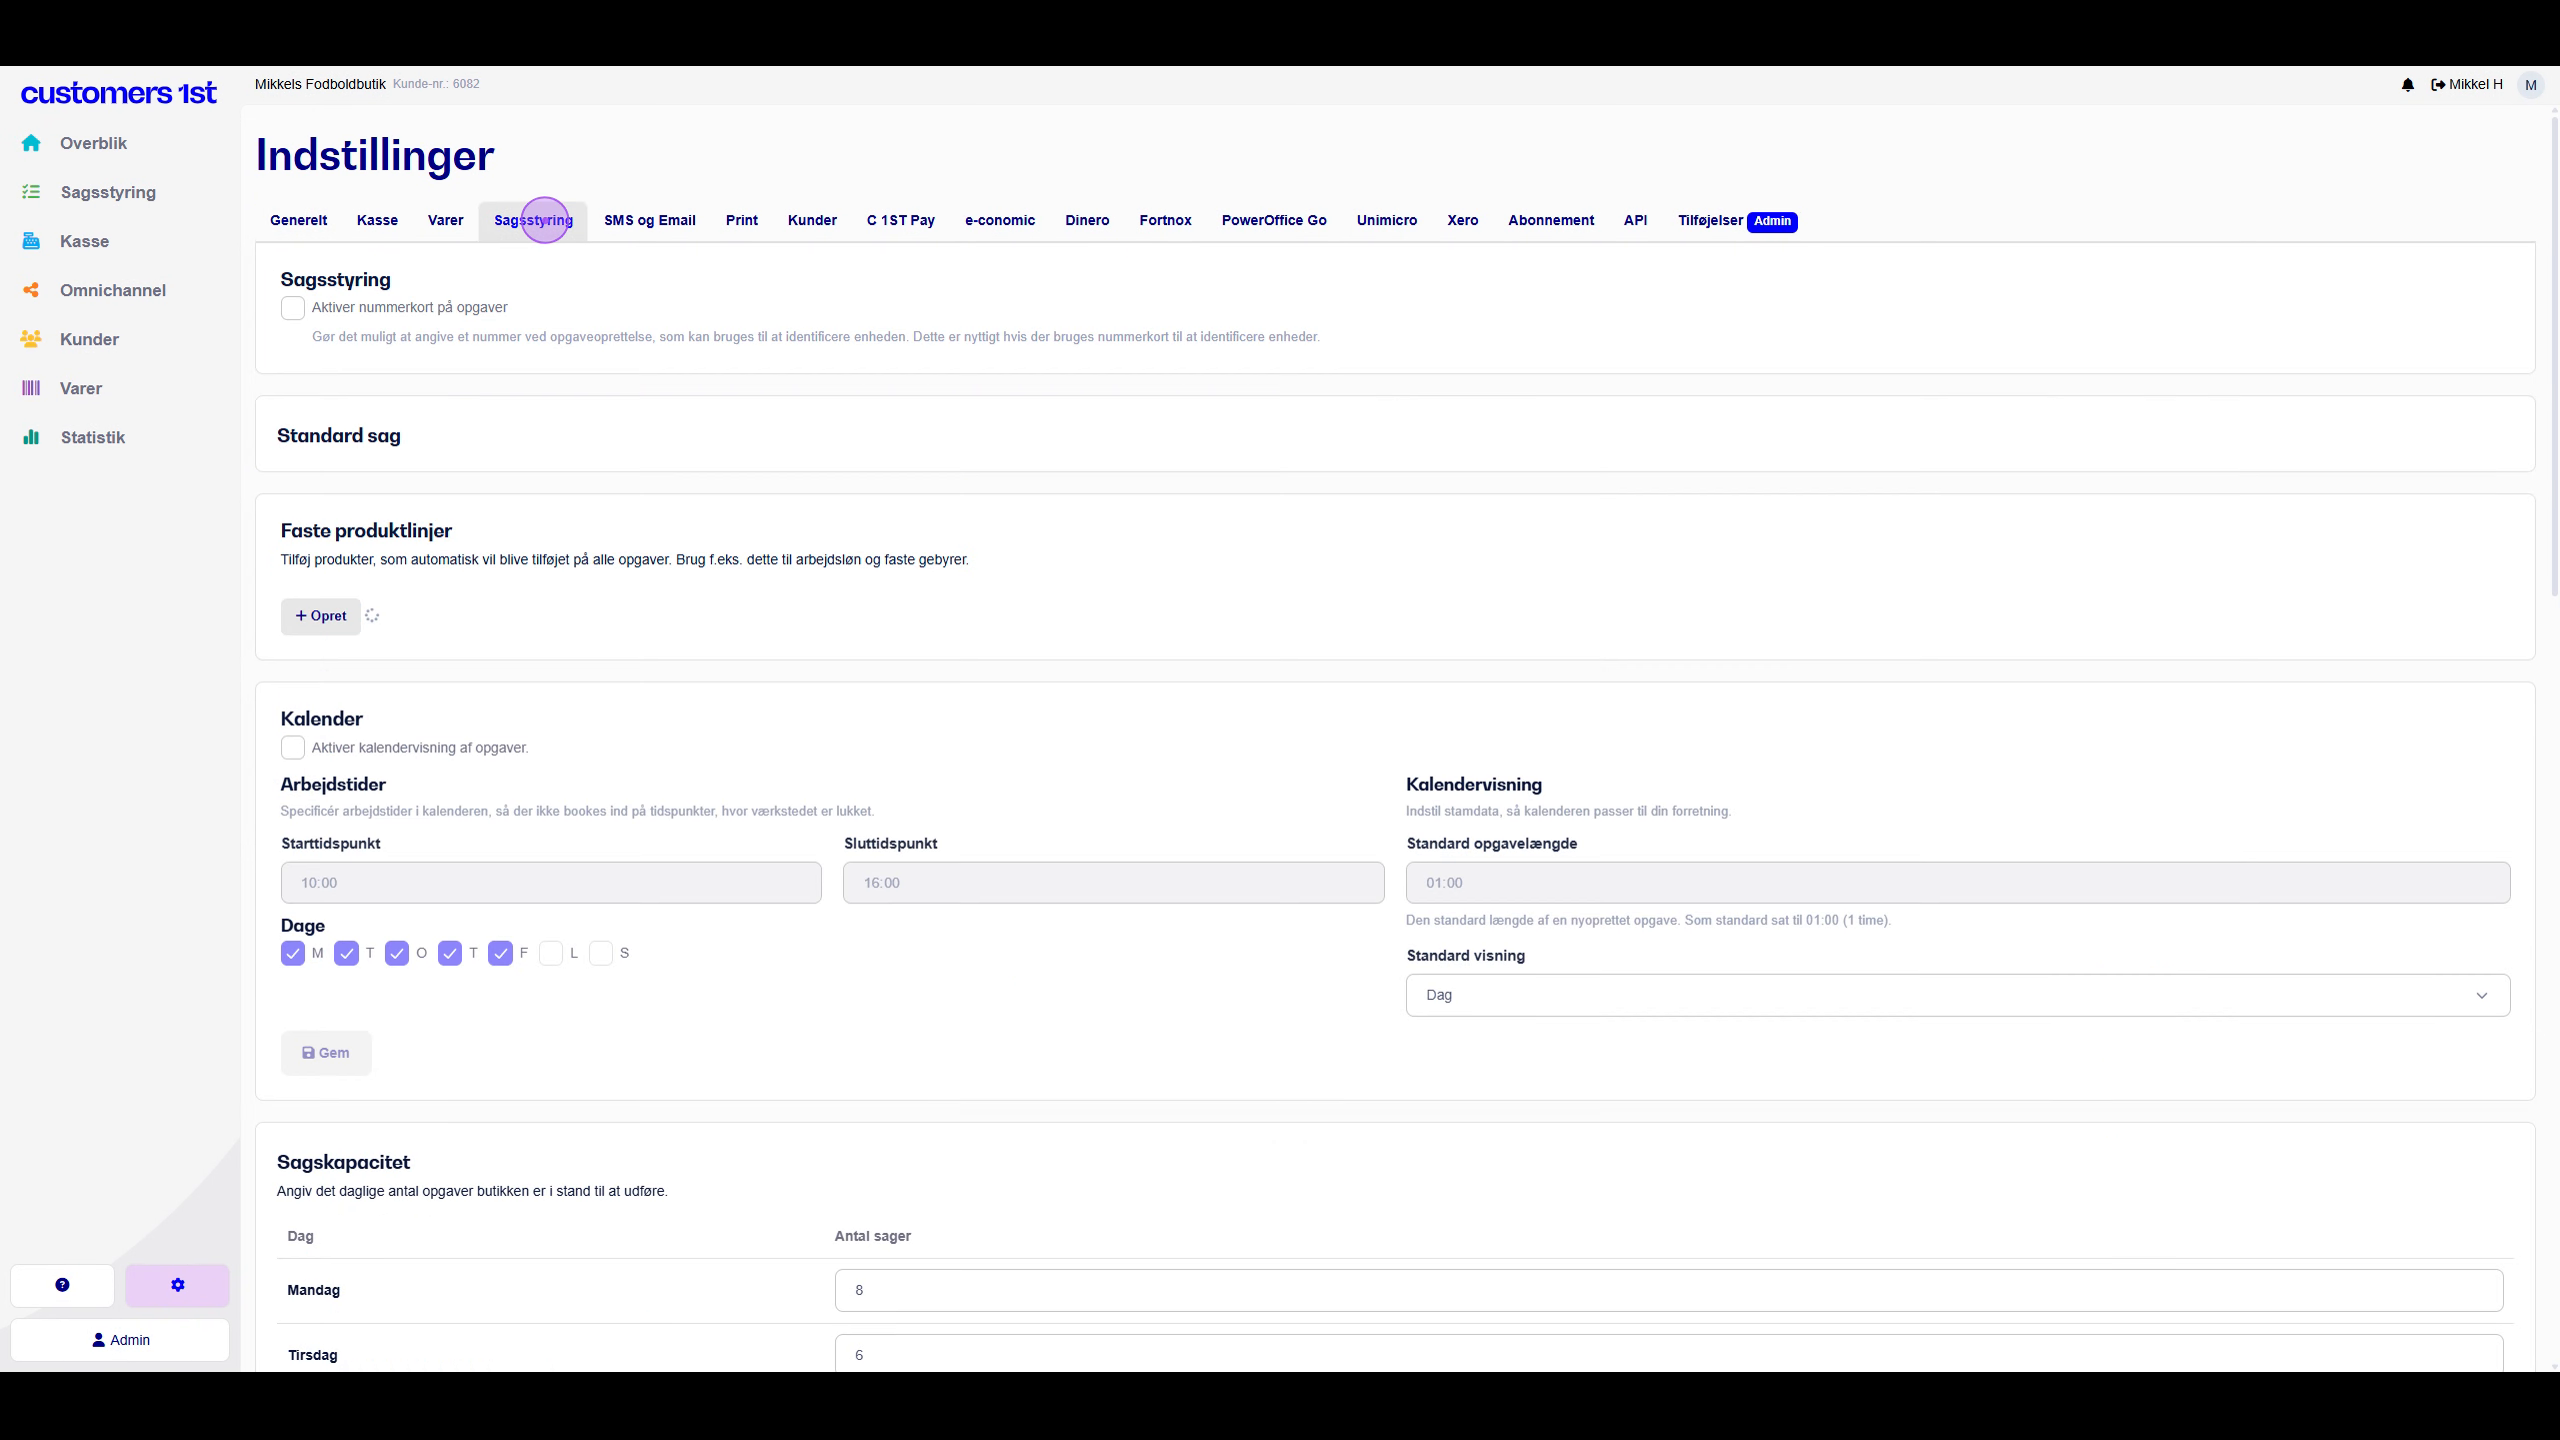
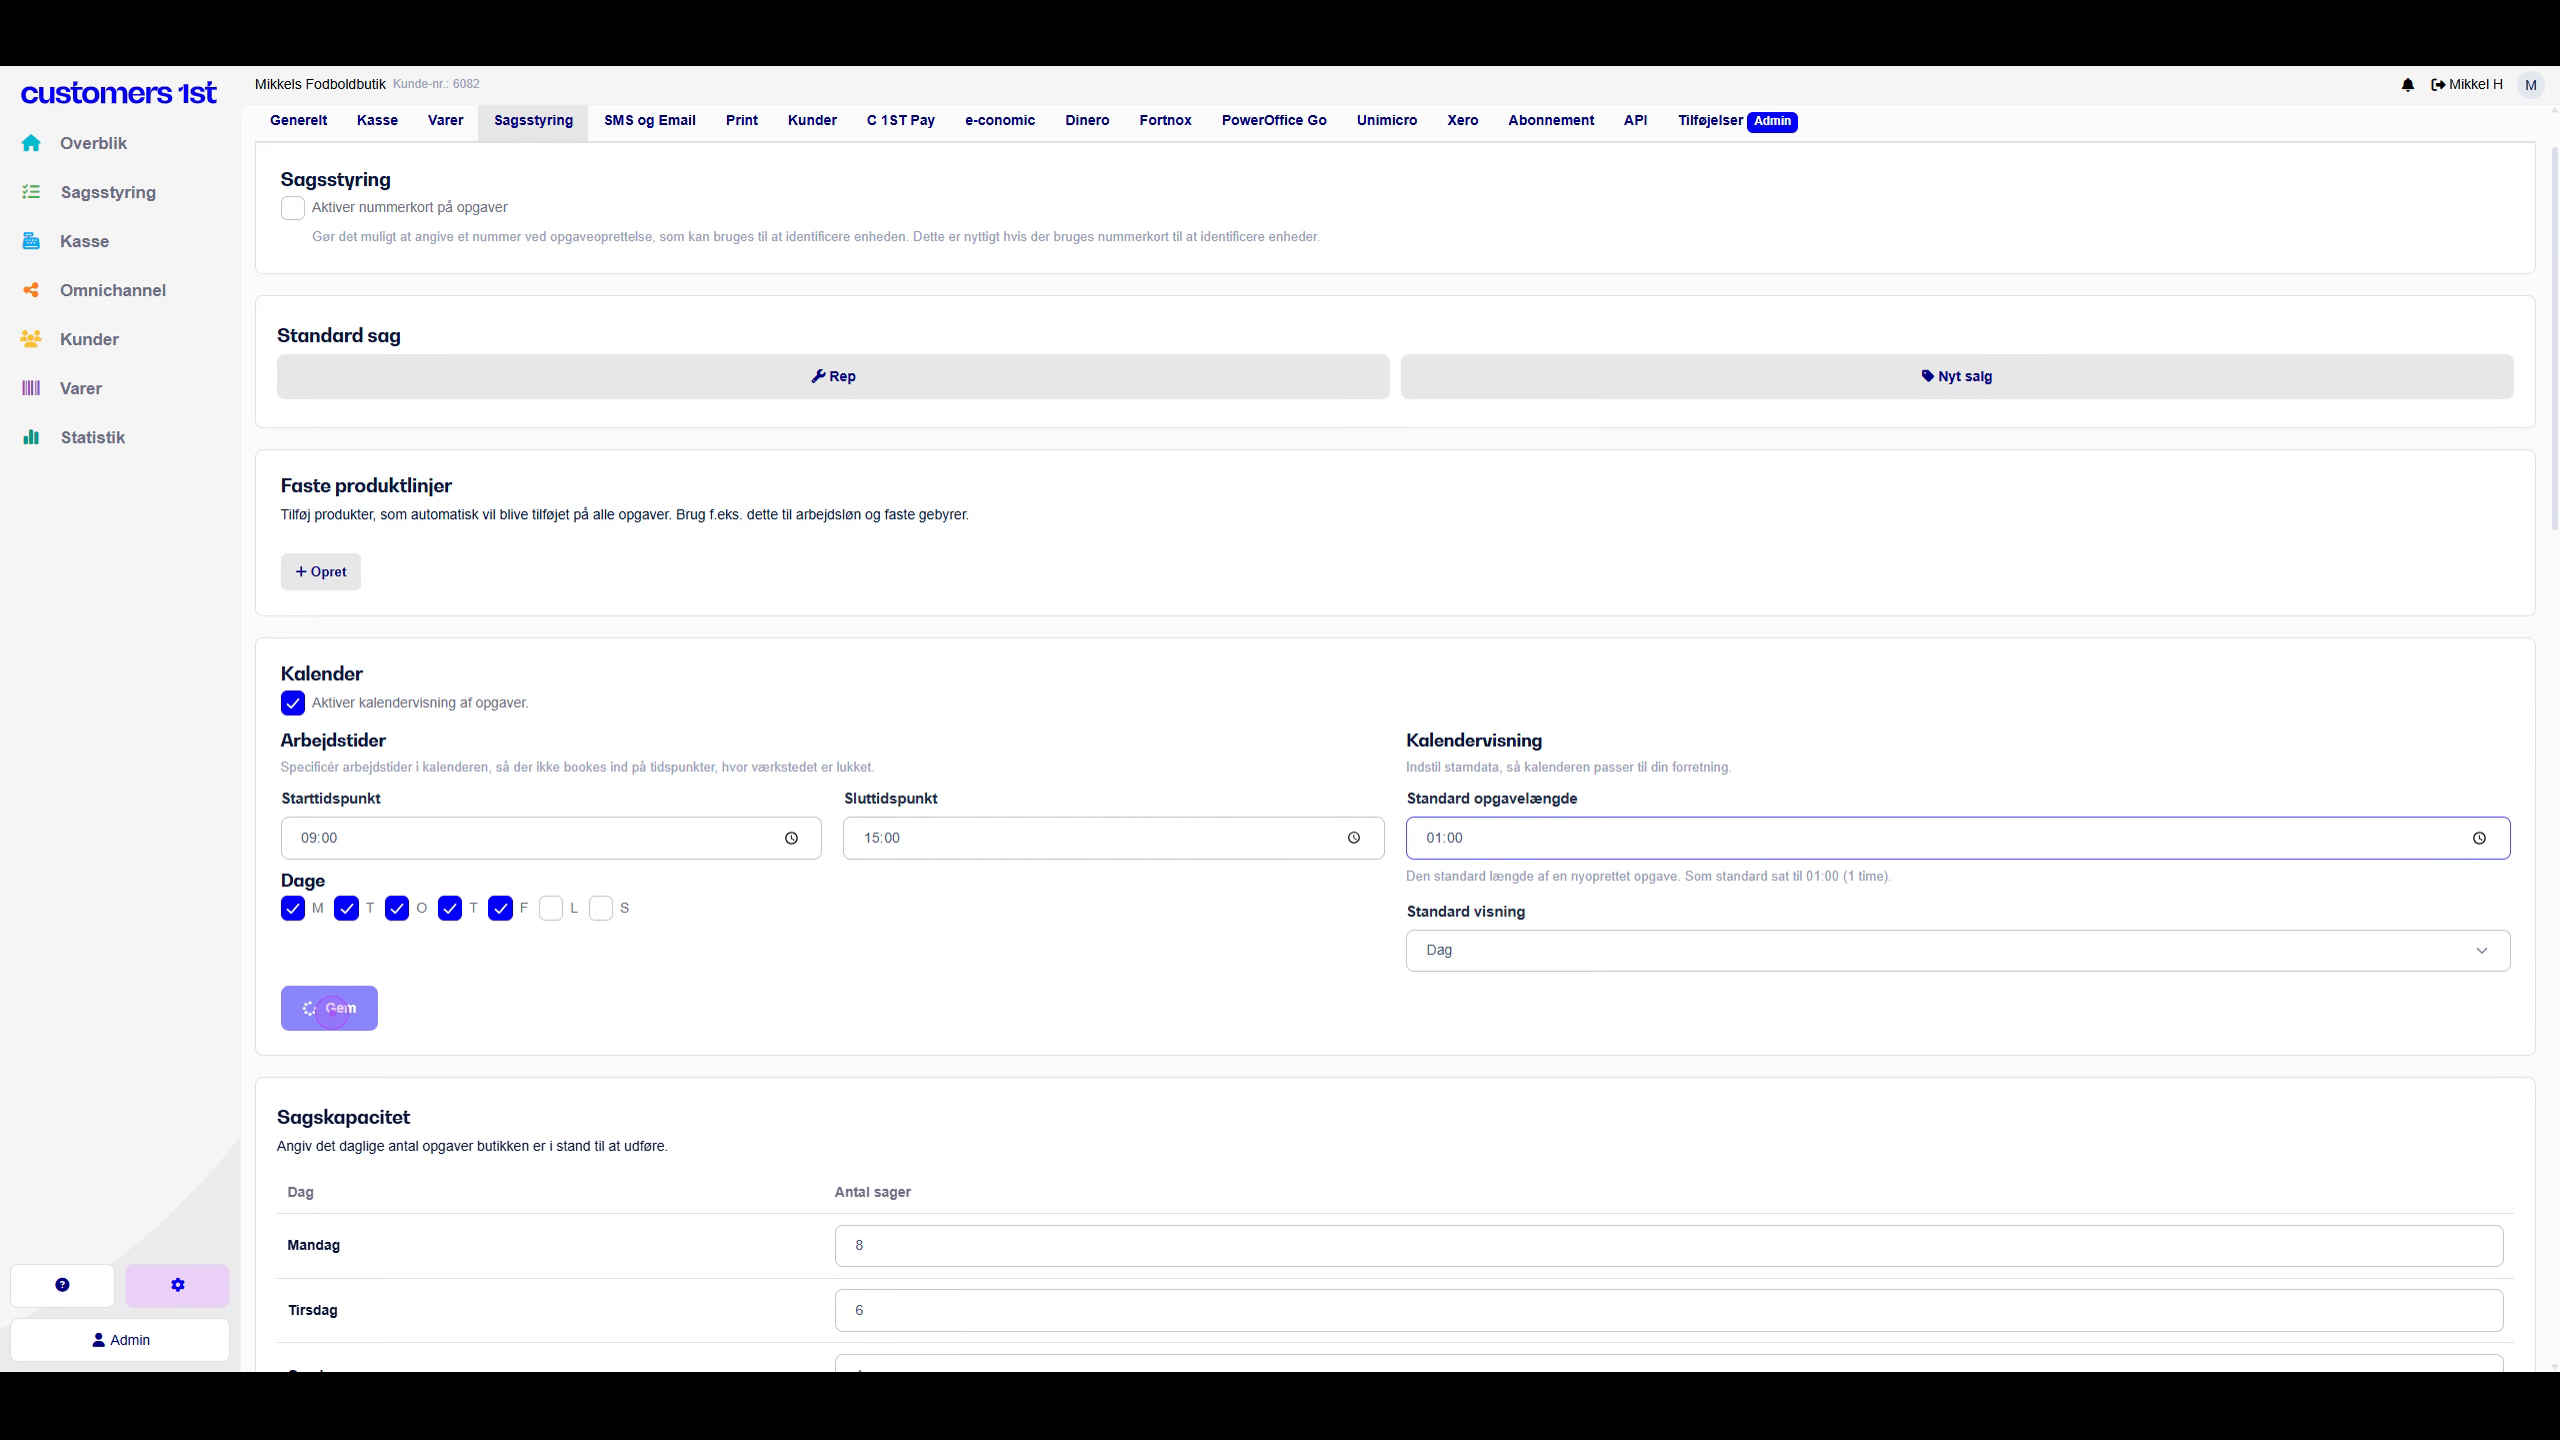
The first step is to activate the calendar function by checking the box in 'Enable calendar view of tasks' so your bookings can land directly in your calendar in Case Management/Work Card. Enter the start time that customers can book from (09:00) and end time (15:00), and select the weekdays when booking should be possible (Monday-Friday).
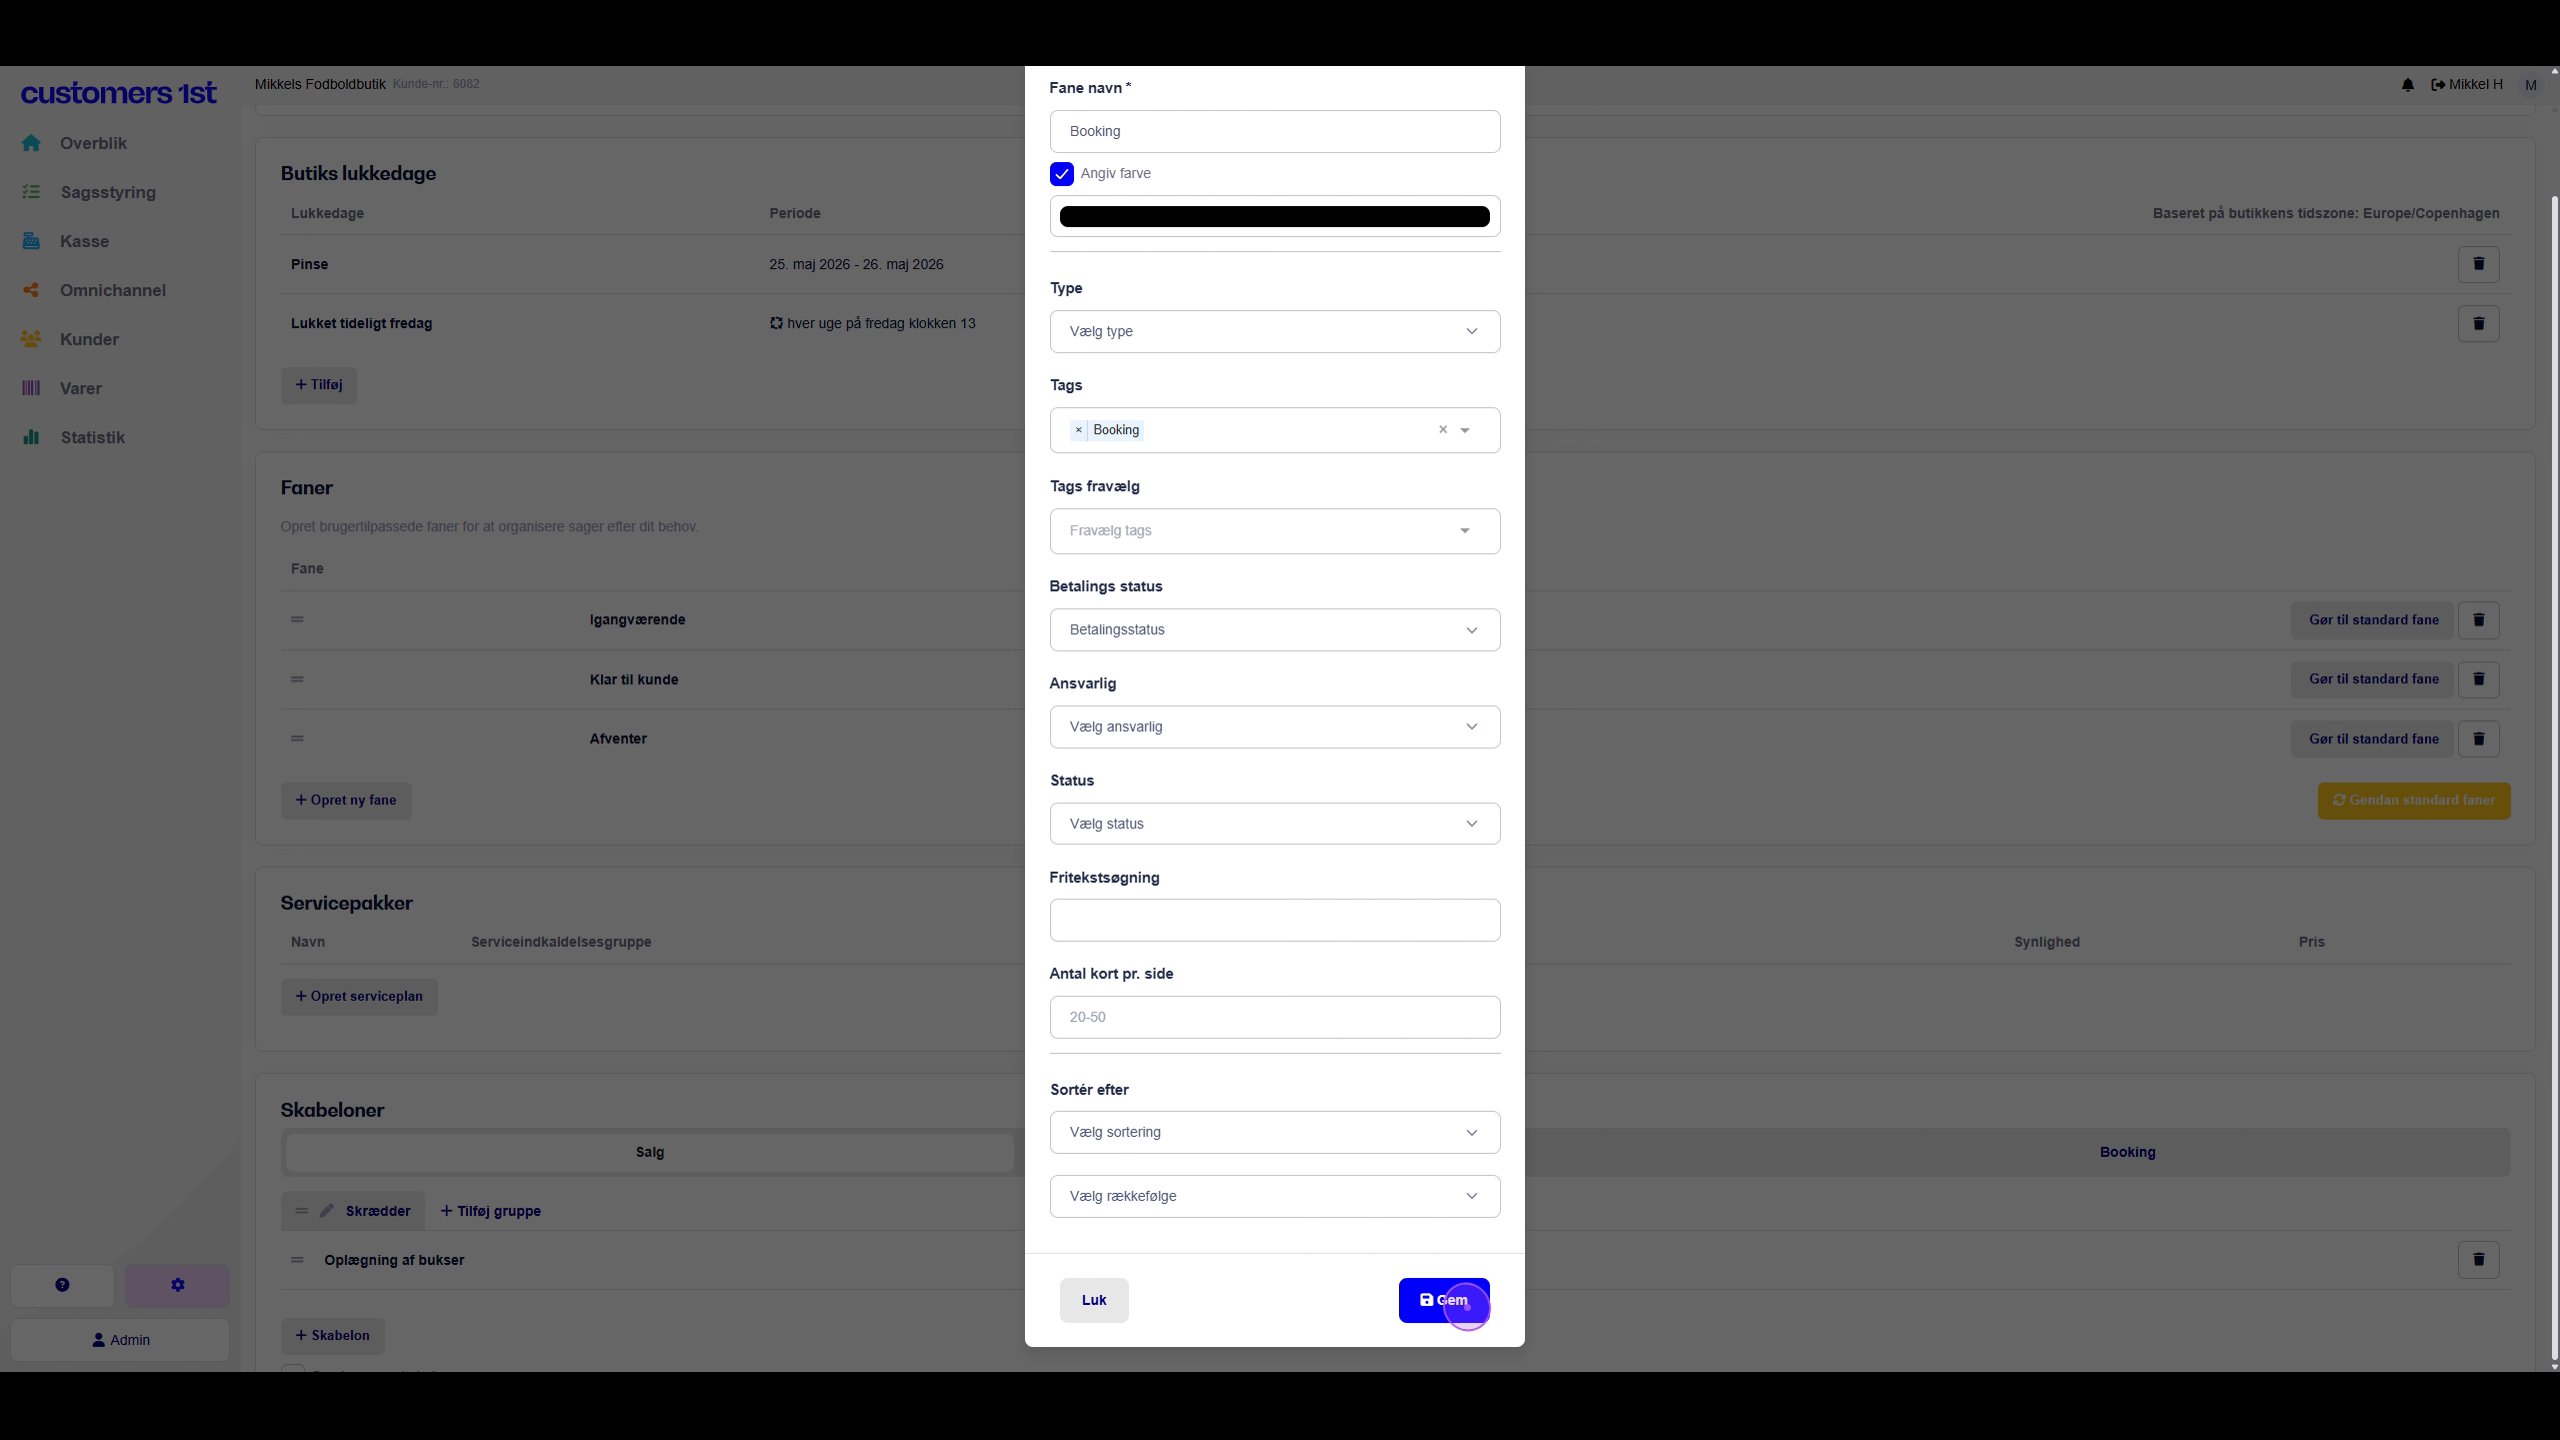
Scroll down to the 'Tags' section and click the '+ Tag' button. Enter 'Booking' as the name, though you can also choose what you want to call the tag, and then save. This tag is used to categorize and filter booking cases.
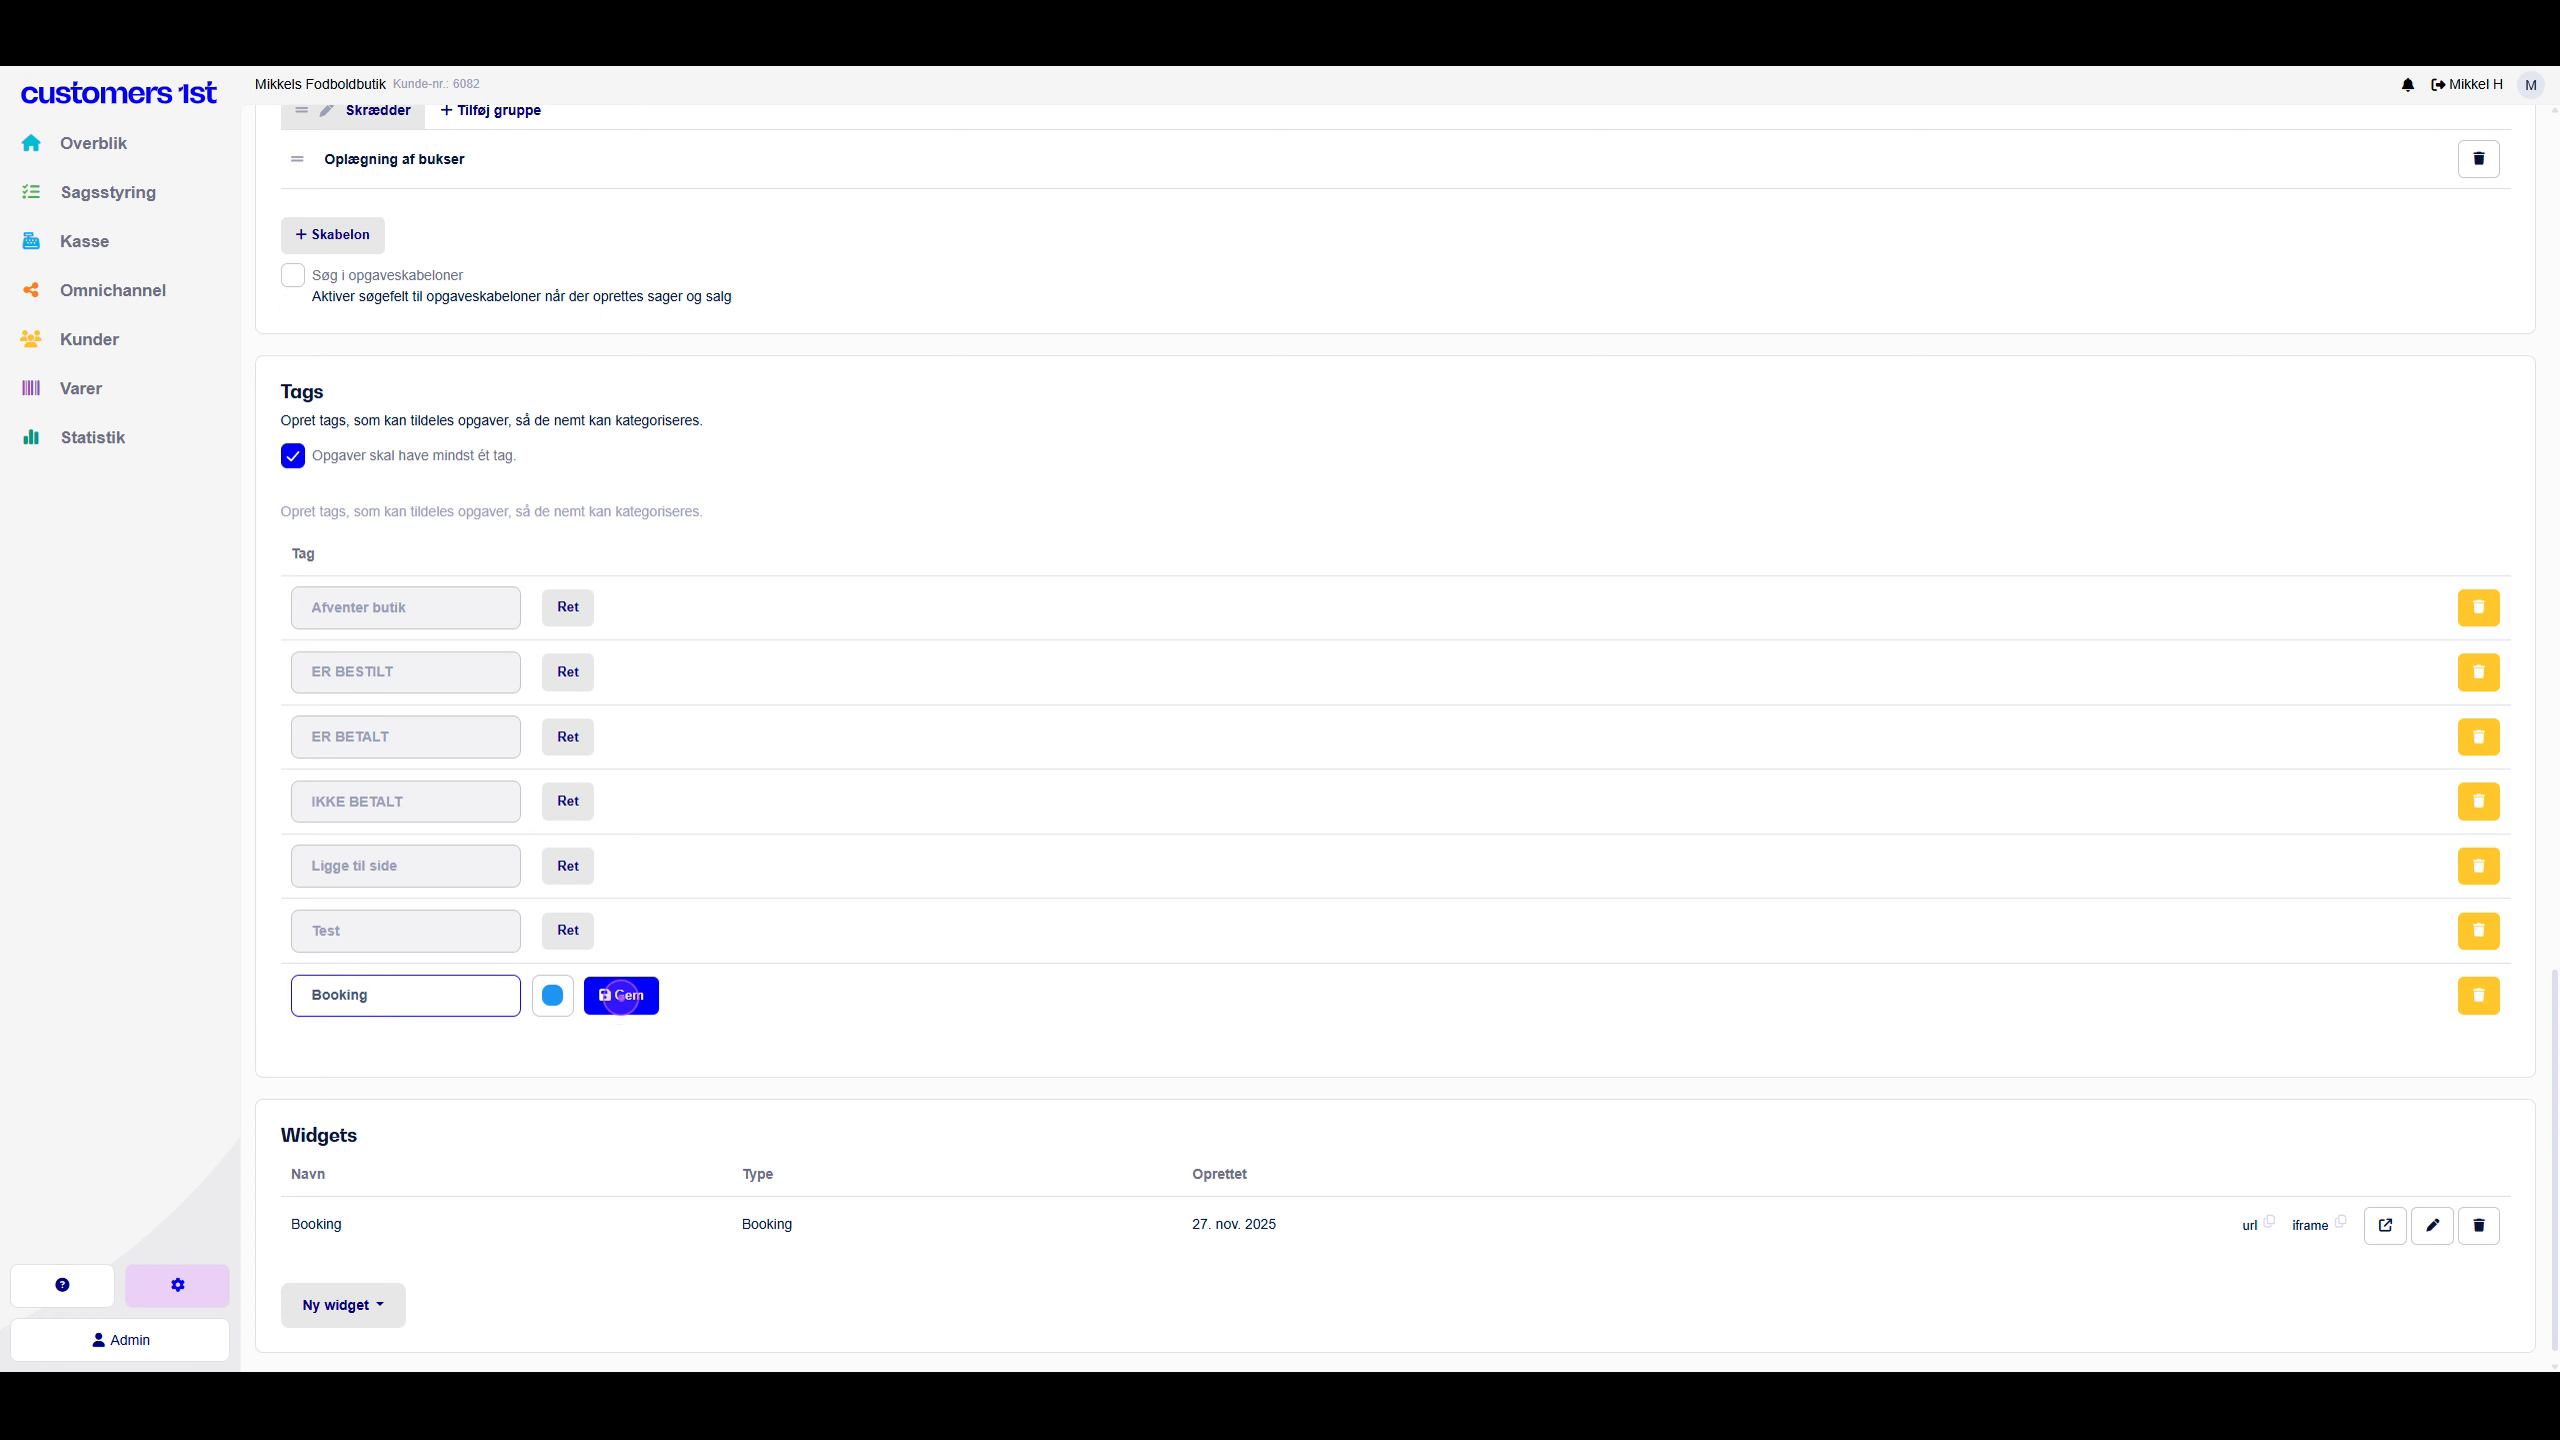
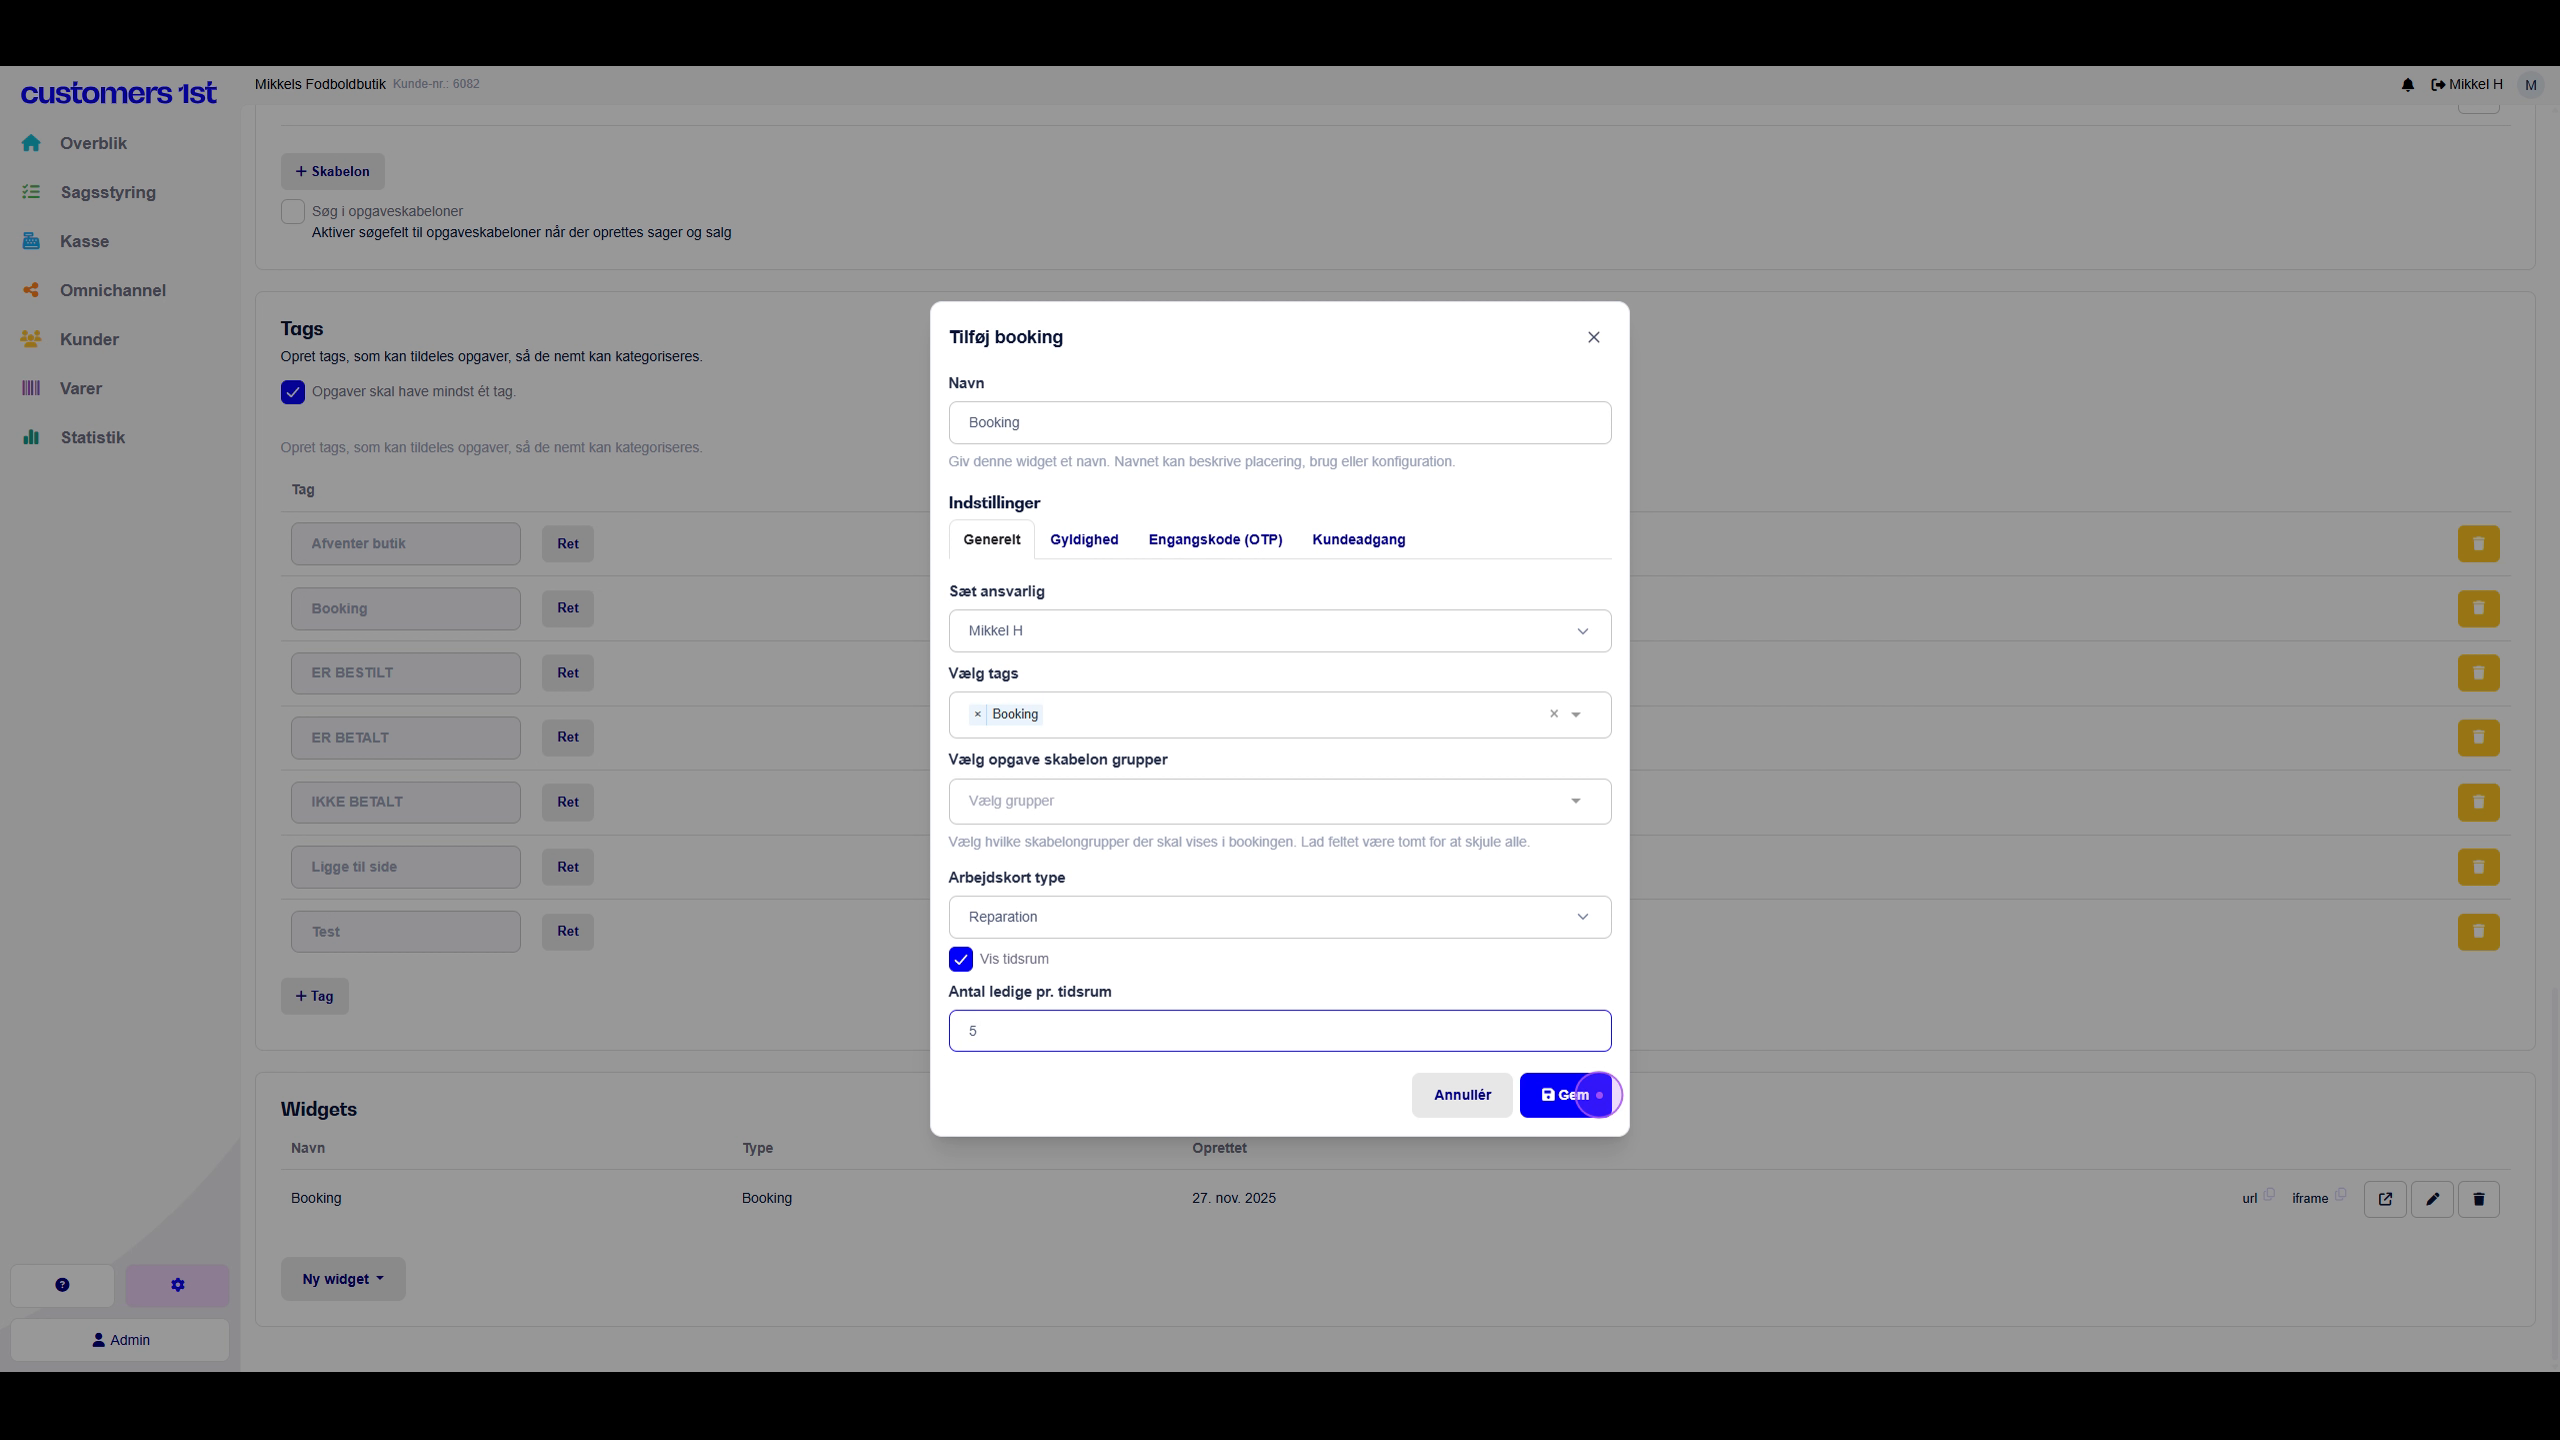
In the 'Widgets' section, click on 'New widget' and select the type 'Booking'. Configure the widget with the name 'Booking', select the responsible person to be assigned to the bookings (this can always be changed in case management/work card), attach the 'Booking' tag that you created earlier, you can enable the 'Show time slots' function, where you can set the number of available time slots a customer can book, if you don't turn it on then the customer cannot choose times but can only select a date they can book in on

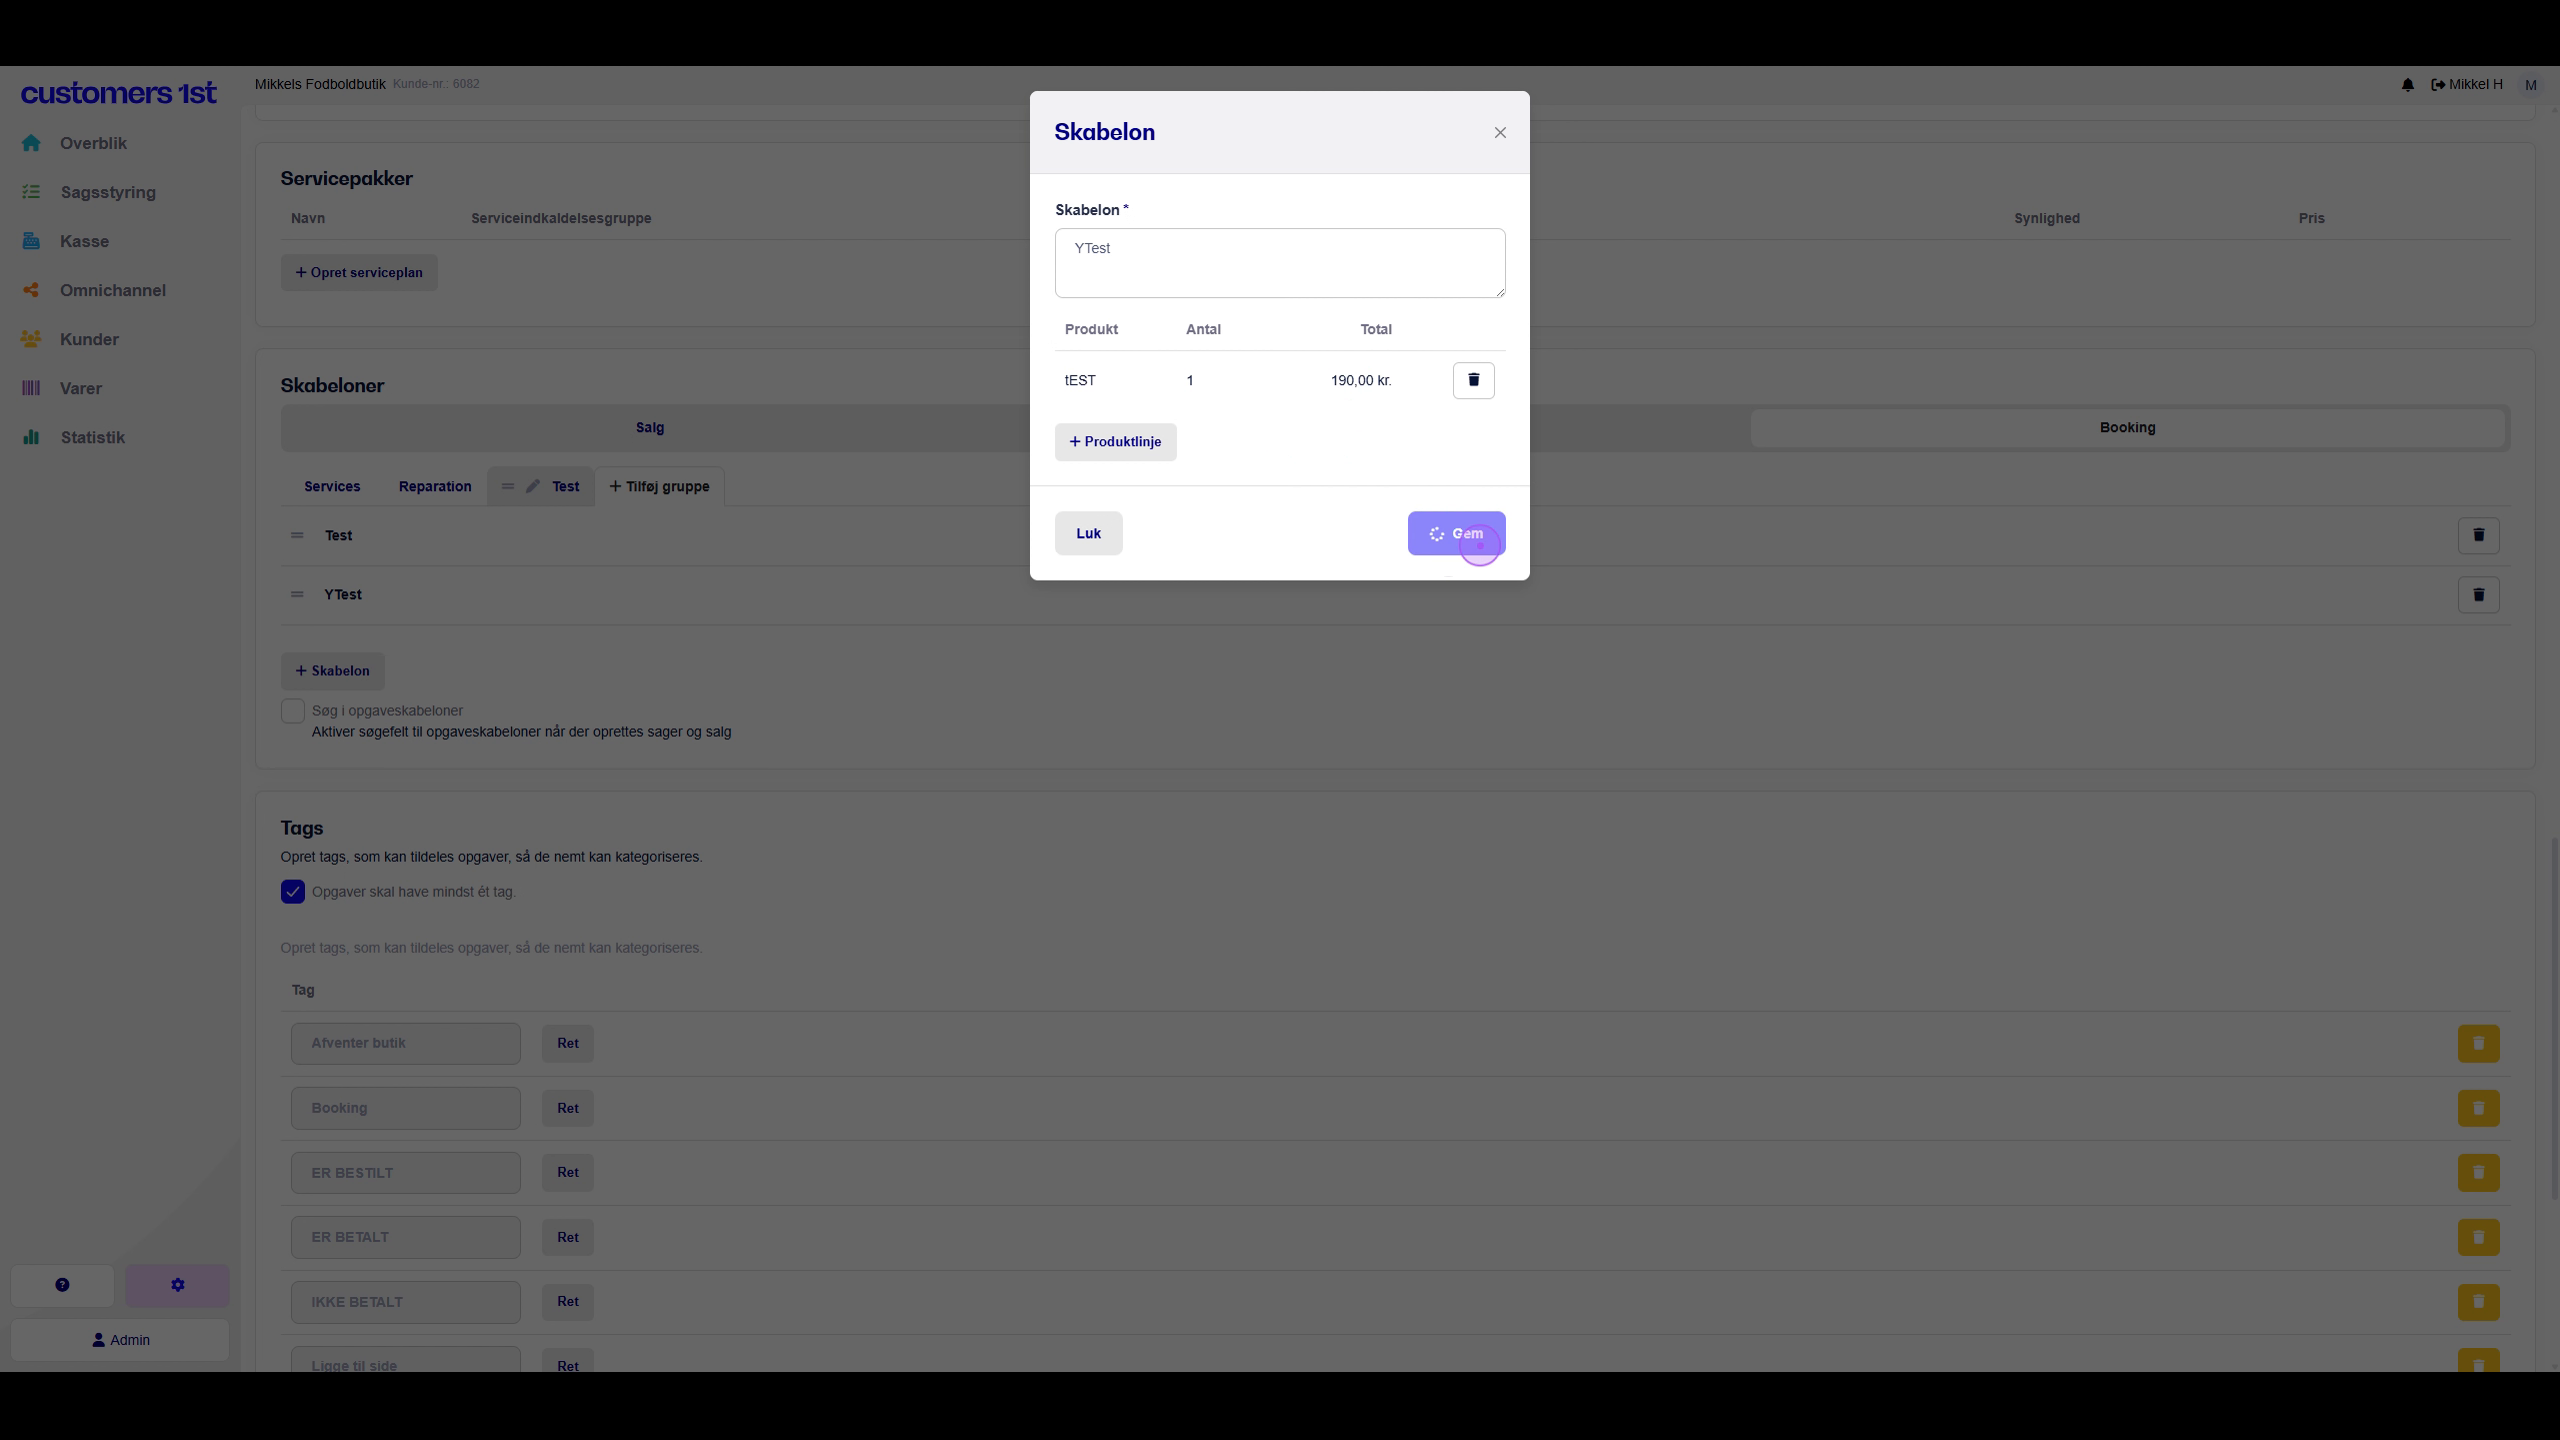
Click on '+ Template' to create a new template. Give the template the name you want the customer to be able to book. If you want to add a price to the template, you can click on 'Add Product Lines', search for the product you want on your template, select the item you want and save the template with the product line attached.
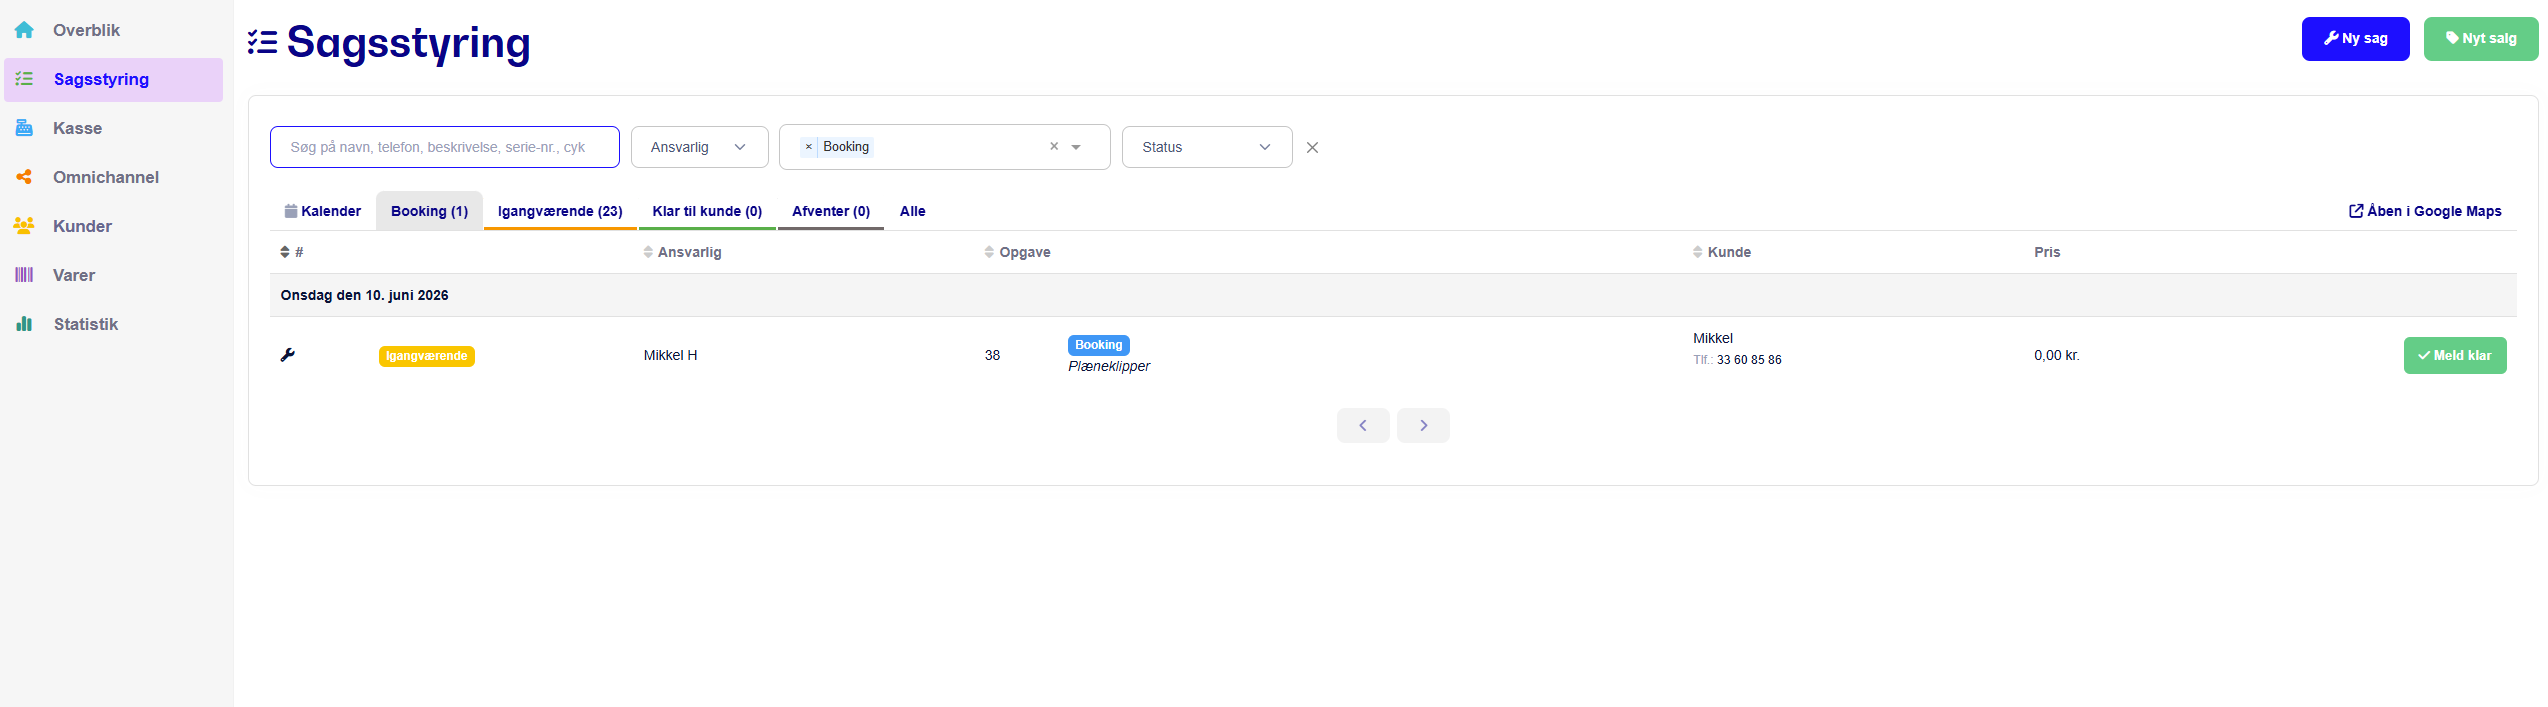
Go back to the main menu and select 'Case Management/Work Order'. Click on the 'Booking' tab you just created to see a filtered overview of all cases tagged with 'Booking'. This means all your bookings will now come into this tab you created called booking.
When you've gone through all these steps, you're actually ready to test your booking. To find your booking form, go to settings > Case management/work card and scroll all the way down to Widgets. Here you can either copy the URL and paste it in a new browser or you can click on the icon Go to,
When you've opened your booking, you can see the entire booking and test everything through.

