NB: Please note that this guide is old, and we no longer sell this type of printer.
If you've received your new Brother QL-700 thermal label printer, just keep reading to quickly get started printing receipts. Setup is quick and straightforward, but you're always welcome to write to our support if you run into problems or have questions about setup.
Connect the label printer with the included USB printer cable.
Next, connect the printer to power with the included power adapter.
Plug the USB end of the printer cable into a free USB port on your computer.
Then turn on the printer by pressing the round power button on top of the printer.
Connect the printer. If there are 2 green lights on the printer, press the small button until the little light stops shining.
Find the printer in the list of printers. (You can search for printer in Windows)
Click Manage
Click Printing Preferences
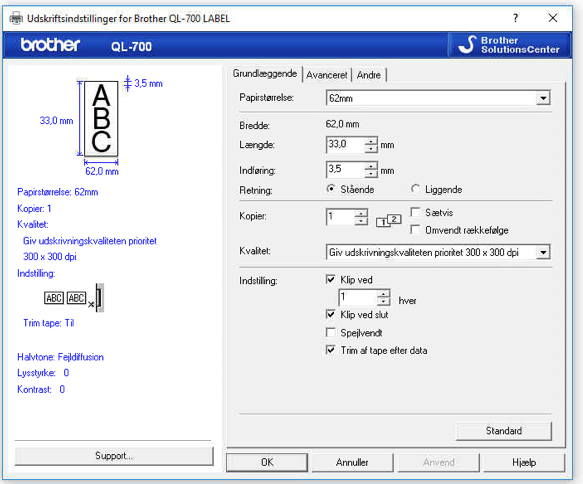
Look at the image below and set your settings the same as these
Click Apply
Go to Settings -> Print
Under price labels, pick the Brother QL-700 printer.
Set margin to standard and set width to 62 mm and height to 29 mm.
Hit the Test button to print a test label.
Download Mac driver here
Install the driver before you plug in the printer
Plug in the printer
Go to http://localhost:631/printers/ - after that, you'll get a Web interface is disabled message
Open Terminal by searching on your Mac (top right)
Copy the following message into the terminal: cupsctl WebInterface=yes and hit enter
Go to http://localhost:631/printers/ again. Now a page will open
Click on Brother QL700
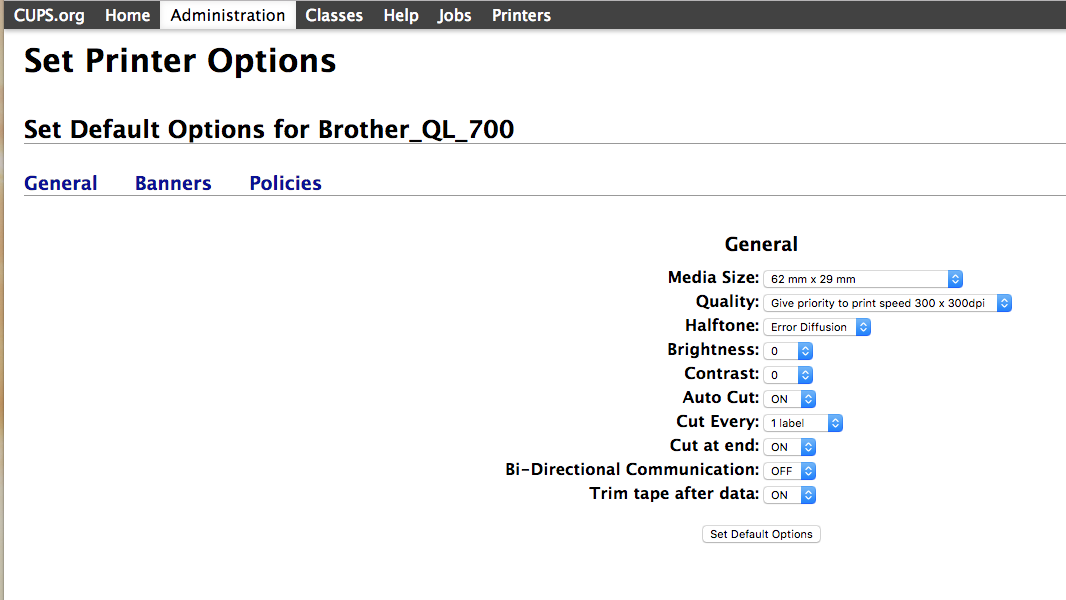
2 drop-down menus will now be available. In the right one you need to pick Set default options
Follow the image below to set up the label and printer correctly.
If you can't access http://localhost:631/printers/ then just follow this CUPS guide.
