If you’ve received your new Star TSP143 USB receipt printer, just follow along here to quickly get started with printing receipts. The setup is quick and super easy, but of course you’re always welcome to reach out to our support if you run into any issues or have questions about the setup.
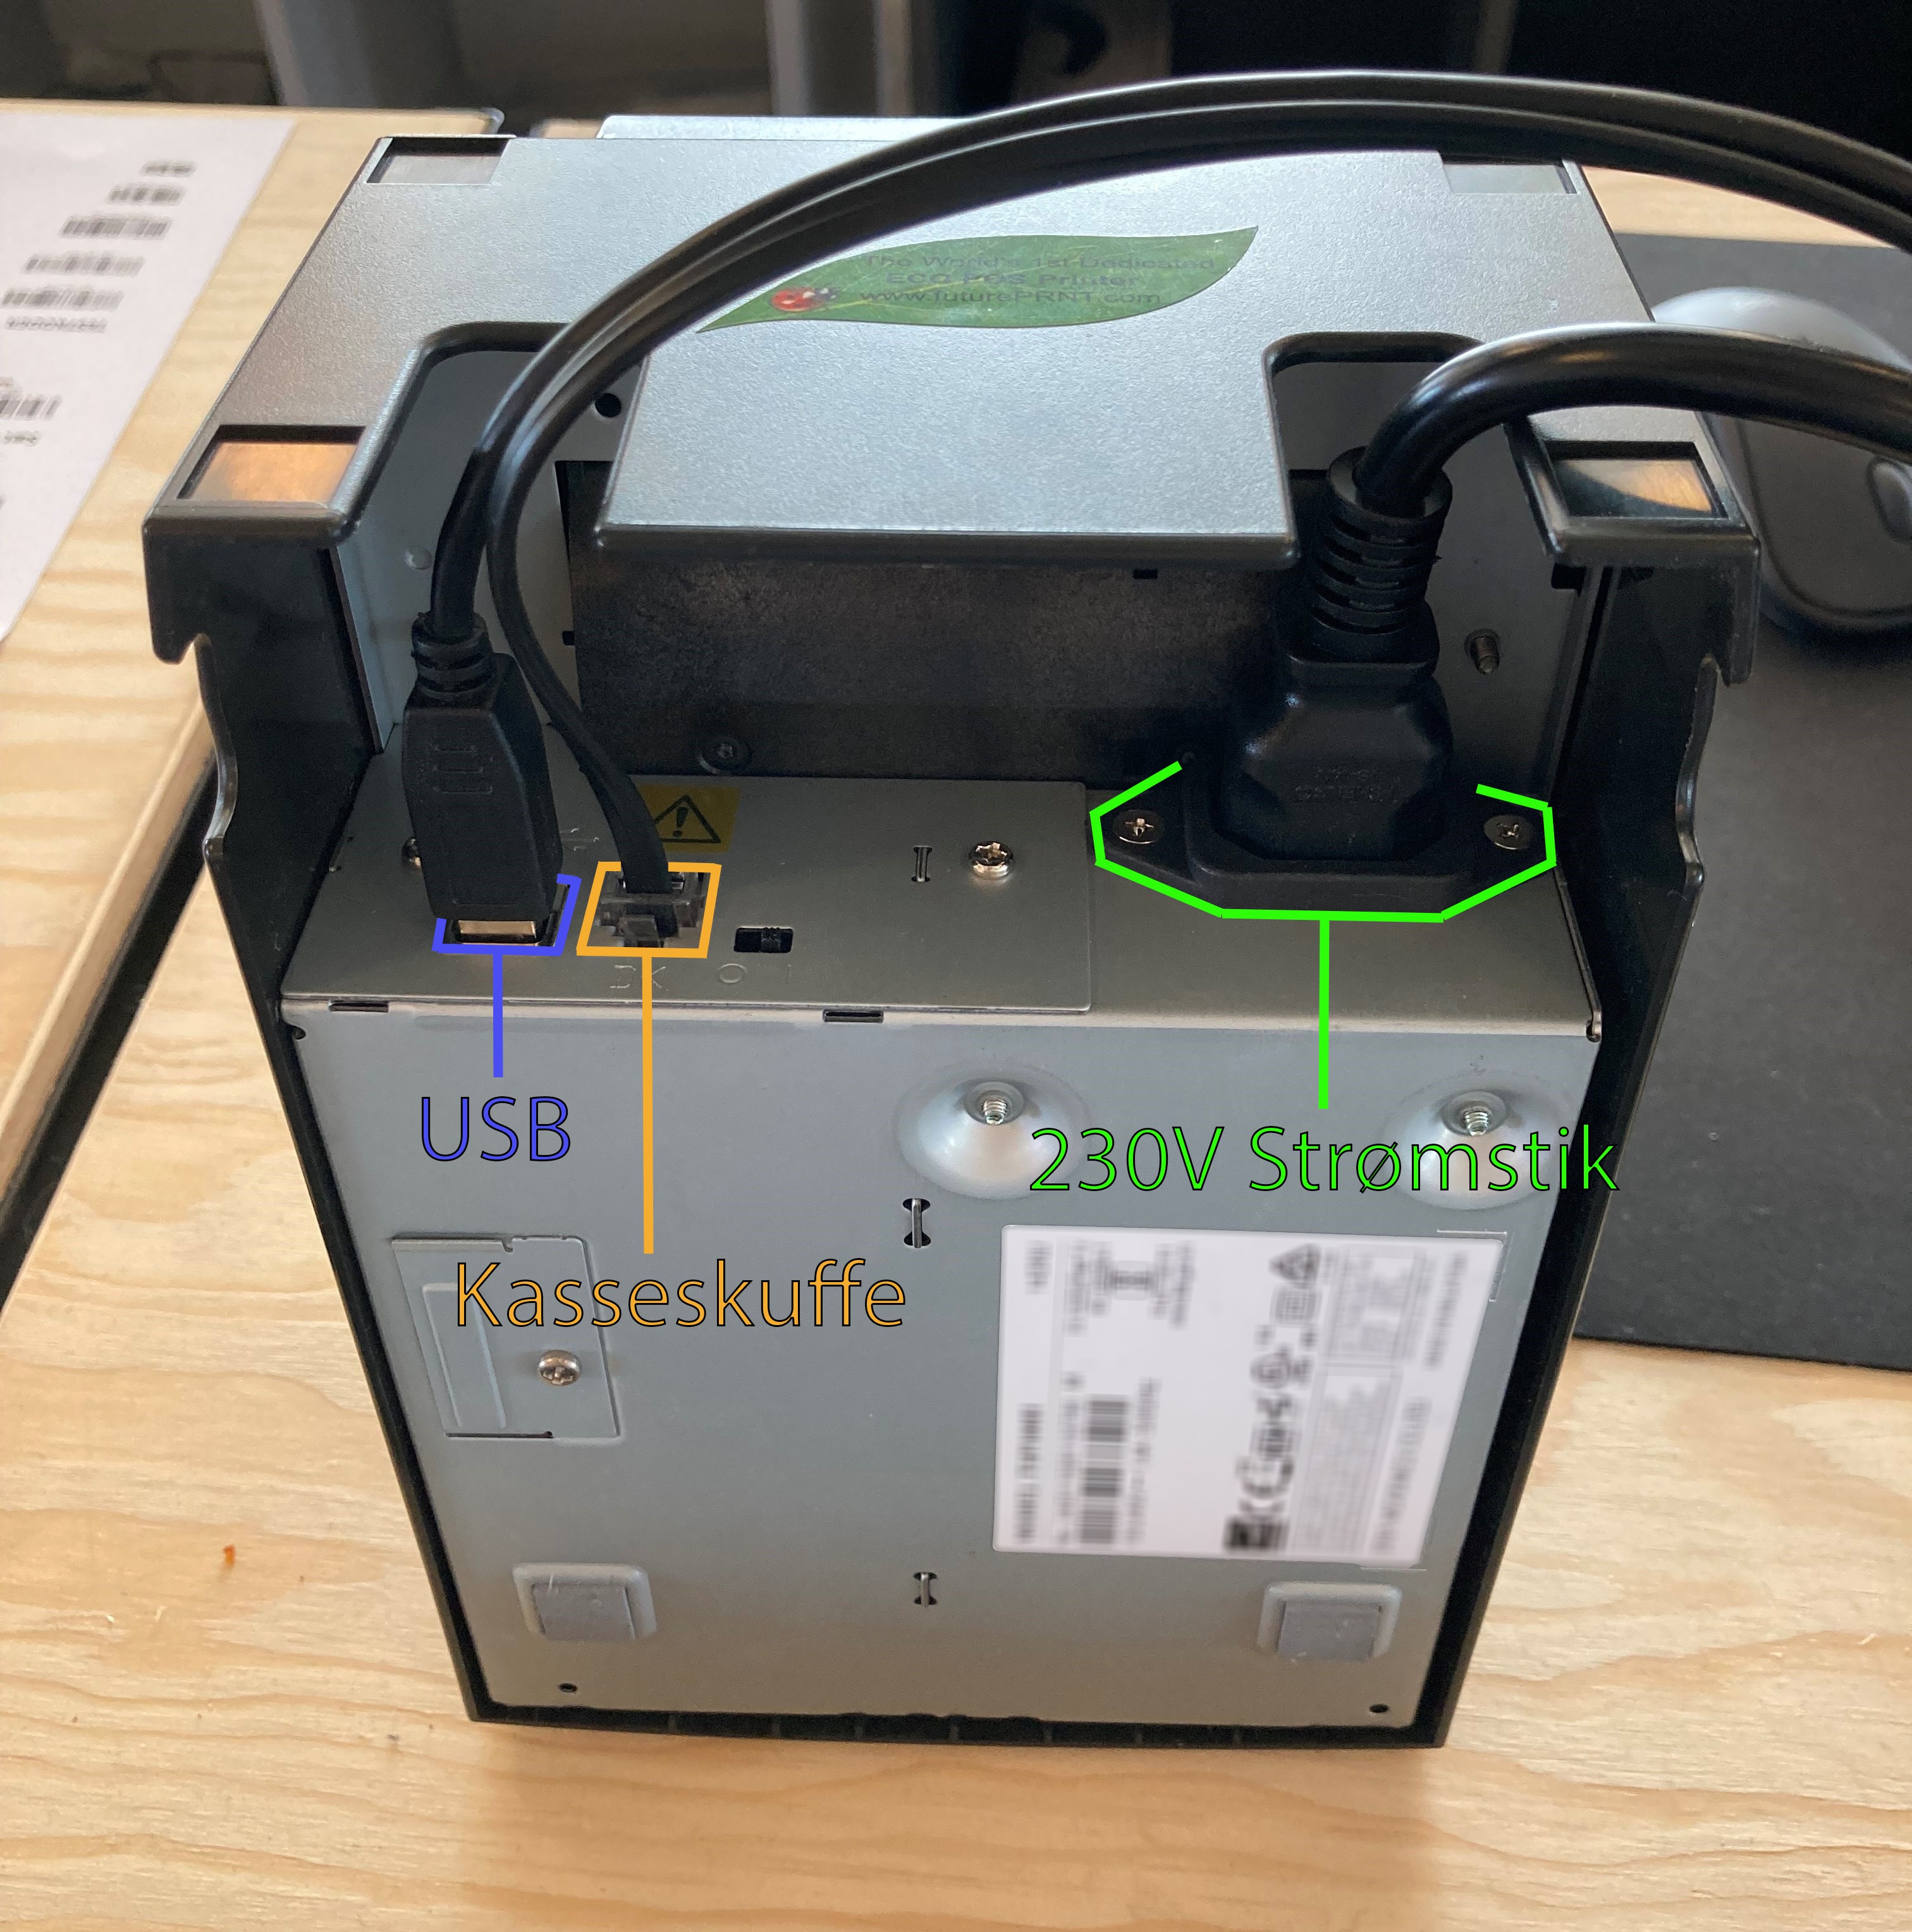
Start by connecting the printer to your PC using the included USB printer cable. (Marked in blue)
Next, connect the printer to power with the included 230V cable (Marked in green)
OPTIONAL - Plug your cash drawer cable into the RJ12 port on the back of the printer (Marked in orange)
Run the installer as administrator.
Click Next.
Choose standard installation and click Next.
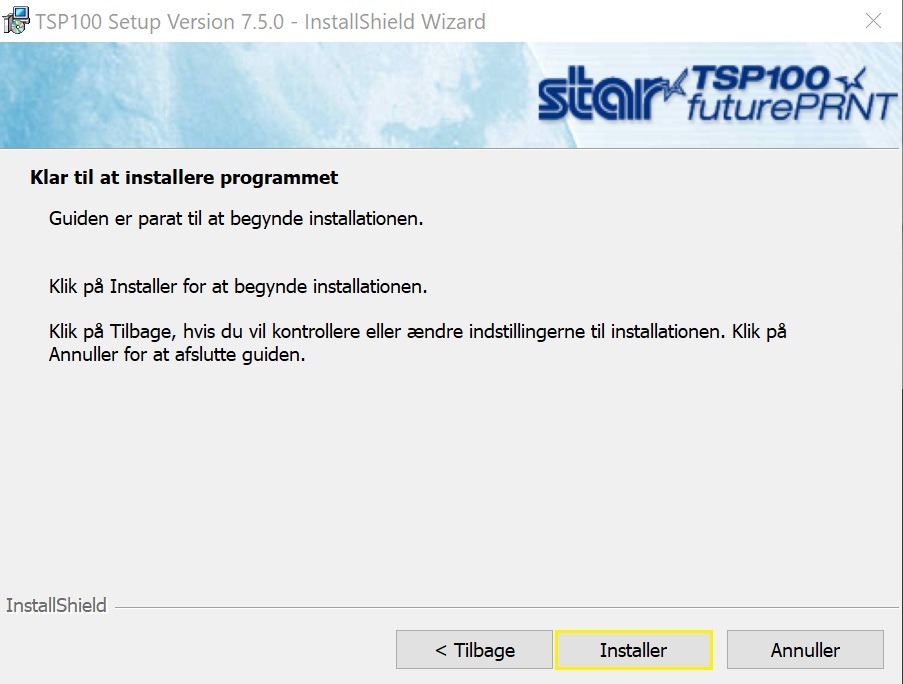
Then click Install and wait for the installation to finish.
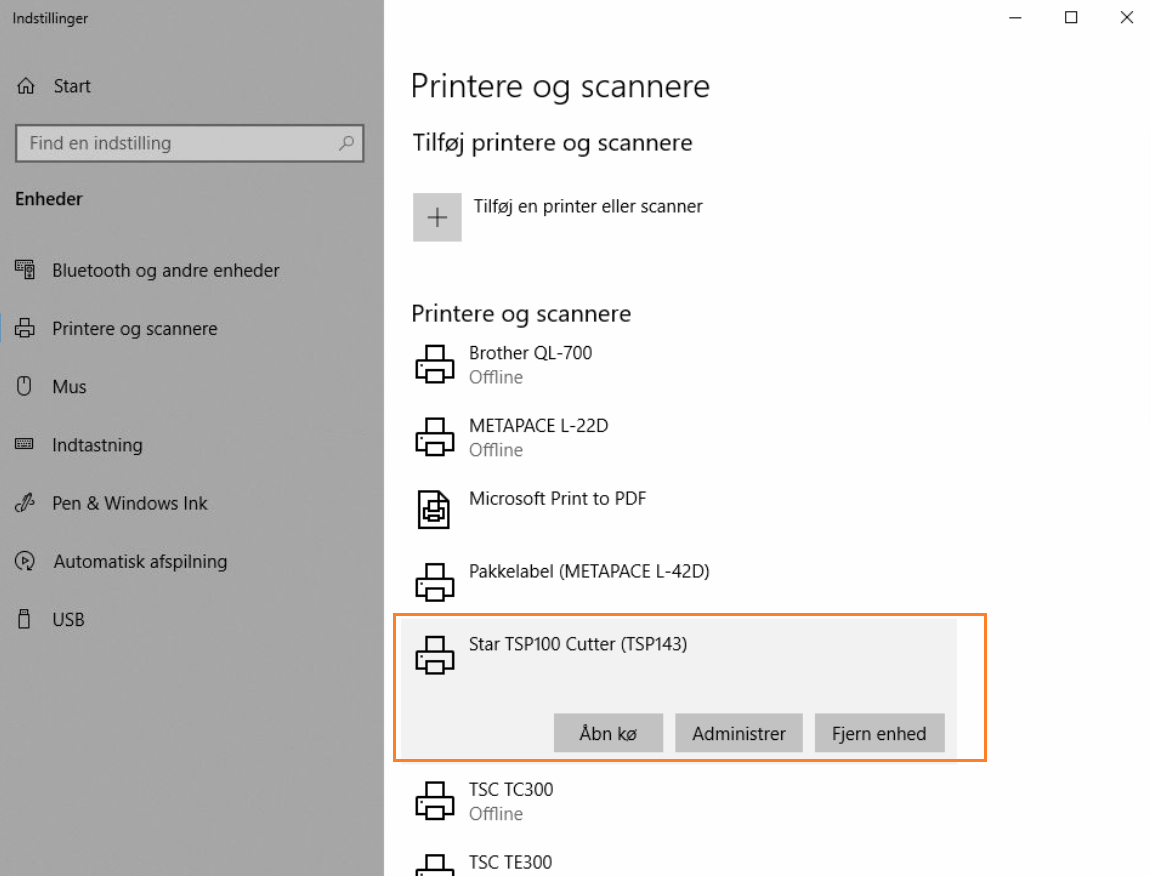
6. When the printer driver is installed, you should be able to find the receipt printer in your Windows printer list. The printer is called "Star TSP100 Cutter" or something similar.
Go to Settings -> Print
Under Receipt you should now be able to choose the system printer from the drop-down list.
Note: If you can only choose Web browser, that's because you haven't installed Printdesk, which you need if you want to print straight from the system to the printers.
When you have picked the receipt printers in the list, you can hit the Test button and then you should get a test receipt printed from the printer.
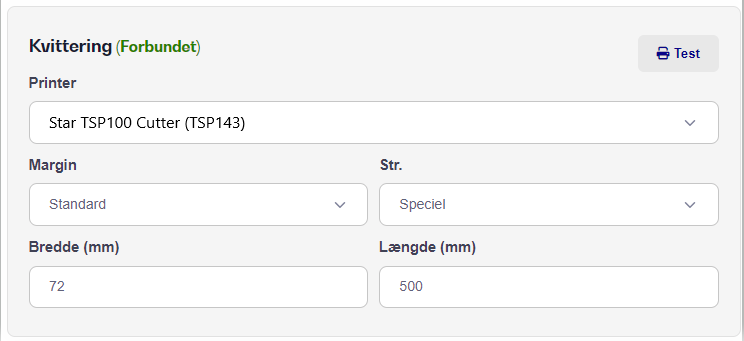
Note: By default, we don't recommend changing the settings below unless your print looks wrong.
See also: Setting up the cash drawer for Star TSP143 Receipt Printer
