In this guide you will learn how to set up, connect and use your Stripe wireless terminal for C 1st Pay.
Follow the instructions carefully to avoid errors.
Start by getting your business set up with Stripe. This process takes the longest and there may be waiting time involved while Stripe validates your information.
In Customers 1st you will need to:
Enter your company details under Settings -> General. You will need to enter your company name, address, postcode city, phone number and email.
Then go to Settings -> Checkout -> C 1ST Pay terminal
Press the Start Stripe Connect Onboarding button
Follow the instructions on the Stripe website for account creation and validation.

NB: The account creation and validation process is carried out by Stripe and is not handled by Customers 1st. You may be required to submit documents to verify your business before you can receive digital payments through Stripe.
You can then set up and configure your terminal. This process can take up to 30 minutes, most of which is waiting for the device to update.
If you need to change settings such as WiFi connection afterwards, you may need the following PIN: 07139
Unpack the device and remove the back cover from the terminal with a fingernail.
Insert the supplied lithium battery into the device and snap the back cover back on.
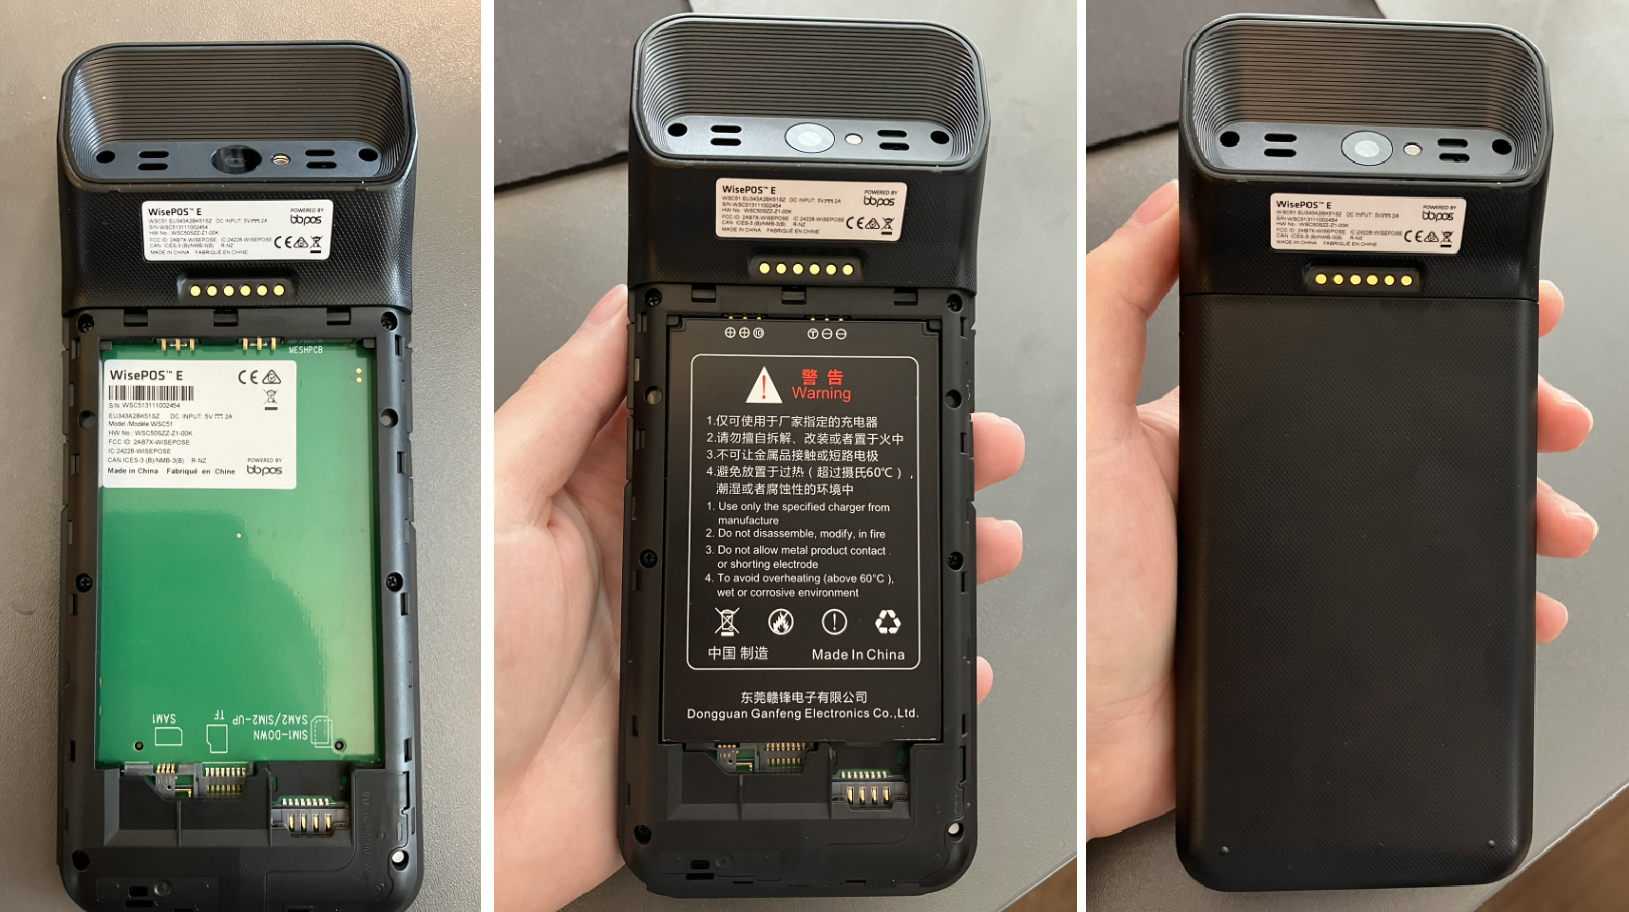
3. Plug in the device to charge with the supplied USB cable.
4. Turn on the device by pressing the power button on the top right side.
5. Follow the on-screen instructions to connect the device to Wi-Fi.
Select your Wi-Fi network from the list
Enter your Wi-Fi password
Connect to the Internet and let the terminal update
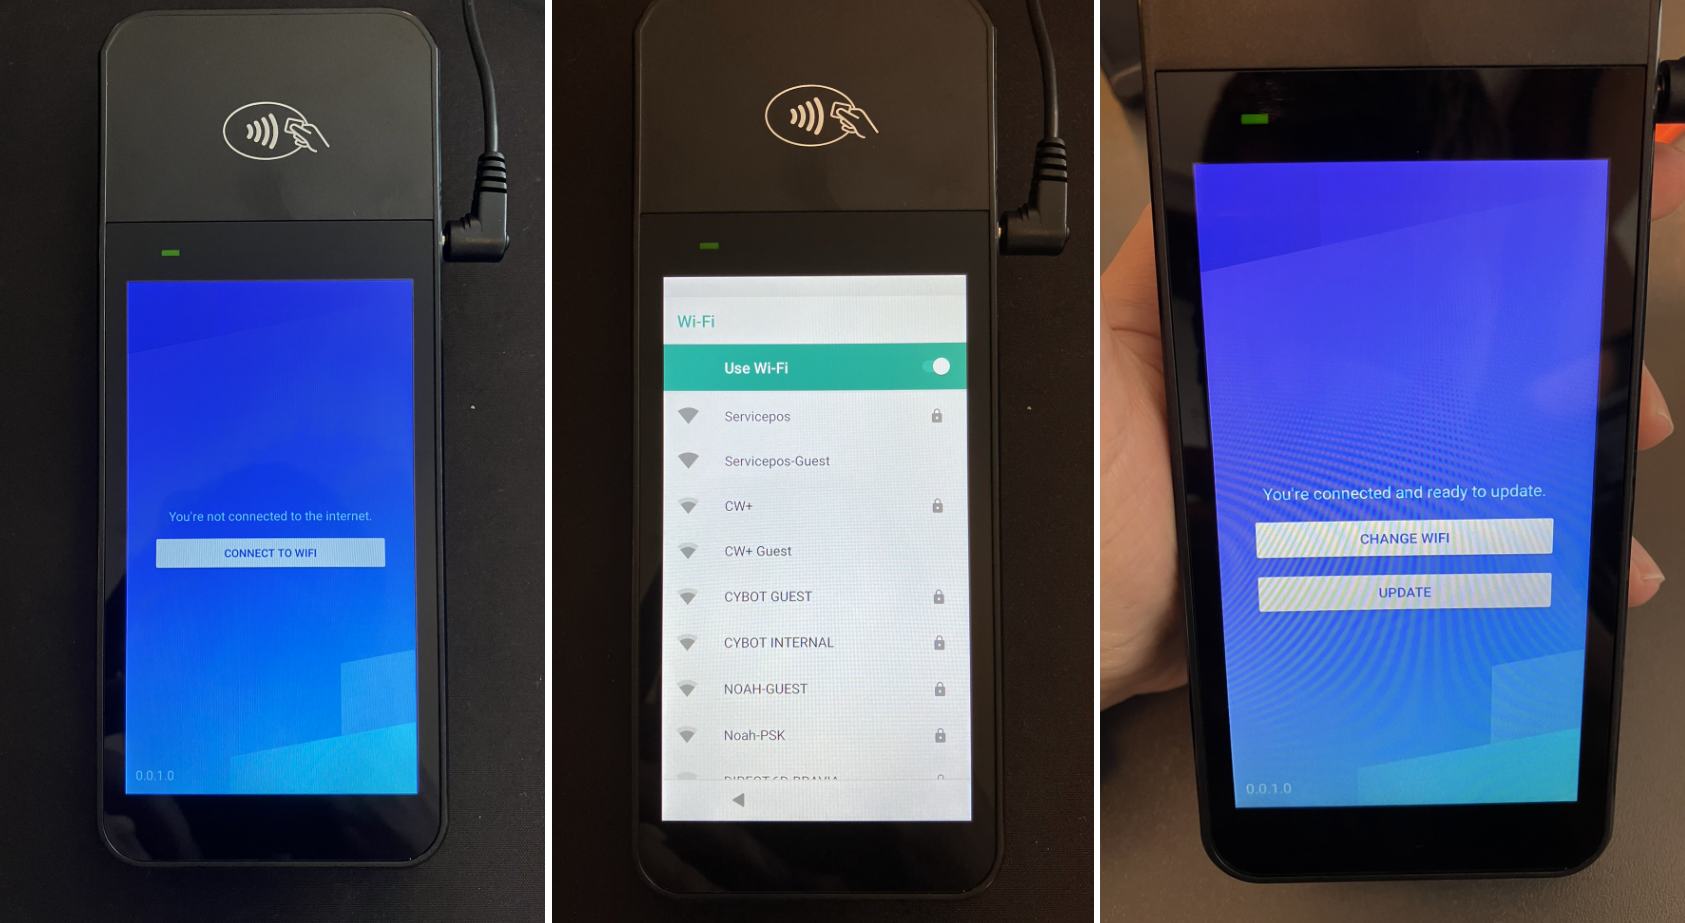
6. Once the terminal is updated and connected, you can start the setup.
7. Select the desired language and country in which the terminal is located.
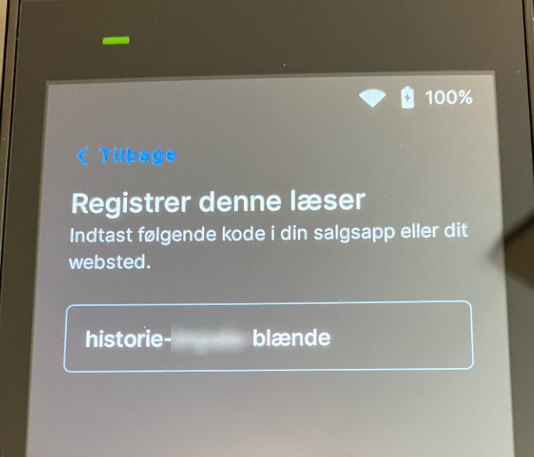
8. Read the text code on the terminal screen (including the hyphen) when the Register this reader screen appears.
Once your Stripe account is created and linked to your Customers 1st store, you can add the terminal
Go to Settings -> Checkout -> C 1ST Pay terminal
Click on Add terminal
Enter a name for the terminal to appear in the checkout
Then enter the text that appears on the terminal in the Pairing code field
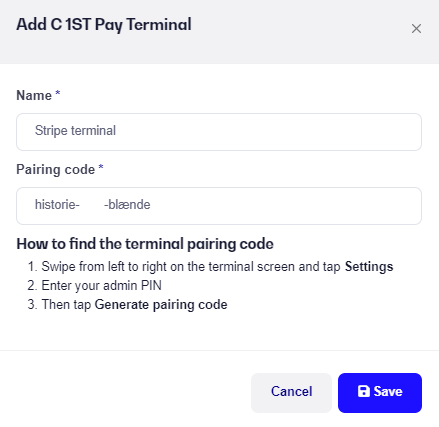
6. Press Save and wait
7. If the information is correct, the terminal is connected and the device starts configuring itself. This may take 5-10 minutes.
8. You will see in the app that the terminal has been added.

9. When the terminal is linked together, it downloads a major update from Stripe before it is ready for use. This may take 20 minutes.
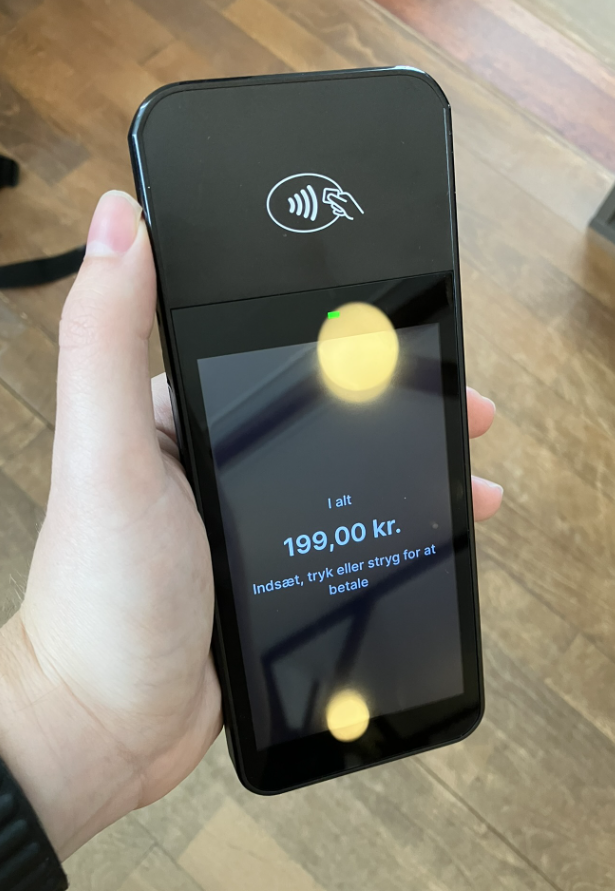
10. When C 1st Pay appears on the terminal's screen, it is ready to accept payments.
Once the terminal is fully set up and linked to your store and Stripe account, you can start using it for payments.
You will find a new green payment button inside the checkout, which you must use when accepting payments via the terminal.
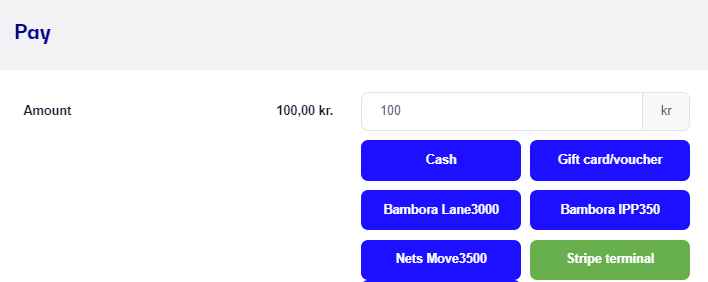
3. Within seconds, the amount will be sent to the Stripe terminal, where the customer can pay with their card and authorise the payment.
4. Once the customer has approved the payment, it will appear directly in your checkout where you can complete the sale and print a receipt for the customer.
Can my terminal be used wired?
- It can be used wired if you have a charging dock for the terminal. Contact our Support by mail or chat for pricing and ordering.
What card types are accepted on the Stripe terminal?
- You can use most international card types on the terminal, including VISA, Mastercard, American Express and JCB. However, regular credit cards cannot be used.
Do I need to day-tune my Stripe Terminal?
- No, you don't. This happens automatically after each sale.
What if a customer tries to pay with a Dankort?
- If the customer has a combination credit card, consisting of either VISA/Debit or Mastercard/Debit, then this type will be used instead of the credit card part.
Only very few customers have a pure Dankort without a secondary card type, where this would be rejected.
Can I return a card payment made with the Stripe terminal?
- Yes, you can. However, you must have funds in your account in order to withdraw. You can also only refund payments on the same card with which the purchase was originally made.
Can I use contactless payment on the Stripe terminal?
- Yes you can! The terminal accepts most types of contactless payment that use NFC technology, including Apple Pay and Google Pay.
What is the minimum amount for a card transaction?
- The minimum amount for a card transaction is 2.50 DKK. If you try to accept less, the payment will be rejected.
How do I charge my terminal?
- The terminal is charged using the USB charging cable provided. You need to use a USB power supply yourself, we recommend one of min. 10W. The terminal should be charged every night to ensure there is enough power on it for a new day.
Can the terminal use SIM cards/4G?
- Not yet unfortunately, but we expect Stripe to make it possible in the affordable future.
