To be able to control your connected cash drawer via the receipt printer's RJ12 port (this applies to pretty much all cash drawers and receipt printers regardless of model/brand).
When the cash drawer is connected physically to the receipt printer with a cable, the printer needs to be set up to open the drawer when printing.
On Macs, this is done using the built-in printing service "CUPS" which has to be enabled on the device before you can access it at the following link: http://localhost:631/printers/
Open Terminal on your Mac (search for it in Finder)
Copy and paste the following in the terminal window: cupsctl WebInterface=yes
Then press ENTER and enter your Mac's password if you're asked for it.
After that you should be able to open Safari and access CUPS at: http://localhost:631/printers/
Set up your receipt printer settings via CUPS
When you're in the CUPS interface you'll get a list of all your connected printers on the Mac.
Find your receipt printer in the list and click on it.
Choose your receipt printer from the list (for example, Star TSP143)
Select Set default options in the drop-down list under the printer.
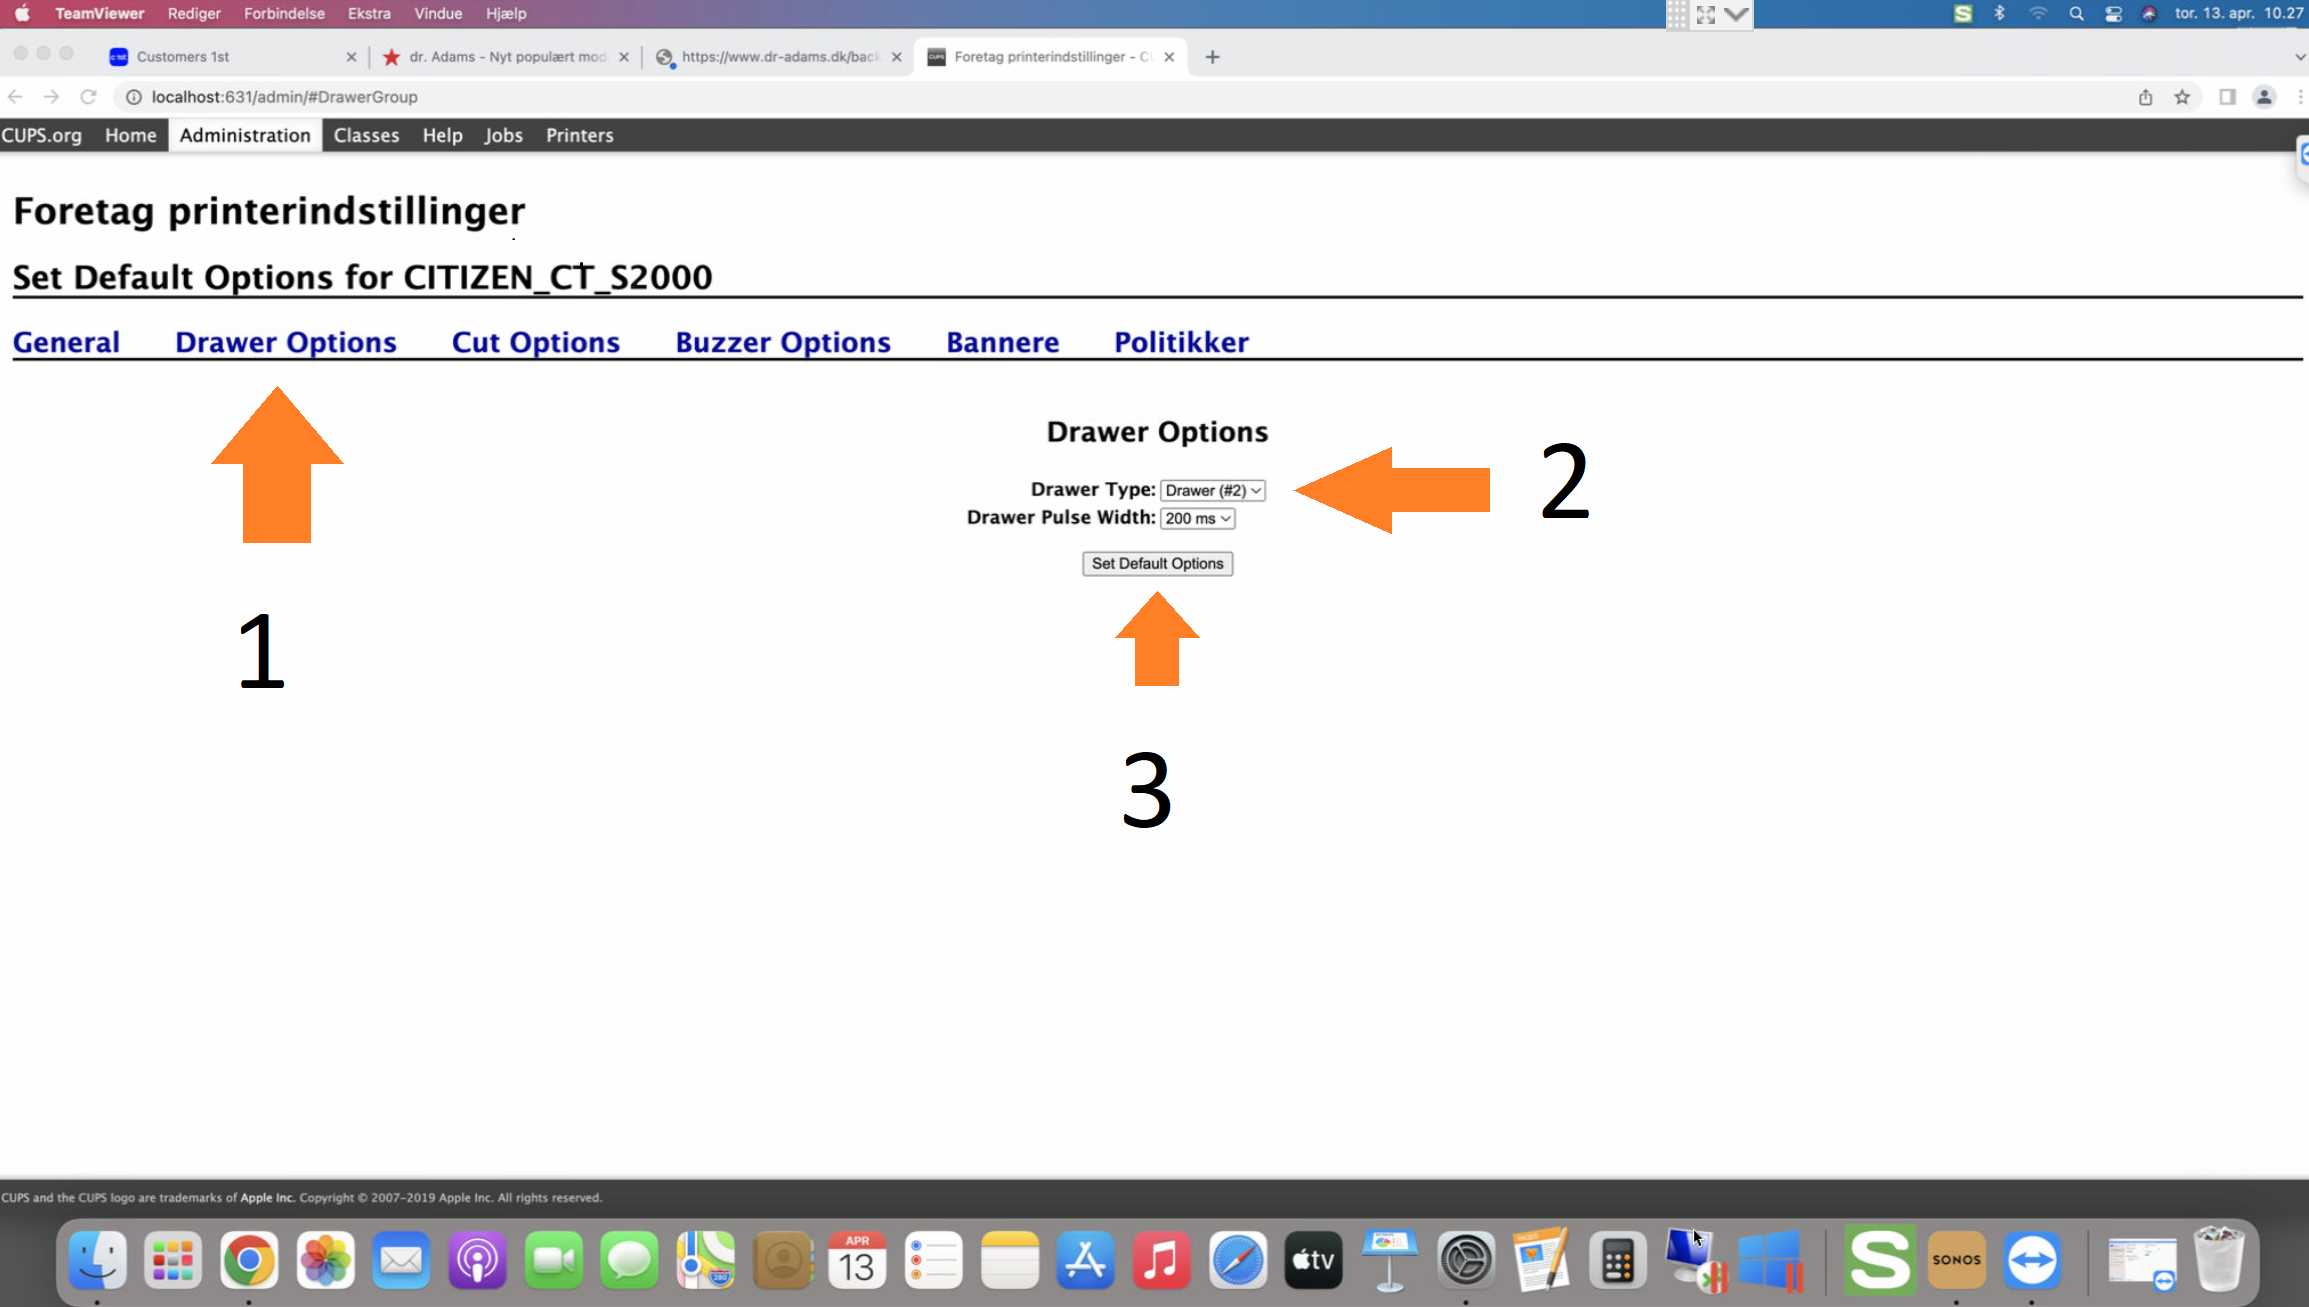
Here you should see a tab called either 'Cash Drawer', ' Cash Drawer Options' or 'Buzzer Options'.
Next, you need to enable the Cash Drawer function and maybe select Drawer 1.*
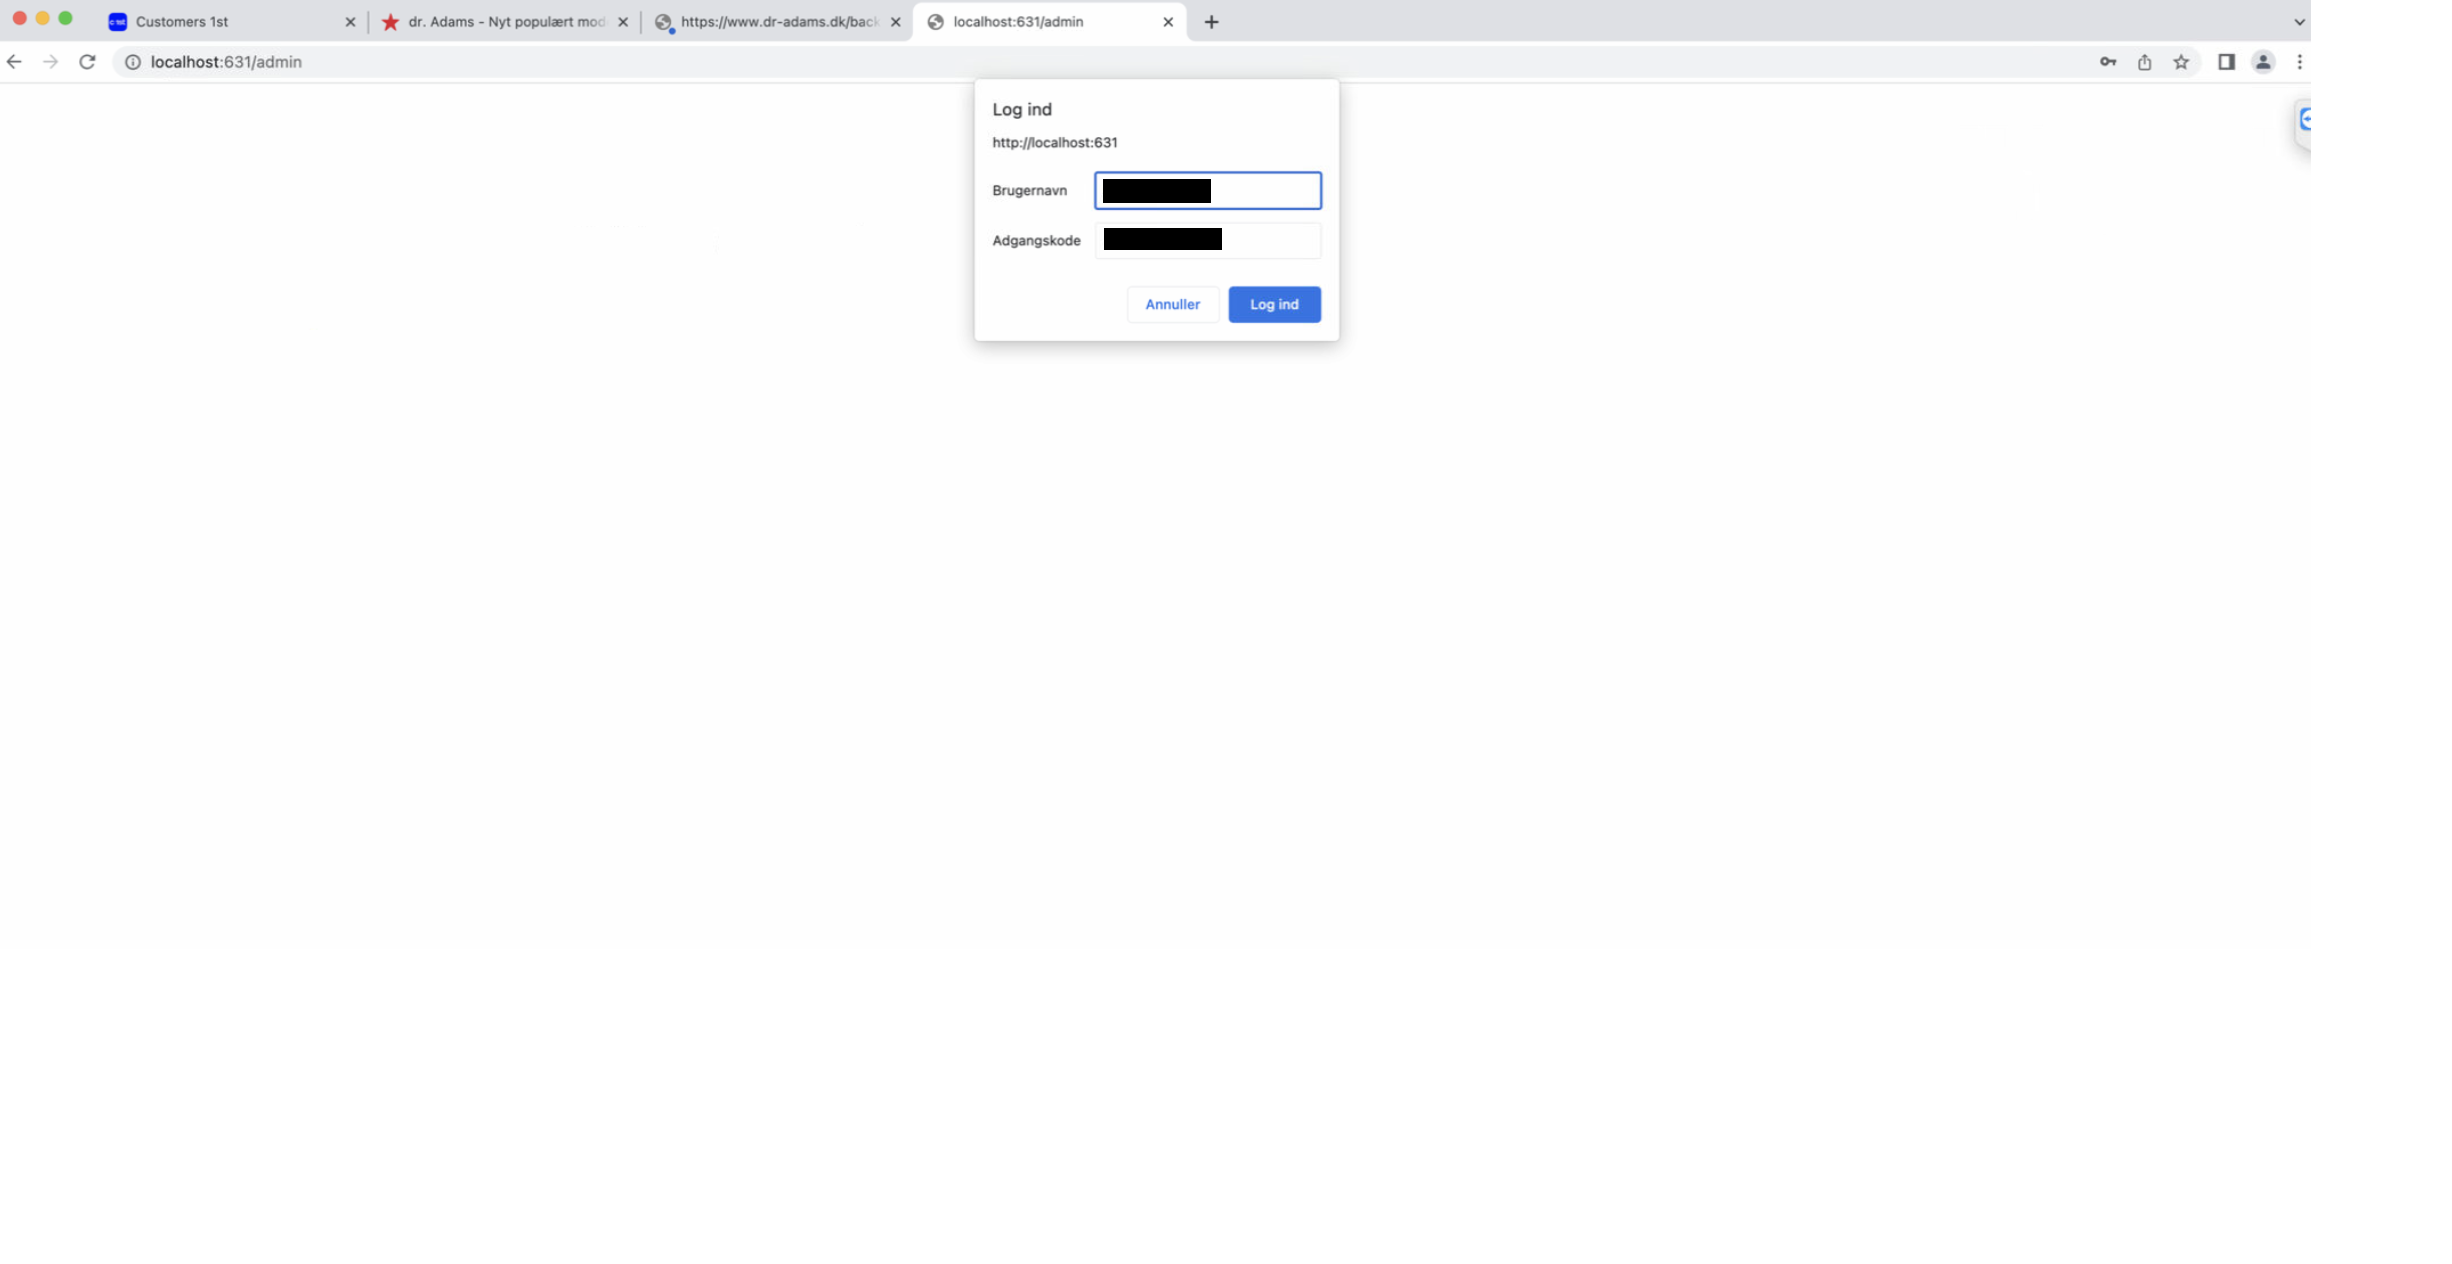
To save the settings, click 'Set Default options' -You might have to enter your Mac's username/password before you can save the settings.
*Note: If there are several options (e.g. Cash Drawer #1 and Cash Drawer #2), we recommend activating both and selecting 'Open before printing'.
With some types of receipt printers, you can set it up so the drawer only opens when you do a cash sale in C1ST.
To do this, you need to add the printer twice (so with two printer profiles) on your Mac, so you can have one standard printer profile and one where the drawer opens every time.
On most types of USB or LAN-connected receipt printers, you can add it again under Mac's printer settings and give the secondary device a different name (e.g. Cash Drawer). That way, you'll have two printer profiles pointing to the same printer, but with two different settings.
If you set this up, you should instead put the Cash Drawer setting on the new printer profile you made for the cash drawer, instead of the regular printer profile as shown above.
Next, remember to pick your Cash Drawer device under C1ST settings -> Show more print options -> Cash Drawer and select it from the list.
So, you'll have your usual printer (e.g. STar TSP143) selected under Receipt and then your newly created printer profile with the drawer setting enabled, picked under Printer Cash Drawer in C1ST.
Remember to use this receipt printer as your main receipt printer in our app under Settings -> Printer -> receipt (And Cash Drawer)
Søgeord: Cash drawer kasseskuffe åben bonprinter buzzer