To use the integration with the e-conomic accounting program, you must:
Have a subscription with Visma e-conomic (must allow API access)
Have the e-conomic integration enabled in our system
See under Settings → Subscription.
Make sure you are logged into both e-conomic and our system
Go to Settings → e-conomic

3. Click the button Grant access to e-conomic. You will then be redirected to a page where you must confirm that we are allowed access to your e-conomic agreement.
4. You can now select the cash journal, department, and other relevant parameters for your setup.
5. Next, click on Register at the top of the settings menu and scroll down to Payment Types and Accounts. Here, you can enter your chart of accounts and account numbers.
Note that you can assign a specific account under each payment type. If all payments should be posted to the same account, simply enter the same account number for each.
6. Scroll to the bottom of the page and insert your chart of accounts.
Revenue*: The default account where revenue will be posted, e.g., 1010.
(Note: Revenue can also be split by product categories under Products → Product Categories.)
Bank*: Your bank account in the e-conomic chart of accounts, e.g., 5820.
You can also enter the number of a safebox or similar if you're not transferring money directly from the register to the bank.
Cash on Hand*: The account corresponding to your register's cash holdings, e.g., 5810.
Cash Differences*: Account in the chart of accounts used for discrepancies.
Cash Rounding*: For rounding differences on cash sales, e.g., when selling an item for 199.95 and receiving 200.00.
Daily Expenses: Account(s) used to post expenses paid directly from the register.
If staff should not be able to register such expenses during the daily report, leave this field empty.
Accounts for Payment Types: For each payment type you create (e.g., "Dankort", "MobilePay"), you can assign a specific account where the amount should be posted.
You’re free to use the same account for multiple payment types if desired.
Fields marked with an asterisk (*) are mandatory and must be filled out before data can be transferred to e-conomic.

Note: The accounts under used sales are not relevant unless you sell used items and want them posted separately.
The "Inventory" tab allows you to manage stock receipts, shipping costs, etc., directly within the integration from C1ST/Bikedesk to e-conomic.

If you use payment terminals, remember to enter an account number for card payments, otherwise you won’t be able to use the e-conomic integration.
You’ll find this field under Settings → pos, then scroll all the way to the bottom.

It is possible to split card types across different accounts in e-conomic by checking the box Post to specific card types.
If you want to split your revenue across multiple accounts, you can do so by assigning an account to the product categories under Products.
Gift Cards / Credit Notes
By default, gift cards and credit notes are posted to the revenue account. This is standard practice, as VAT must be reported on them just like regular revenue.
If you prefer to have gift cards or credit notes posted to a separate account in e-conomic, you can create a product category (e.g., Gift Cards) and assign your desired e-conomic account number to it.
Then, assign this category to the two products with the following product numbers: giftcard and voucher
Once you have set up the integration correctly, you will get a new option when creating End of day in the POS (POS → End of day → +New Daily Report).
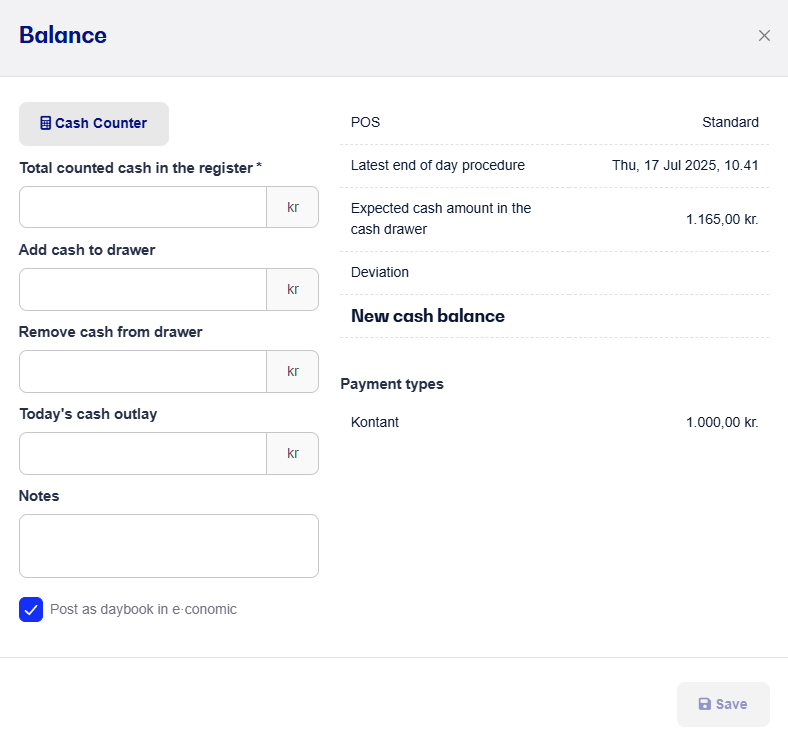
By default, the option to transfer the daily report to e-conomic will now be checked. All data is transferred to e-conomic in the cash journal and must therefore be approved / posted there.
See our other guide on how the e-conomic integration works for more information - click here.
