When you’ve created an order using a purchase list, the products must be received into the system. If you haven’t yet placed an order through the system, you can read a guide on how to do that here: How to use the purchasing module
If you do not have a purchase order but want to create a goods receipt manually, you can read how to do that here: Create a manual goods receipt
When your products arrive and need to be received in the system, navigate to Products → Purchases. From there, select the purchase order you want to receive products from. Click on the purchase and select Create Goods Receipt.
Note: It is also possible to select individual product lines if you are not receiving the entire order at once. This allows you to partially receive an order.
You will now be redirected to the goods receipt screen based on the specific purchase order.
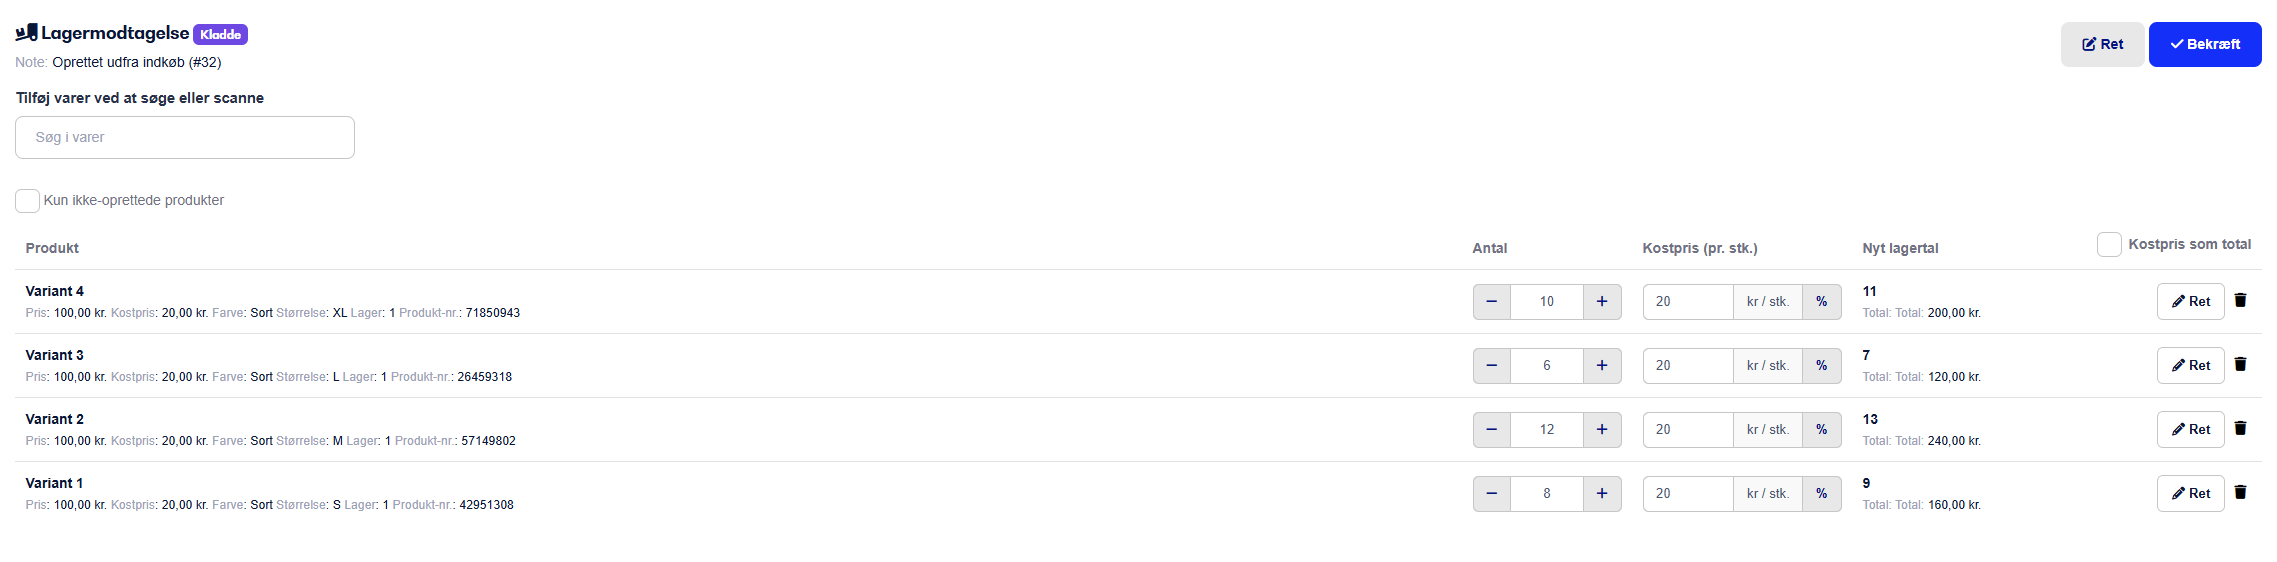
On the goods receipt screen, enter the quantity you’ve received for each individual product.
If your order has been split by the supplier and you haven’t received certain items, you should remove them from the goods receipt by clicking the trash can icon and confirming that the item is not being received today.
You can then proceed to receive the remaining items. The products you removed will still appear under the original purchase order, but the ones you’ve received will be marked as received.
During the goods receipt process, you can also update your cost price if you're purchasing at a different price than usual.
If you check the box "Cost price as total", the cost price you enter will apply to the entire quantity on that product line.
Once you've confirmed that the received quantities are correct, click Confirm Goods Receipt.
Note: If you’re using the e-conomic integration, you can create your goods receipt directly in e-conomic.
In the example above, not all products were received at the same time, so under Products → Purchases, the order still appears under Ongoing Purchases with the remaining items.

Inside the purchase order, you can see which products have already been received, and you also have the option to set an expected delivery date for the remaining items.
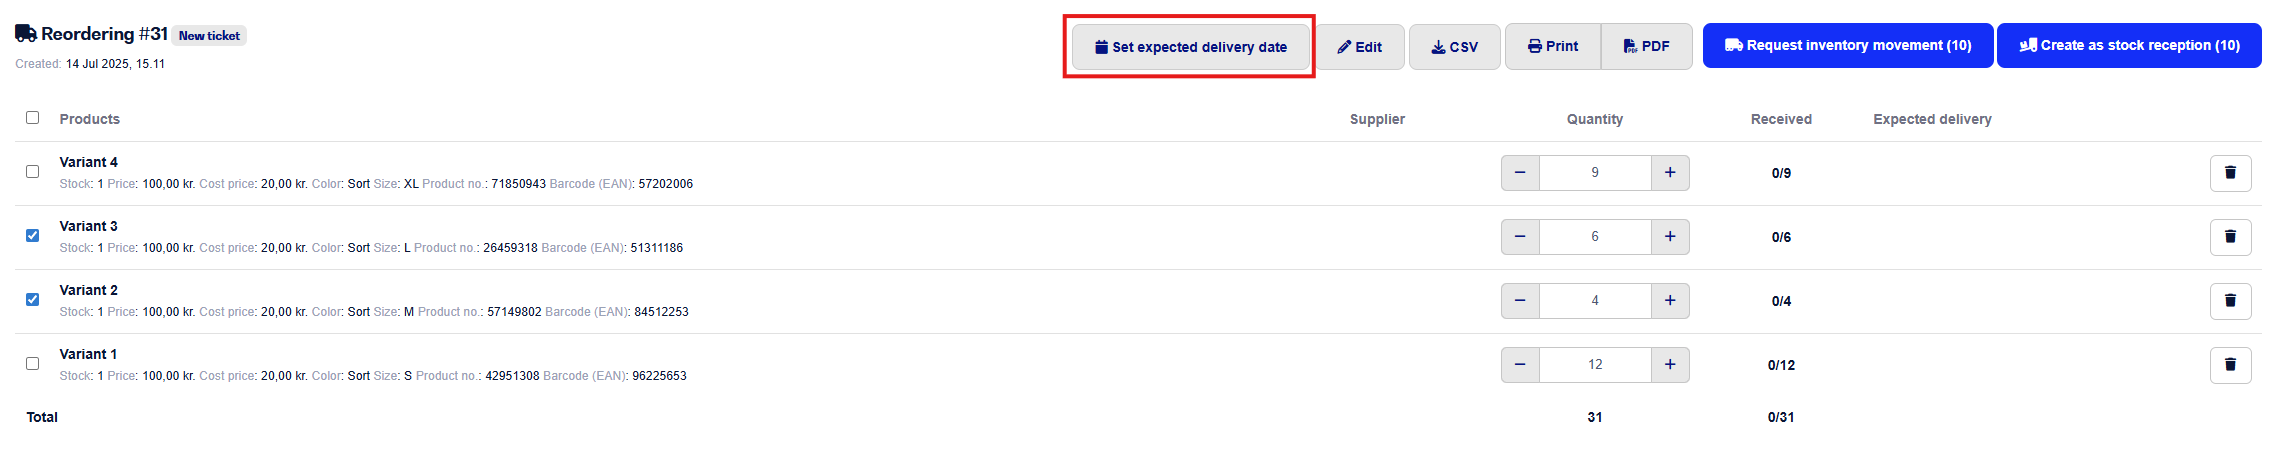
By clicking Set expected delivery date, you assign the same date to all products in the purchase. If you know that different products have different delivery dates, you can click on each individual product and set the date there.
When the remaining items arrive, simply create another goods receipt as described earlier in the guide. This new goods receipt will only include the products that have not yet been received from the original purchase order.
If there are items you are not going to receive, you can remove them by clicking the trash can icon. Otherwise, just proceed to receive the remaining items as previously described.
Note:
By setting an expected delivery date, you can search for the product in your product catalog, click on it, and under the Purchases tab, view the expected delivery date.
If the product was ordered through a work order, the expected delivery date will also be visible on the work order.
You can read more about using work orders here.
