If you've received your new Zebra ZD2220 thermal label printer, just follow along here to get started printing receipts in no time. The setup is quick and easy, but of course, you're always welcome to reach out to our support if you run into any problems or have questions about the setup.
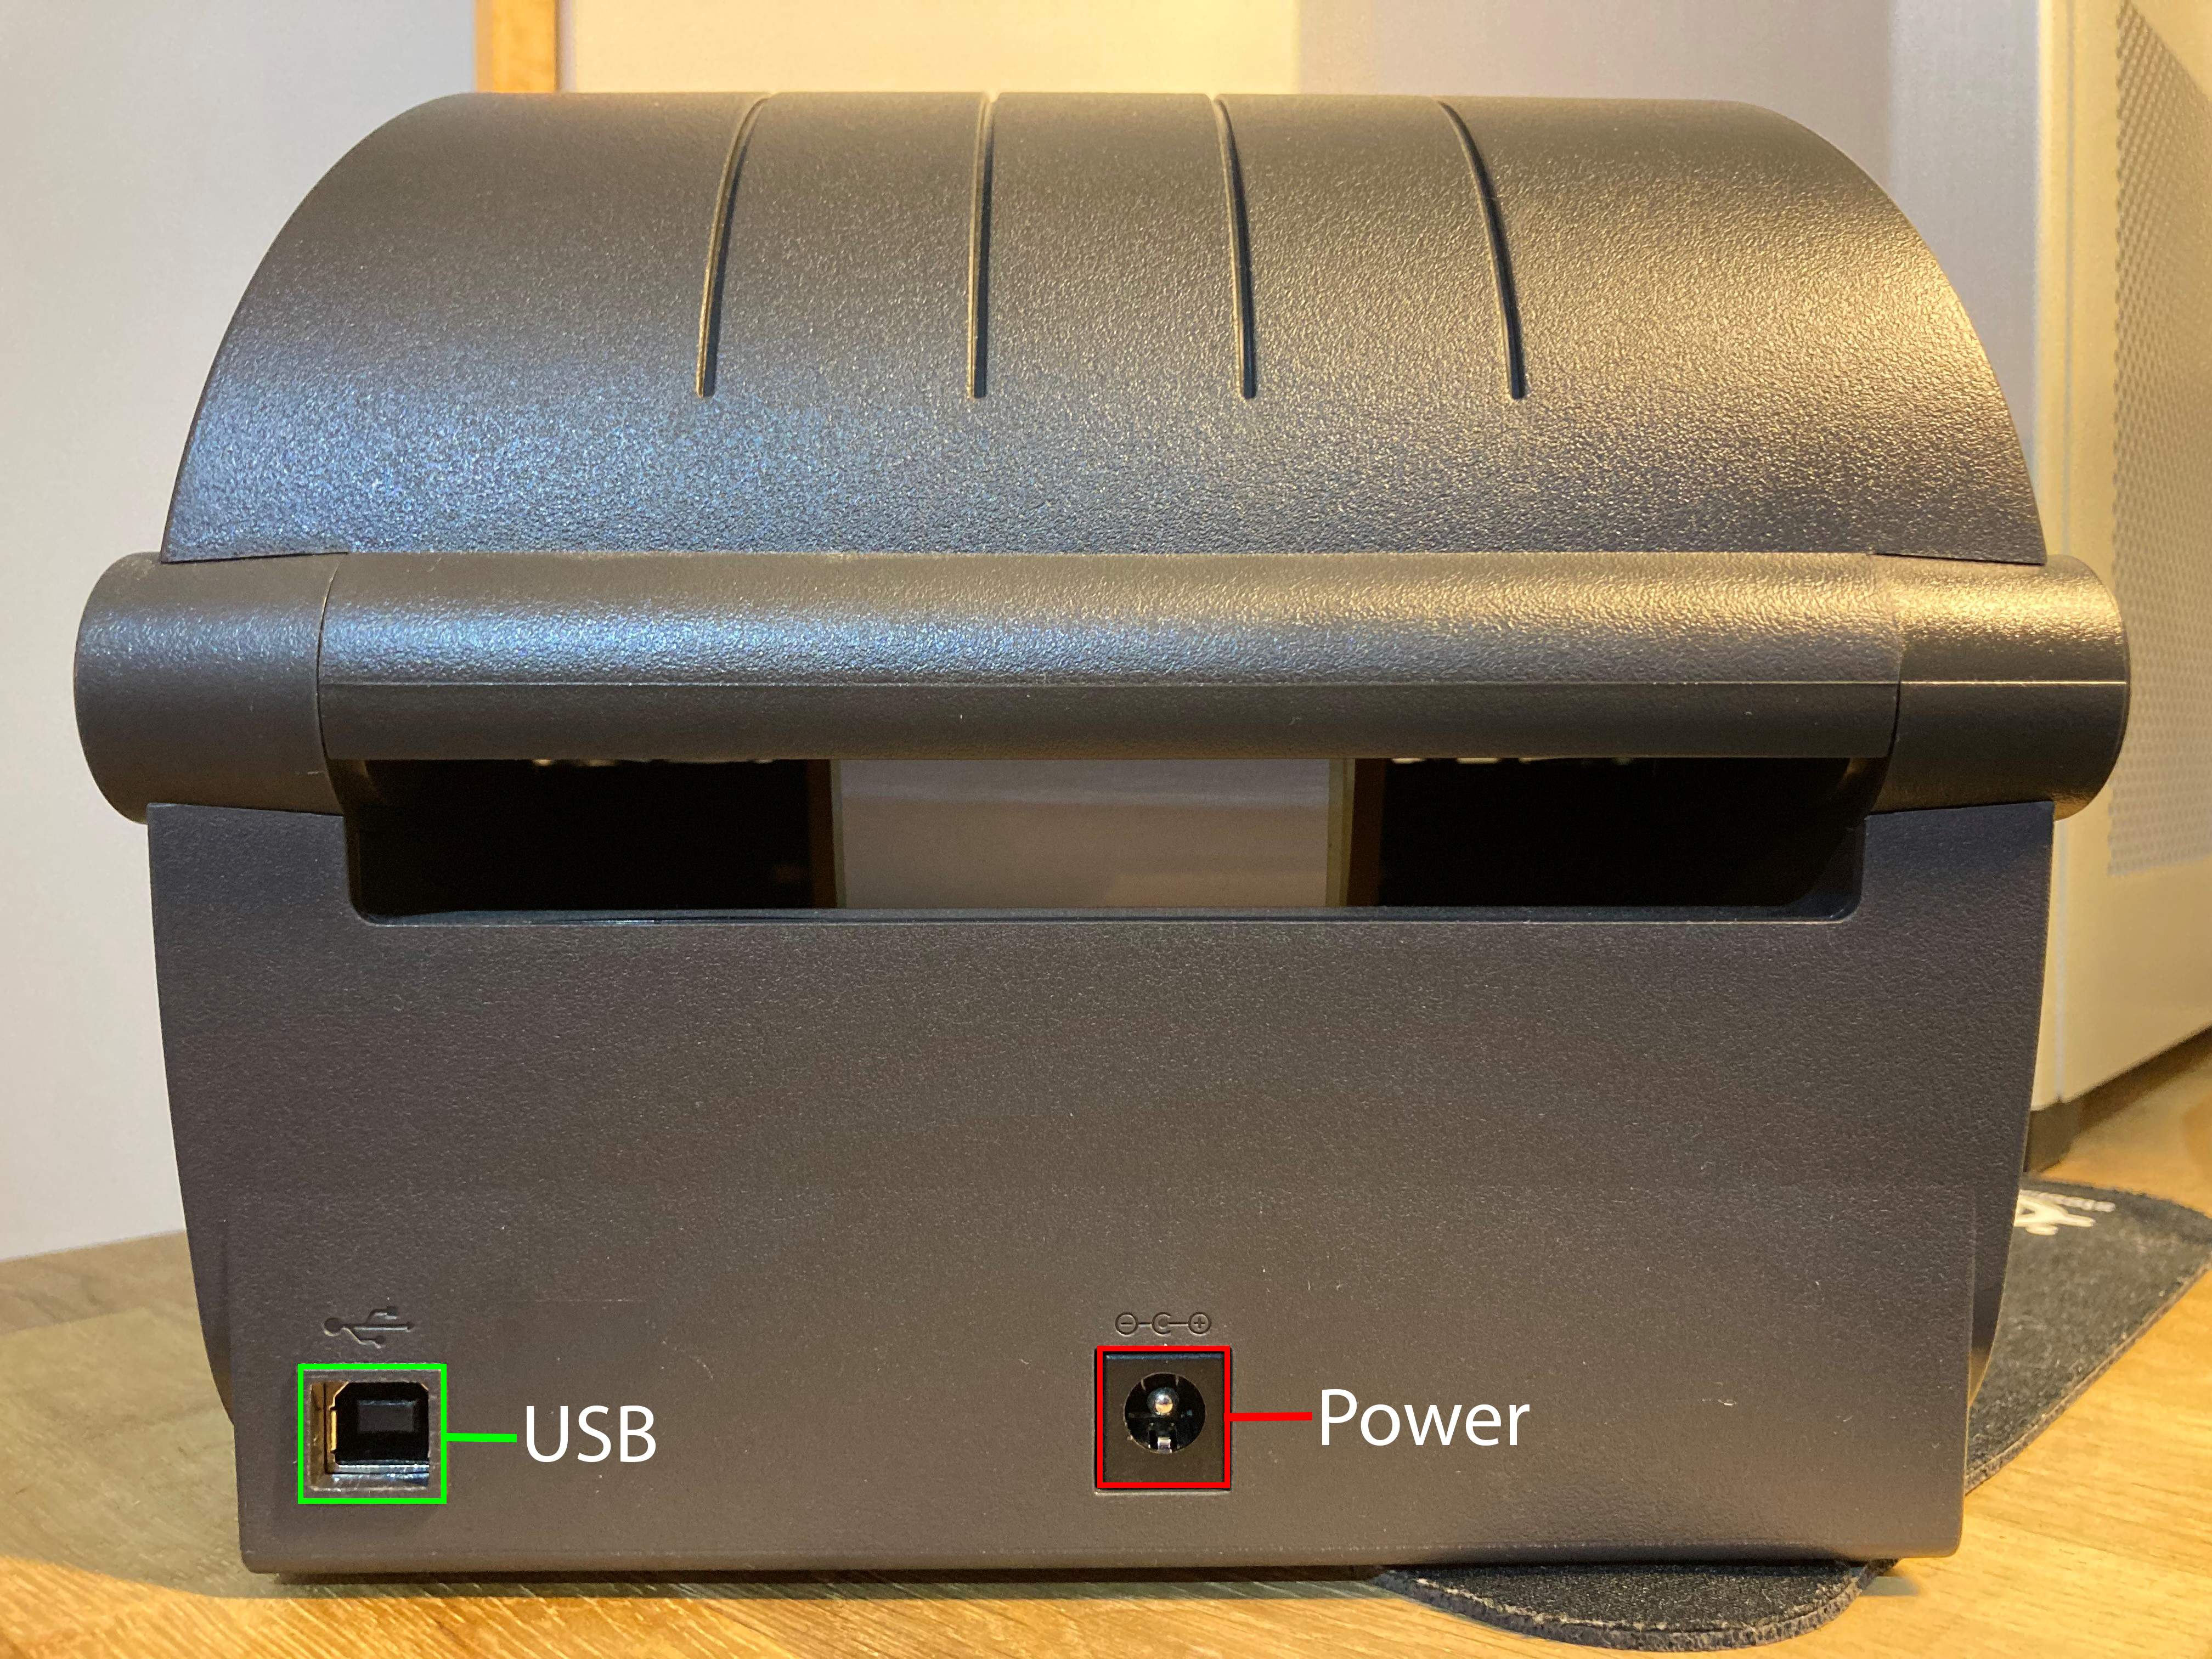
Connect the label printer with the provided USB printer cable.
Then plug the printer into power using the included power supply.
Insert the USB end of the printer cable into a free USB port on your computer.
Now turn on the printer by pressing the round power button on top of the printer.
Open the printer compartment by squeezing the orange buttons on each side of the printer.
Insert a *thermal label roll between the printer’s spool holders. You need to pull them each to the side to make space for the roll.
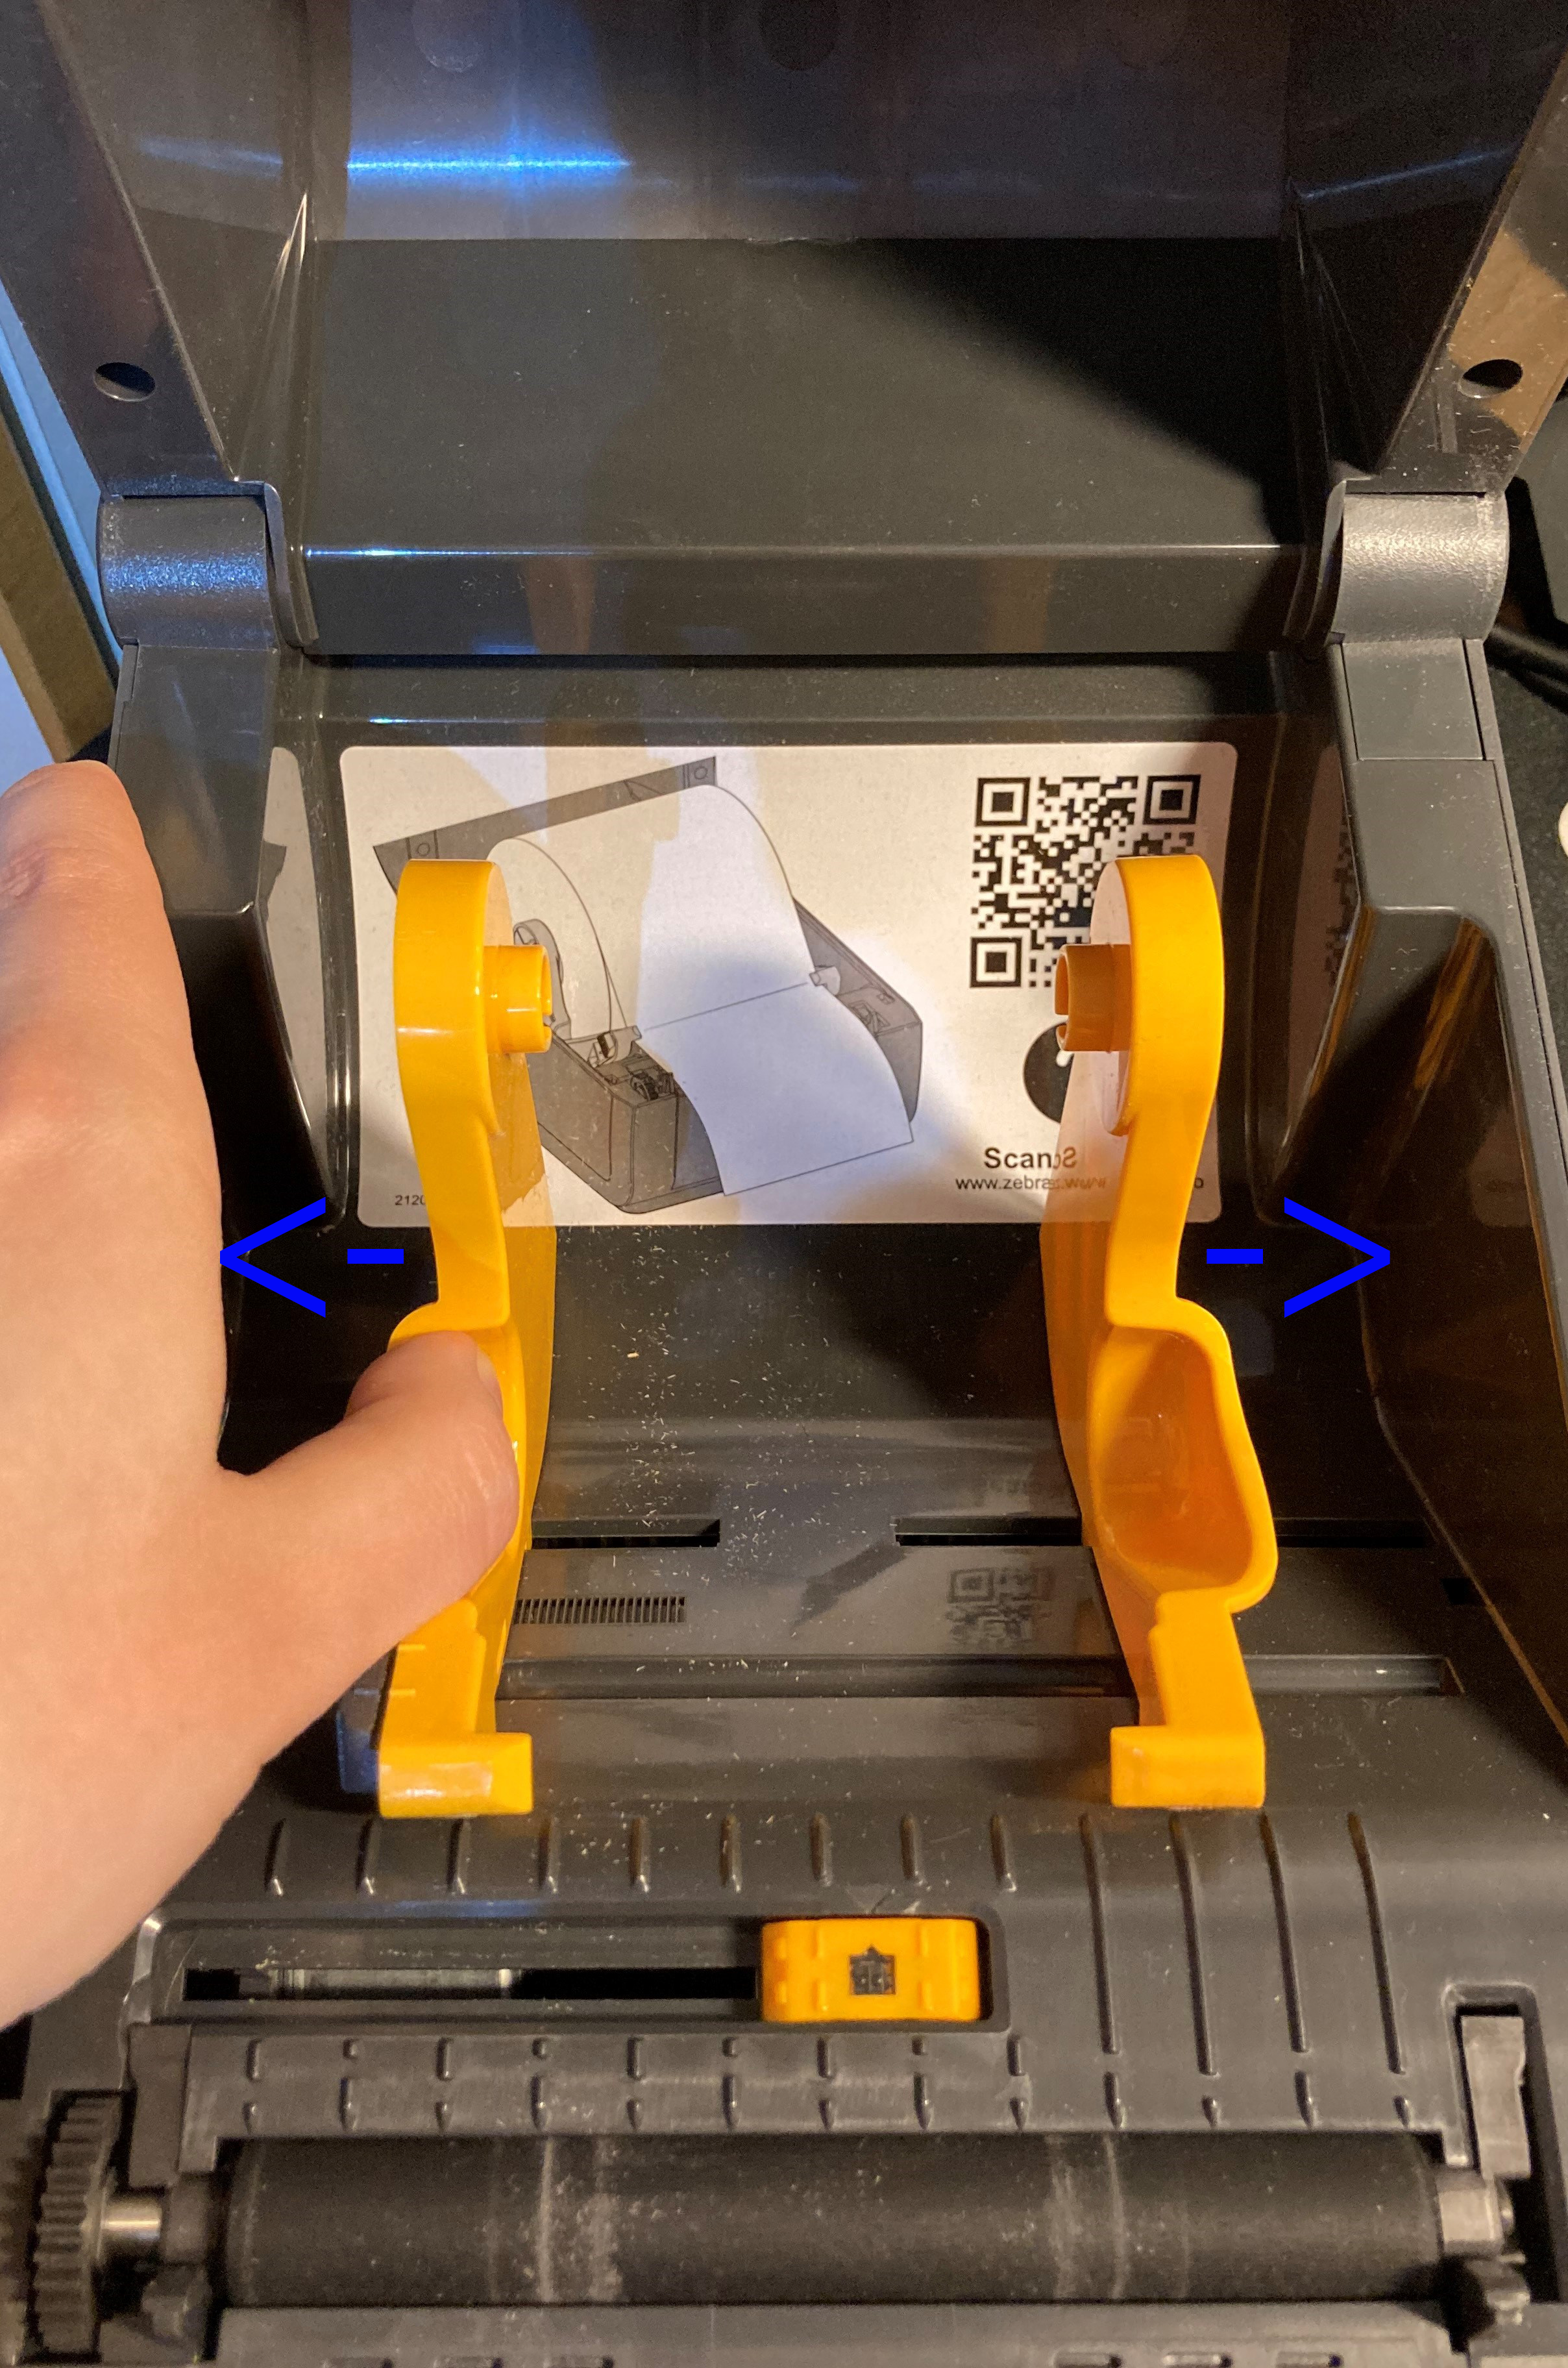
Make sure the label roll is properly fastened on the holder and the label strip goes through the clip at the bottom of the holder.
Set the sensor at the bottom of the printer; in most cases, it just needs to be all the way to the right (as default)
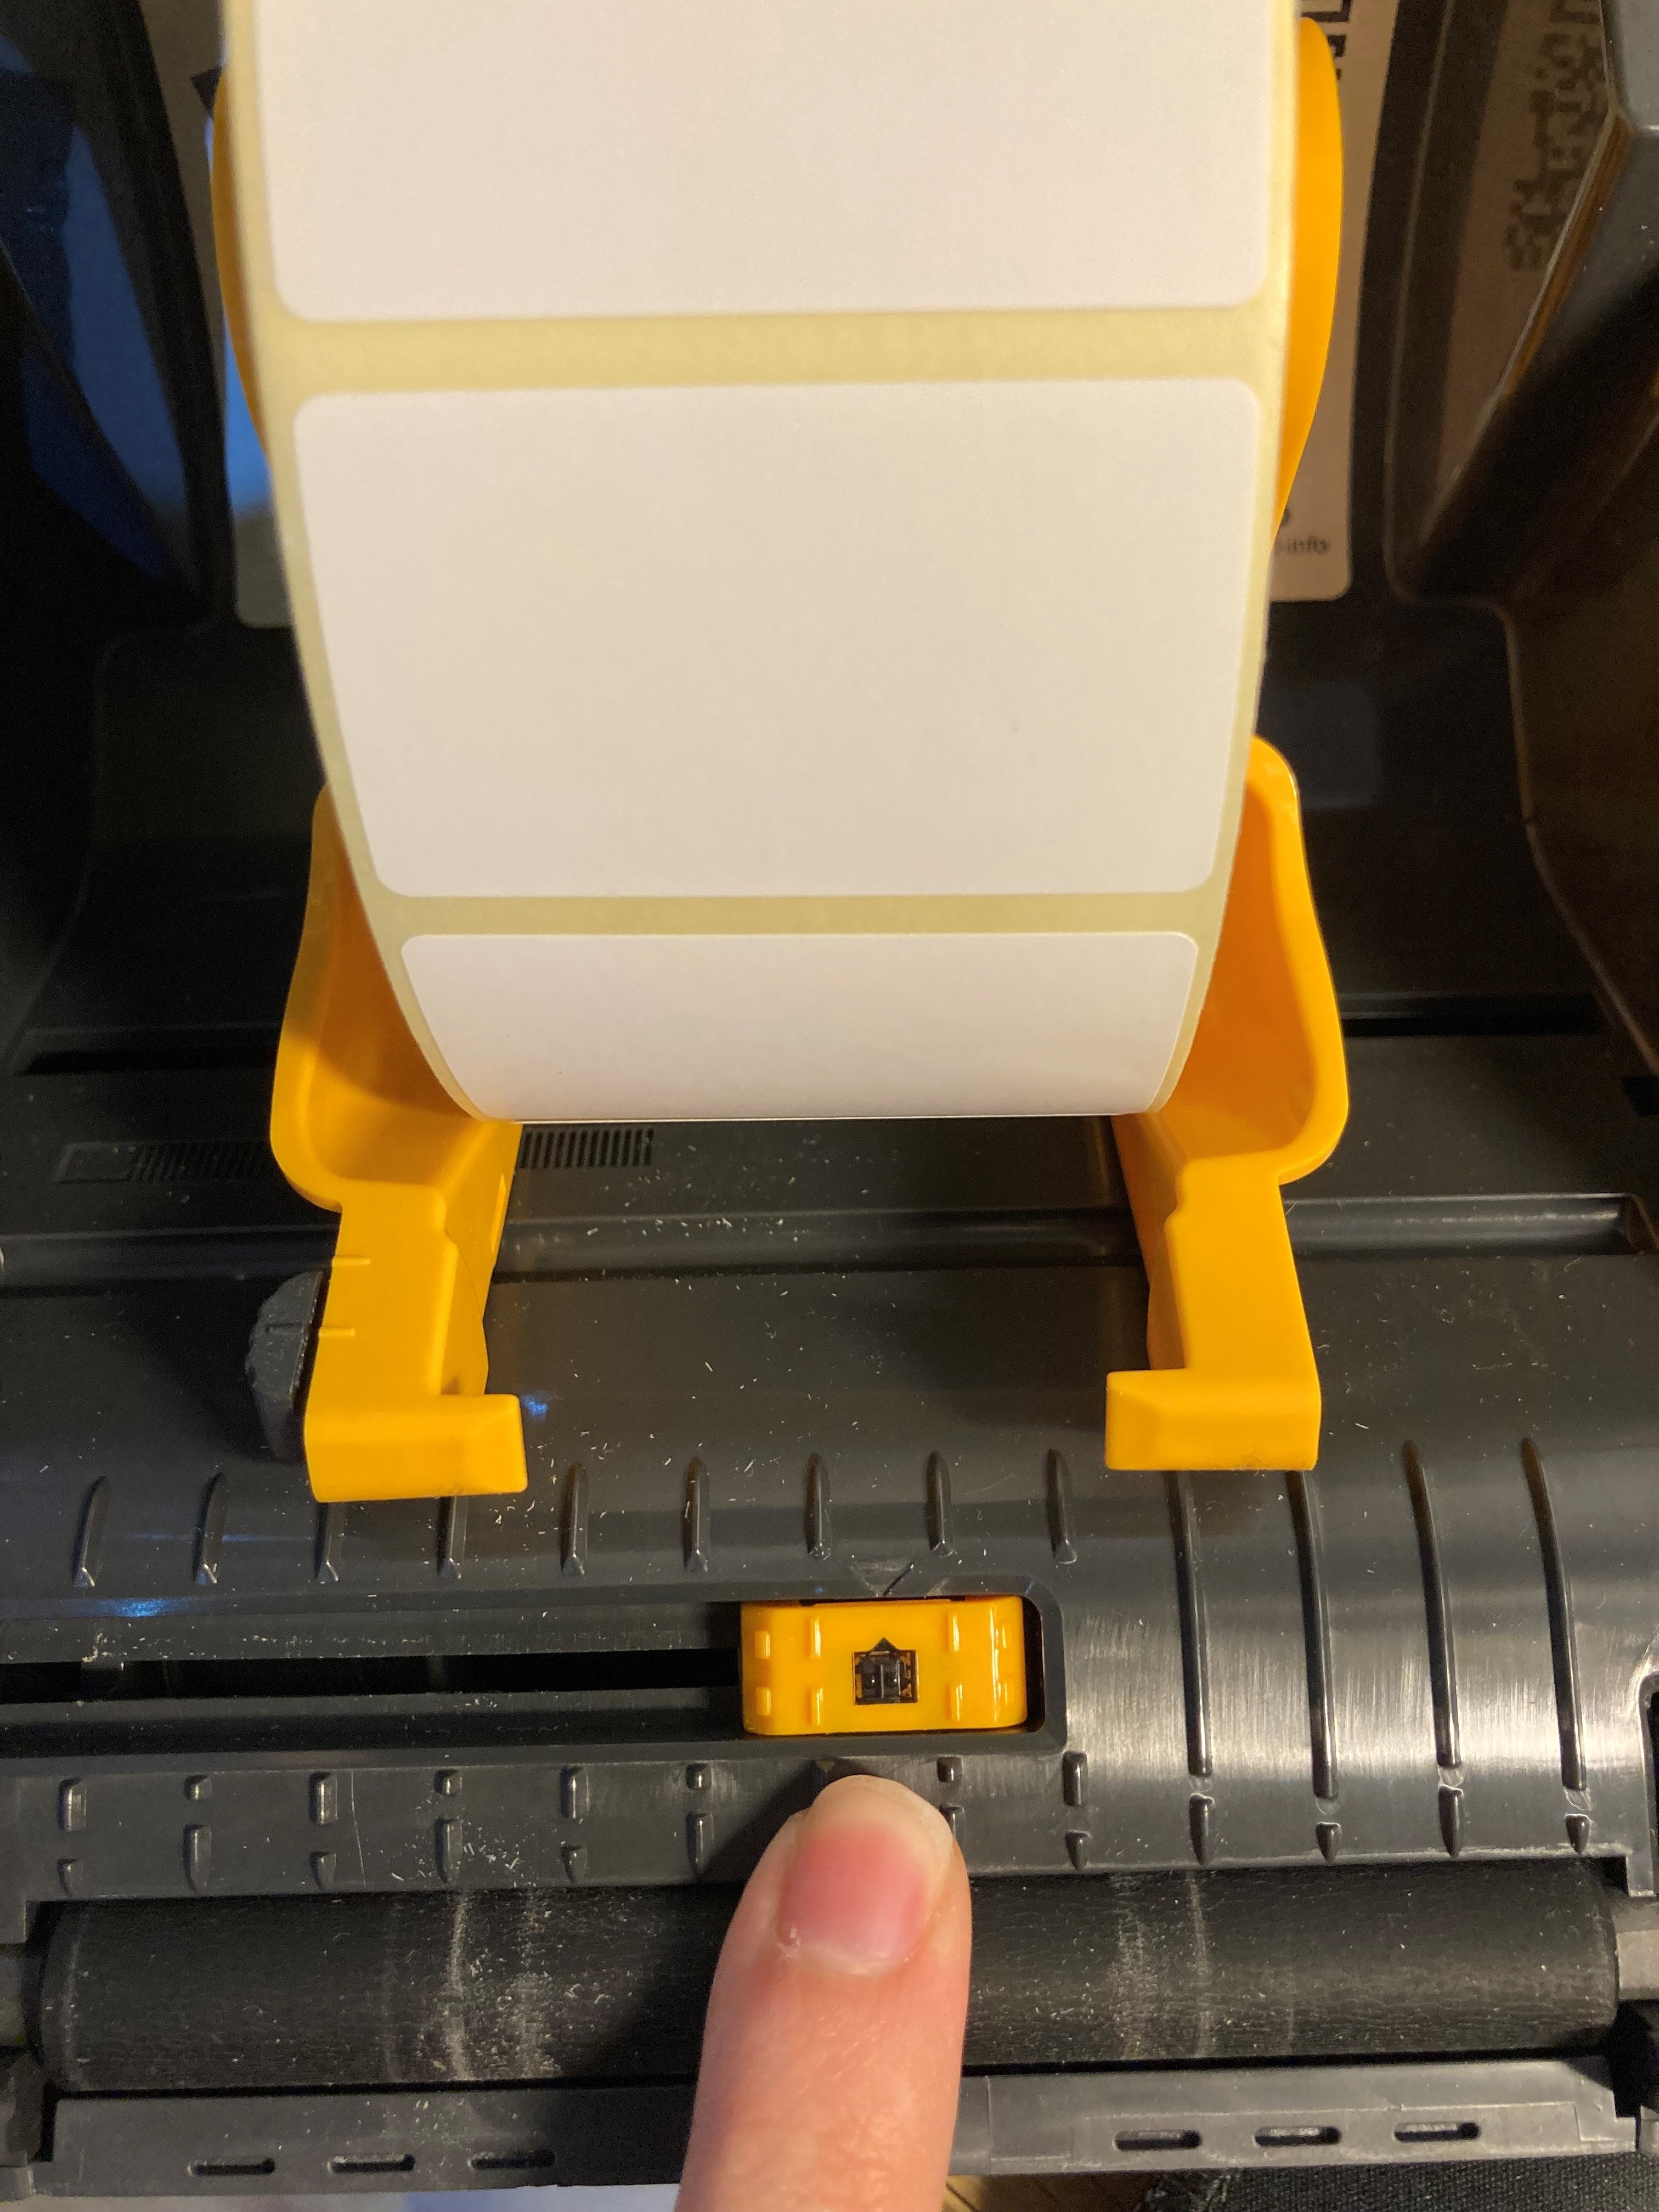
Pull the label out onto the rubber roller and over the printer opening.
Make sure it’s placed straight in the printer and then close the lid by pressing it down until you hear a small click.
Then press the square 'feed' button at the top of the printer. It should roll out one or more labels.
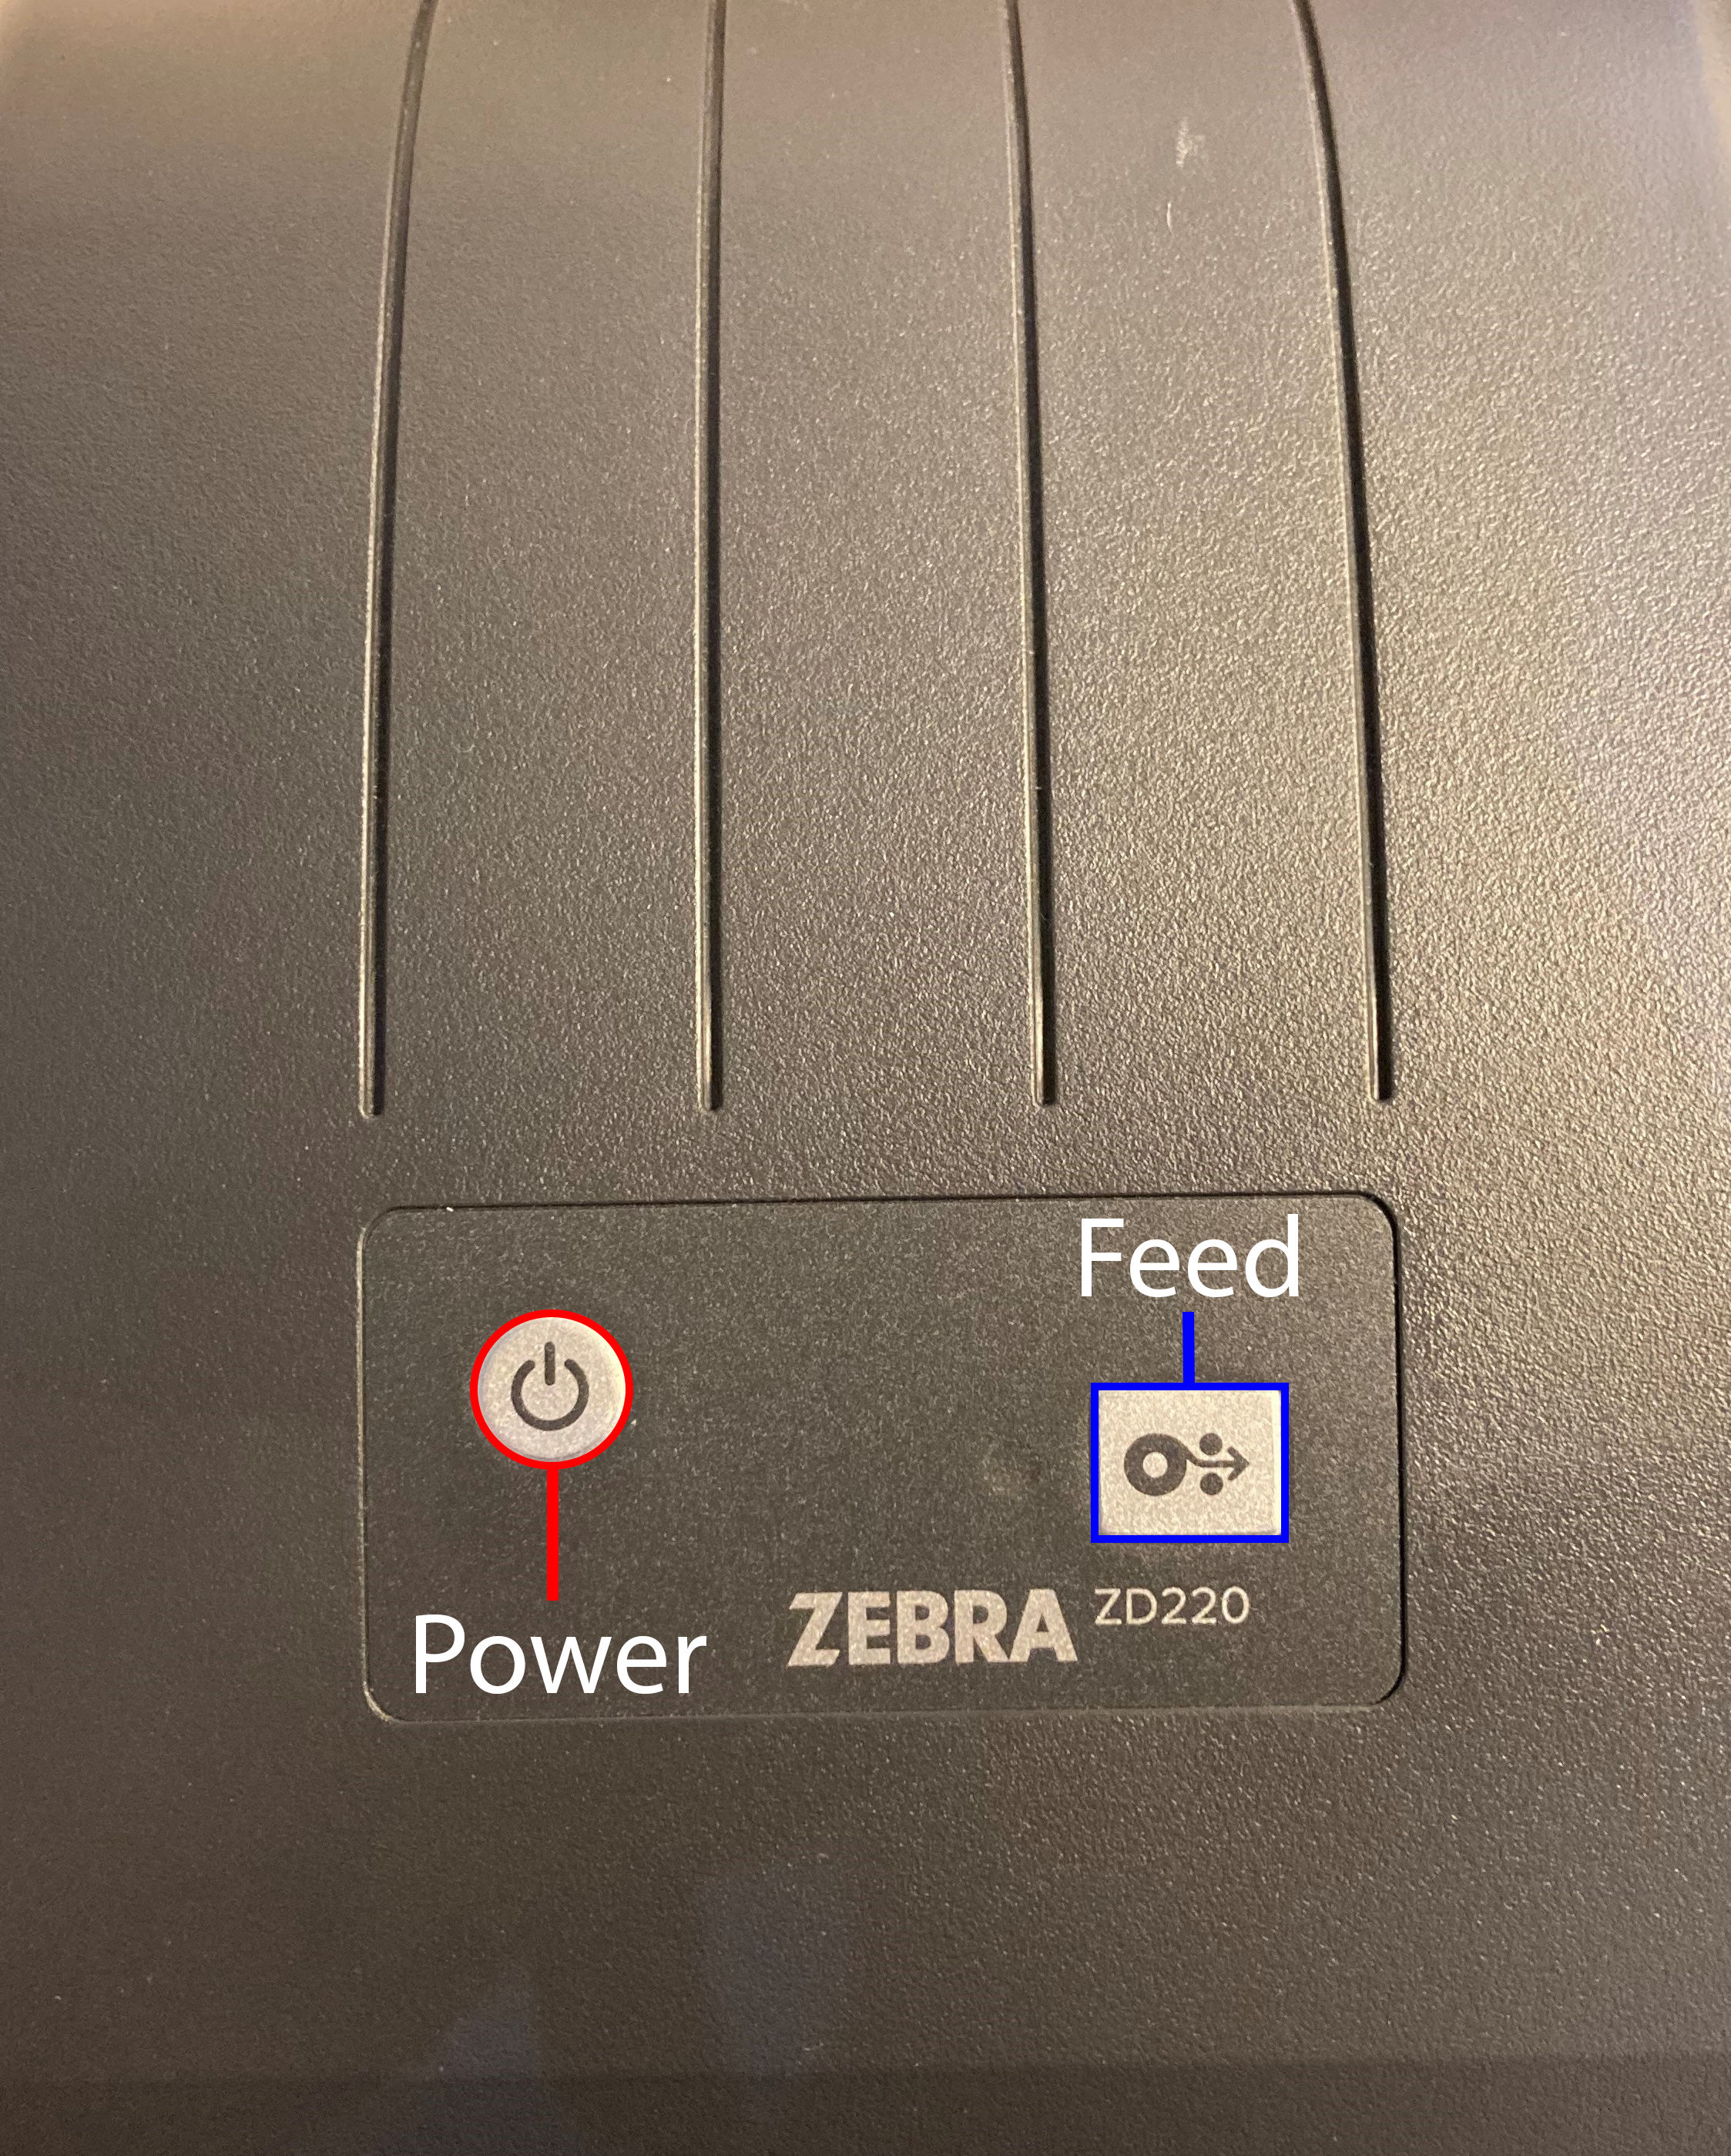
To calibrate the printer for your label size, hold down the 'feed' button until it flashes green 2 times, then release. The printer should run out 3-6 labels and pull them in a bit during the process, until it’s measured the size and is done.
When this is done right, you should be able to get exactly one label out of the printer by pressing the 'feed' button once.
To install the printer on your MAC, first make sure it’s plugged in and that the printer is connected to your computer with the included USB cable.
Next you’ll need to add the printer. Do that by searching for Printers & Scanners.
Click (+) and choose the printer that’s connected via USB.
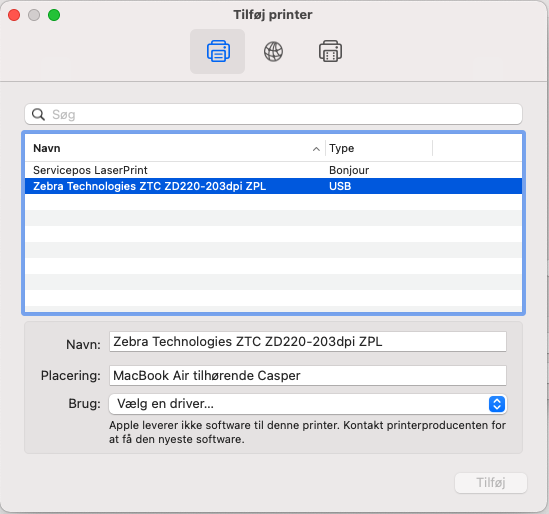
Click “Choose a driver…” then click “Choose software”.
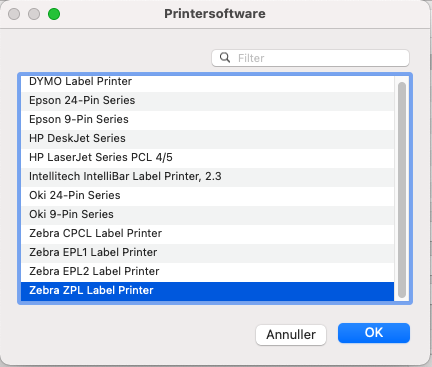
Select the “Zebra ZPL Label Printer” and click OK, then “Add”.
Now the printer’s installed on your MAC and you can use it in the system if you’ve installed our print app, printdesk, which you’ll find here.
Next, just choose your label printer under Settings -> Print in the app and set the same size that you're using in the printer, e.g. 40x25 mm or 50x30 mm.
If you can only pick Webbrowser and don't see your connected system printers, make sure that Printdesk is installed.

INFO: You can use your label printer for both price labels and exchange tags.
Important for Mac compatibility: This is tested and works on MacOS Monterey and Catalina. On older Mac computers, we can't guarantee full functionality.
Once that's done, you can hit the Test button and the system will now print a test label, so you can see how it all fits together.
*Remember to buy the right thermal labels for your label printer - check out our selection of thermal labels for Zebra ZD220 label printer here.
If you need to set up the printer on a Windows PC, check out our guide here.
