When you receive your new Nets terminal by mail, you can prepare much of the setup yourself to get it ready for integration into the system. However, you still need to contact our support, as we must manually add and activate the terminal for your store.
MERCHANT CARD
Make sure you have your Merchant Card ready, as it is required to change settings on the terminal. If you don’t have the Merchant Card or have lost it, you need to contact Nets.
We cannot complete the terminal setup process without the Merchant Card in your possession.
INTERNET CONNECTION
The terminal must be connected to the internet directly. You need to ensure it can be connected to your internet router or a network switch that is connected to your router.
If you receive a brand new terminal, it will come with all the necessary cables to connect it. However, you are responsible for purchasing the router, switch, and network cables, as these are not included.
IT IS THE CUSTOMER’S OWN RESPONSIBILITY TO ENSURE A WIRED INTERNET CONNECTION TO THEIR DESK/POS. THE TERMINAL CANNOT BE CONNECTED DIRECTLY TO THE POS/COMPUTER.
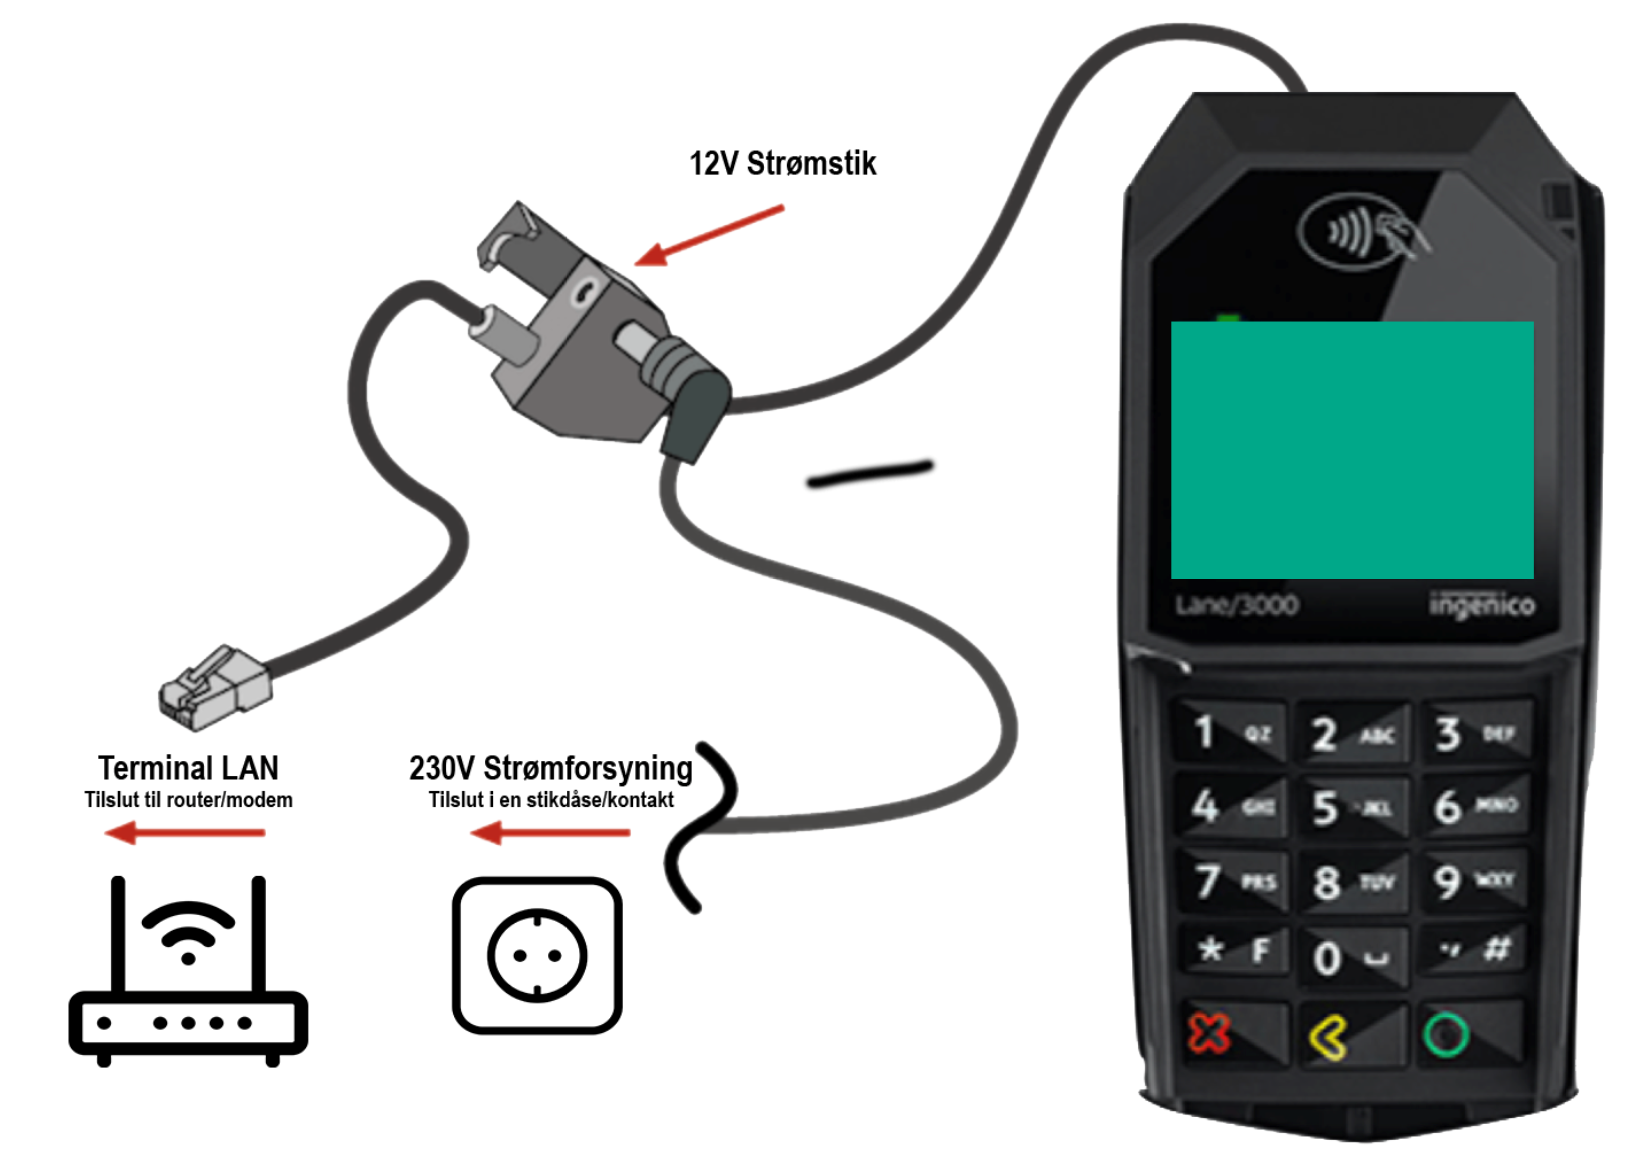
When you receive the terminal, it comes with all the necessary cables required for setup. Only one main cable runs from the terminal, which provides both power and internet.
The cable from the terminal connects to a splitter, which is then connected directly to your router/modem or a network switch. In addition, a 12V external power adapter must be plugged into the splitter and connected to a power socket.
Connect the main cable directly to the underside of the terminal. Gently push the plug in until it clicks into place.
The other end of the cable, with the network plug (Ethernet), should be connected to your router/modem or a switch that is connected to your router/modem.
Insert the supplied 12V power adapter into the appropriate port on the splitter — the DC socket is located right next to where the Ethernet cable comes out.
Once all other cables are connected, including the internet cable, plug the power adapter into a wall socket or power strip so the terminal receives power and starts up.
Once the terminal is connected to power and the internet and has powered on, you must ensure that the terminal is configured with the correct settings (also called parameters) so it can connect to Nets' servers.
Find your Merchant Card (a white card labeled Merchant Card).
Swipe the Merchant Card through the magnetic reader to access the administrator menu.
Select Parameter (6) → Edit (1) → Communication (2)
Set/verify the following settings are correctly configured:
Use the up/down arrow buttons to navigate between the settings, and use the green button to modify and confirm each setting.
Communication type = Ethernet
Use DHCP = DHCP
Host IP = 91.102.24.142
Host Port = 9680
Check that all values are entered correctly the terminal should then restart automatically.
Swipe the Merchant Card again and then select Parameter (6) → Edit (1) → POS (3)
Set/verify the following settings:
ECR = Yes
Comm. type = IP Ethernet
ECR/TLS = Yes
ECR IP address = 015.197.206.182 or 003.033.230.243
ECR IP Port = 6001
Check that all values are entered correctly the terminal should then restart automatically.
Once the terminal has restarted, it should display the startup screen with the Nets logo, and in the top-left corner, it should show ‘ECR’ in green text.
Then, press the down arrow button and note the Terminal ID that appears. We need this ID in order to complete the setup of the terminal.
If you have a firewall that only allows specific ports, you must ensure the following ports are opened in its settings — otherwise, the terminal will not be able to connect to Nets’ servers and will not function.
Port 6001 (ECR)
Port 9680 (Nets DK Central)
Both TCP and UDP must be allowed.
Swipe the Merchant Card
Select Card Agreements
Select Download
Wait until the terminal has finished downloading all the card agreements
Press the Save/Green button when the terminal finds your store
If you want to change the language on your terminal, follow these steps:
Swipe your Merchant Card
Press 6
Press 1
Press 1
Select Language
Now choose your language
The terminal will restart and then the language will be changed.
Once you have completed all these steps, please contact our support team, as we need to activate the terminal and link it to your store.
Inform them that you have received a new Nets terminal that needs to be set up, and provide your customer number as well as the Terminal ID.
