When you receive your new Nets terminal by mail, you can prepare most of the setup yourself to get it ready for integration into the system. However, you still need to contact our support team, as we must manually add and activate the terminal for your store.
Nets Merchant Card / ‘Merchant Card’
Make sure you have your Merchant Card ready, as it is required to change settings on the terminal. If you do not have the terminal’s Merchant Card or have lost it, you must contact Nets.
We cannot complete the terminal setup process without you having the Merchant Card in your possession.
The terminal must be connected to the internet either via Wi-Fi or configured to use the mobile network (called GPRS), if you have ordered a Move3500 terminal with a prepaid SIM card.
If the terminal connects via Wi-Fi, you need to have the password for your wireless network (SSID); otherwise, the terminal may have trouble connecting. The terminal must be within stable range of your Wi-Fi and have a good connection.
When you receive the terminal, it may not have the battery installed. The battery will be included separately, and you need to insert it into the terminal.
Remove the back cover of the terminal by sliding the latch upwards, then carefully lift off the cover.
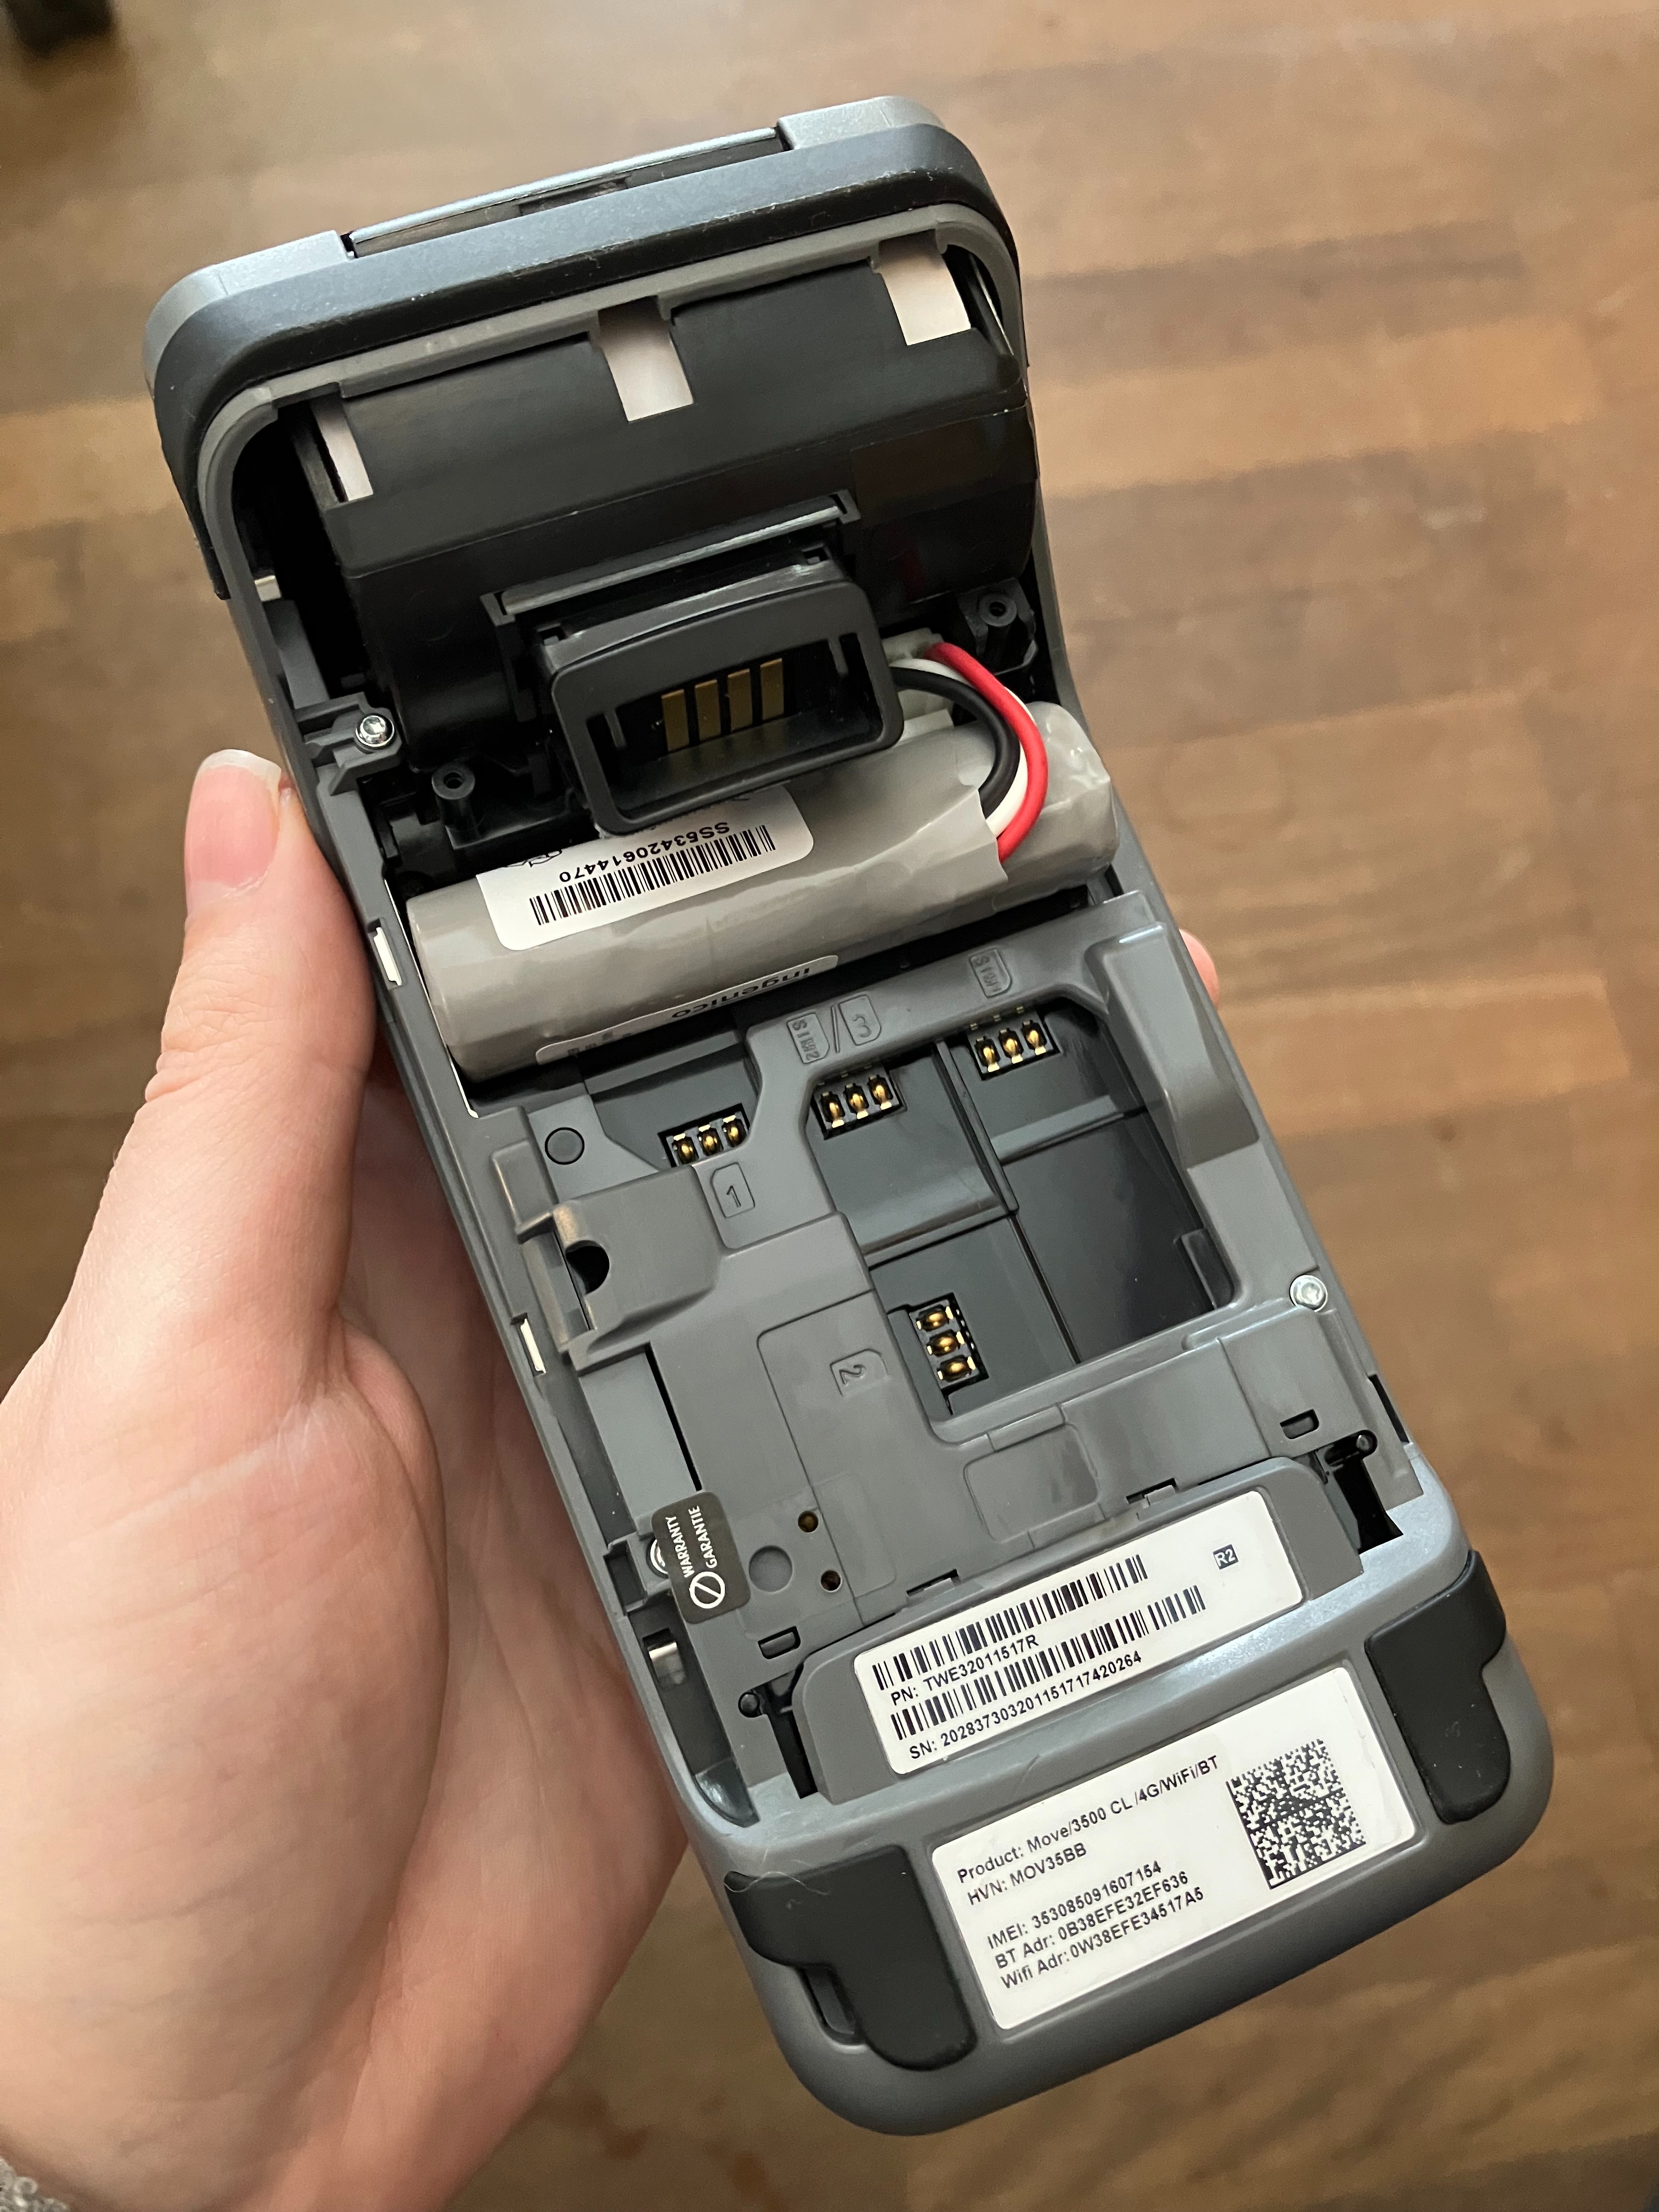
Once the battery is installed in the terminal, you should place it on the included charging dock and charge it until the battery reaches at least 50%.
*This step is not necessary if your terminal connects via GPRS (mobile network) and includes a SIM card.
When the terminal is turned on and at the start screen, press the DOWN ARROW button.
Use the arrow keys to select 4. WiFi Setting, then press the green button to confirm.
When prompted, swipe your Merchant Card through the magnetic reader.
Select Scan Networks to search for available Wi-Fi networks.
Choose your wireless network from the list using the arrow keys and confirm with the green button.
Enter your Wi-Fi password when the terminal asks for it.
Once connected to the network, save the settings and return to the start screen.
Note: The terminal can only connect to wireless networks secured with a password/encryption (WPA2). Open networks cannot be used for security reasons.

Once the terminal is connected to power and internet and can power on, you need to verify that the terminal is configured with the correct settings (also called parameters) so that it can connect to Nets’ servers.
Find your merchant card (the white card labeled “merchant card”).
Swipe the merchant card through the magnetic reader to access the administrator menu.
Select Parameter (6) -> Change (1) -> Communication (2).
Set/check that the following settings are configured:
You navigate between the settings using the up/down arrow buttons and change/confirm your selection by pressing the green button afterwards.
Communication type = Wi-Fi / GPRS (if using mobile network)
Use DHCP = DHCP (Not applicable for GPRS)
Host IP: 91.102.24.142
Host Port: 9680
Check that everything is entered correctly, and the terminal should then restart by itself.
Swipe the merchant card again and then select Parameter (6) -> Change (1) -> Register (3).
Set/check that the following settings are configured:
ECR = Yes
Communication type = IP Ethernet / GPRS (if using mobile network)
ECR/TLS = Yes
ECR IP address = 003.033.230.243
ECR IP port = 6001
Check that everything is entered correctly, and the terminal should then restart by itself.
When the terminal has restarted, the start screen with the Nets logo should appear, and in the top left corner, you should see ‘ECR’ displayed in green.
Then press the ‘Down Arrow’ button and note the Terminal ID that appears. We need this to complete the terminal setup.
Only if you are using your own Wi-Fi network.
If you have a firewall that only allows certain ports to be open, you must ensure these ports are opened in its settings. Otherwise, the terminal will not be able to connect to Nets’ servers and will therefore not function.
Port 6001 (ECR)
Port 9680 (Nets DK Central)
Both TCP and UDP must be open.
Insert the merchant card.
Select Card Agreements.
Select Download.
Wait until the terminal has downloaded all the card agreements.
Press Save / the green button when the terminal recognizes your store.
If you want to change the language on your terminal, follow these steps:
Insert your Merchant Card.
Press 6.
Press 1.
Press 1.
Select Language.
Now choose the Language you want.
The terminal will restart, and the language will be changed.
Once you have completed all of the above steps, you need to contact our support team so we can activate the terminal and link it to your store.
Let them know that you have received a new Nets terminal that needs to be set up, and provide your customer number and the Terminal ID.
Søgeord: Move - 3500 - Trådløs - Simkort
